How to Use Cloudflare Tunnel to Expose Multiple Local Services
I receive requests from my viewers quite often, given the time and effort I need to commit to these requests, I did not respond to most of them. However, I still try all of the products they want me to cover just in case I find something intersting. The most recent request I got was to talk about using Cloudflare Tunnel with Traefik.
After trying Cloudflare Tunnel for a couple hours, I was amazed by how easy it is to set up especially when you use it with Docker. IMO this tool itself is a good reverse proxy and there is no need to use Traefik in the middle as long as you don’t need to use Traefik’s feature like RateLimit or Servers load balancer. Since their official doc did not cover the docker usage in detail, hopefully this post will help you with this use case.
I’ve also tested Ngrok but it is lacking two major features that Cloudflare provides for free:
- Custom Domain
- Multiple tunnels (Ngrok only allows 4 tunnels for free account)
All right, let’s start.
Prerequisites
- Point your domain to Cloudflare. You can follow official doc to do a full setup if you haven’t done so.
- Enable Universal SSL. This will generate a free wildcard SSL certificate to cover all first level sub domains. I am a big advocate of using SSL for EVERYTHING. You really should use https as much as possible even for local testing.
- Enable Zero Trust. Tunnels is managed under Zero Trust dashboard. You can follow their official doc to subscribe to the free plan and find it under Access.
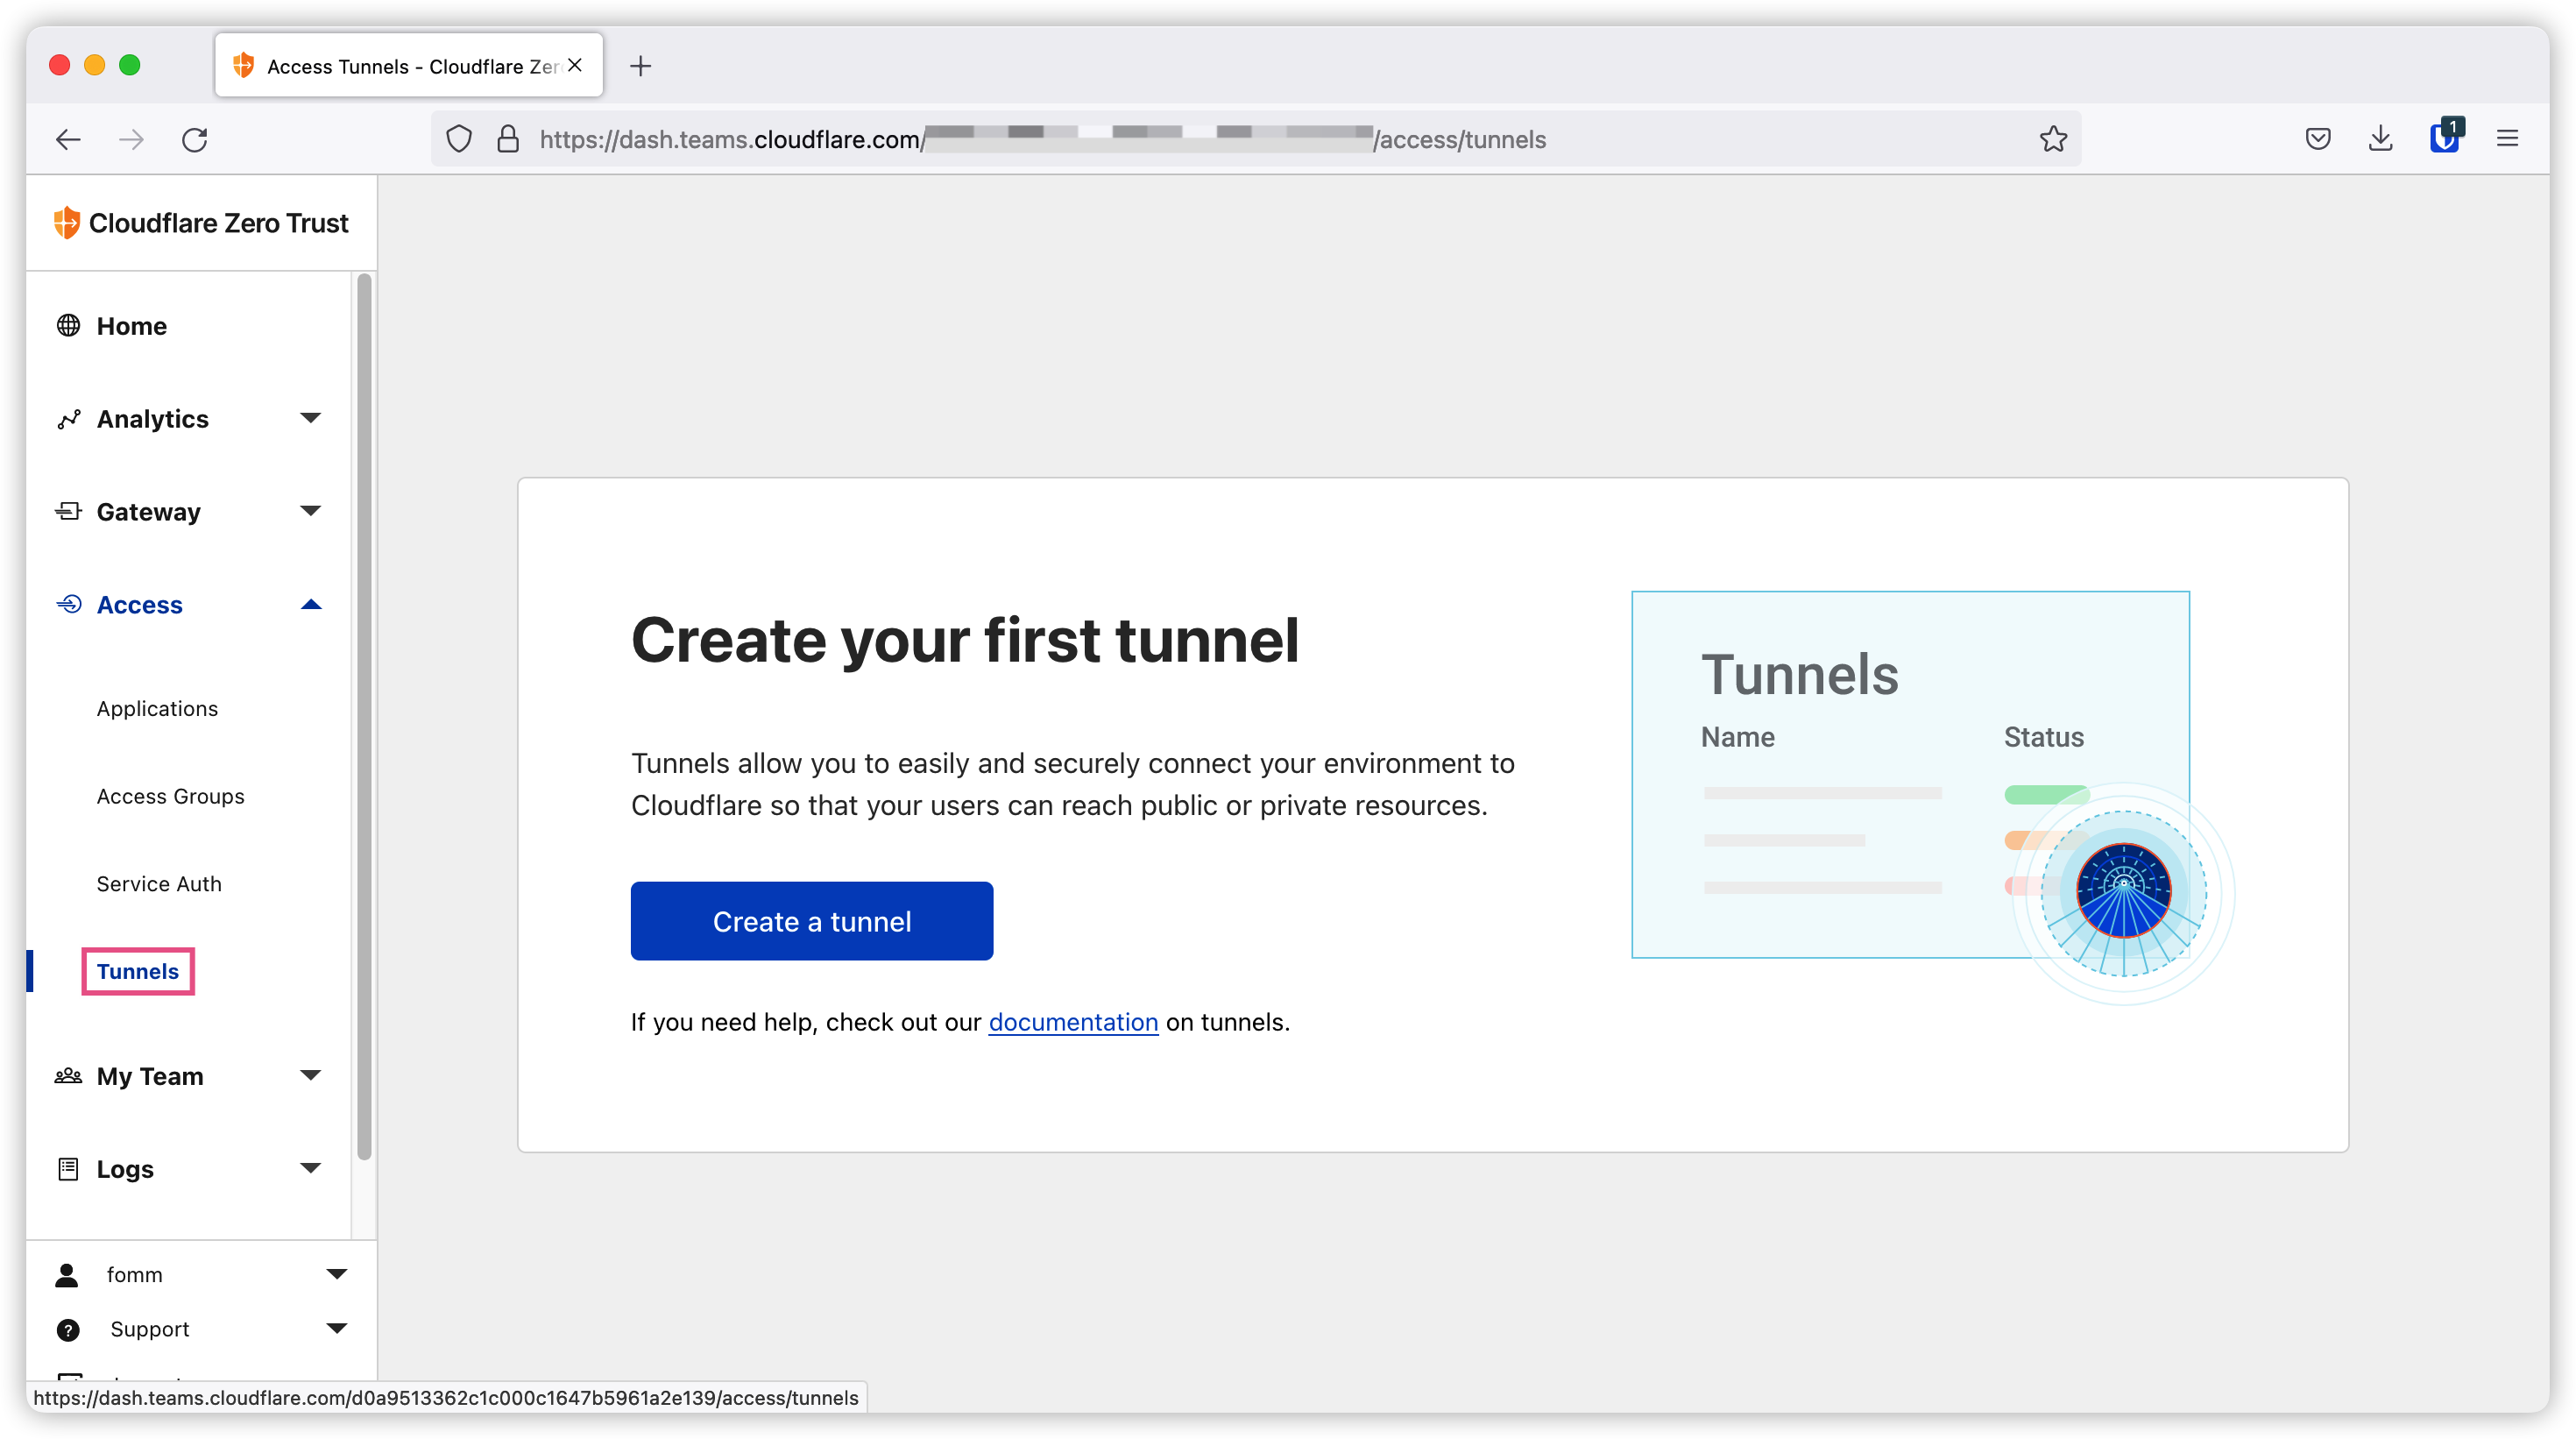
Create Tunnel
Firstly I create tunnel demo on dashboard.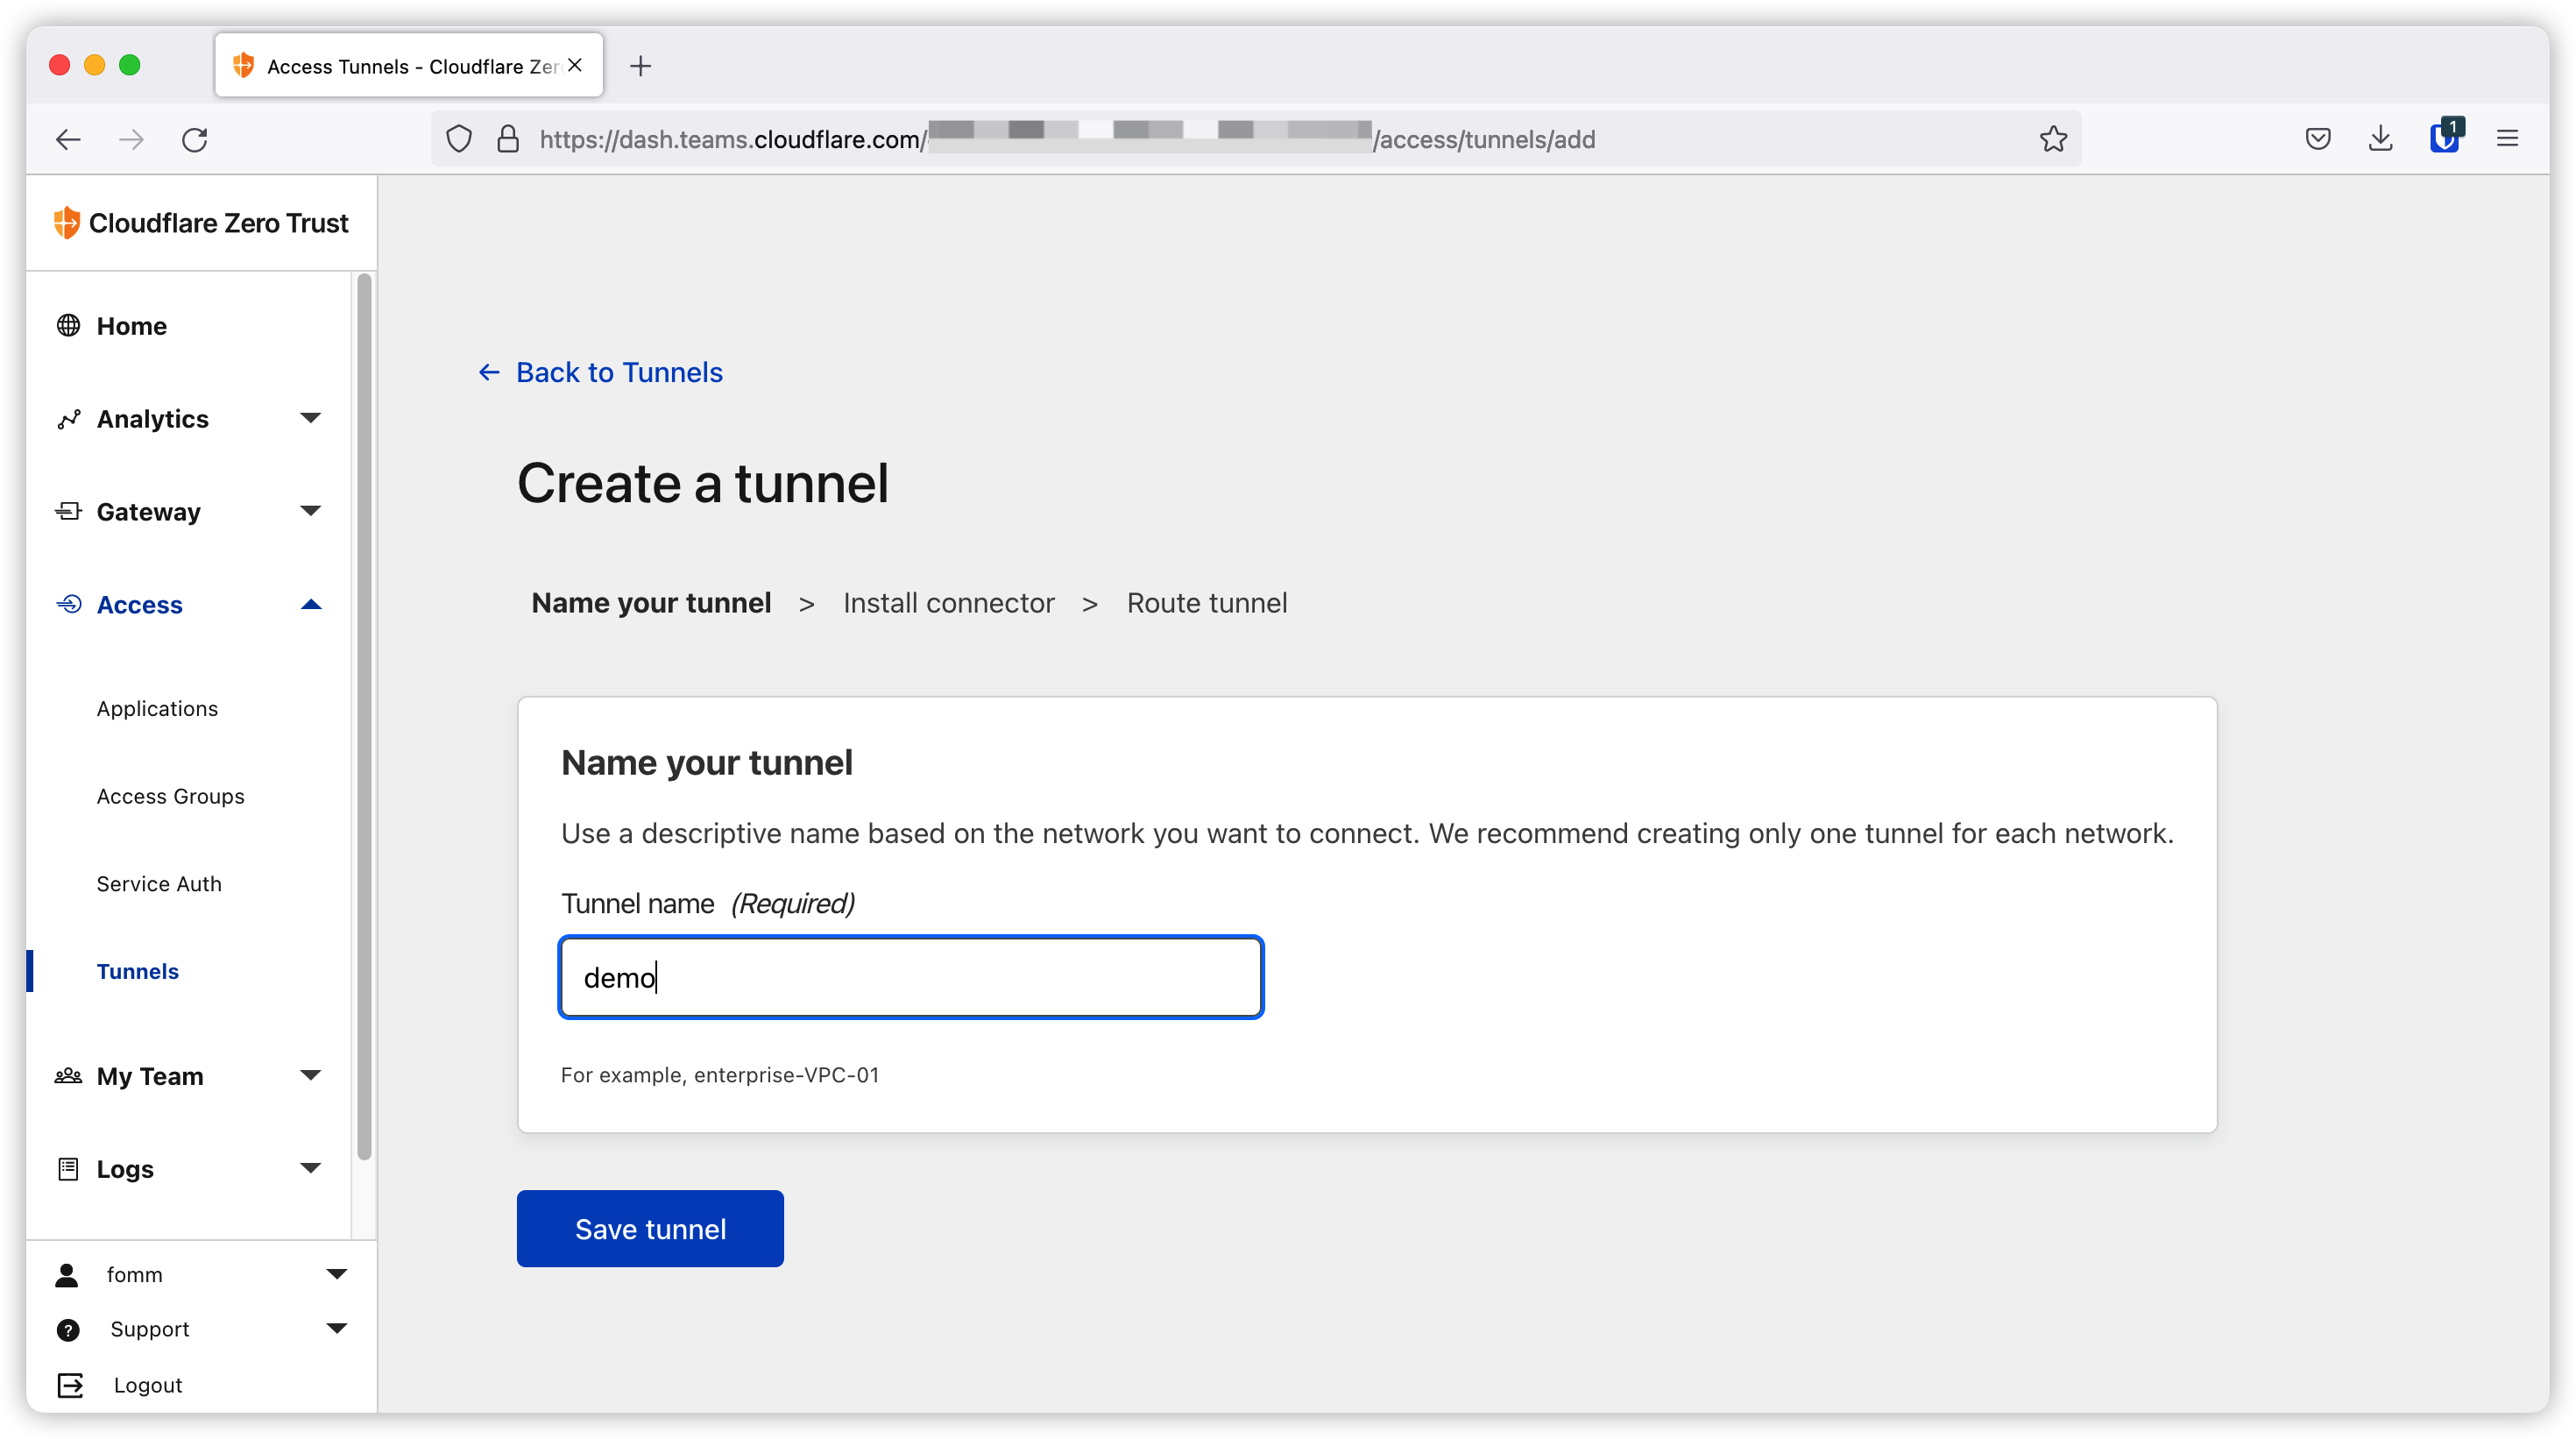
Then I select Docker to get the docker run command.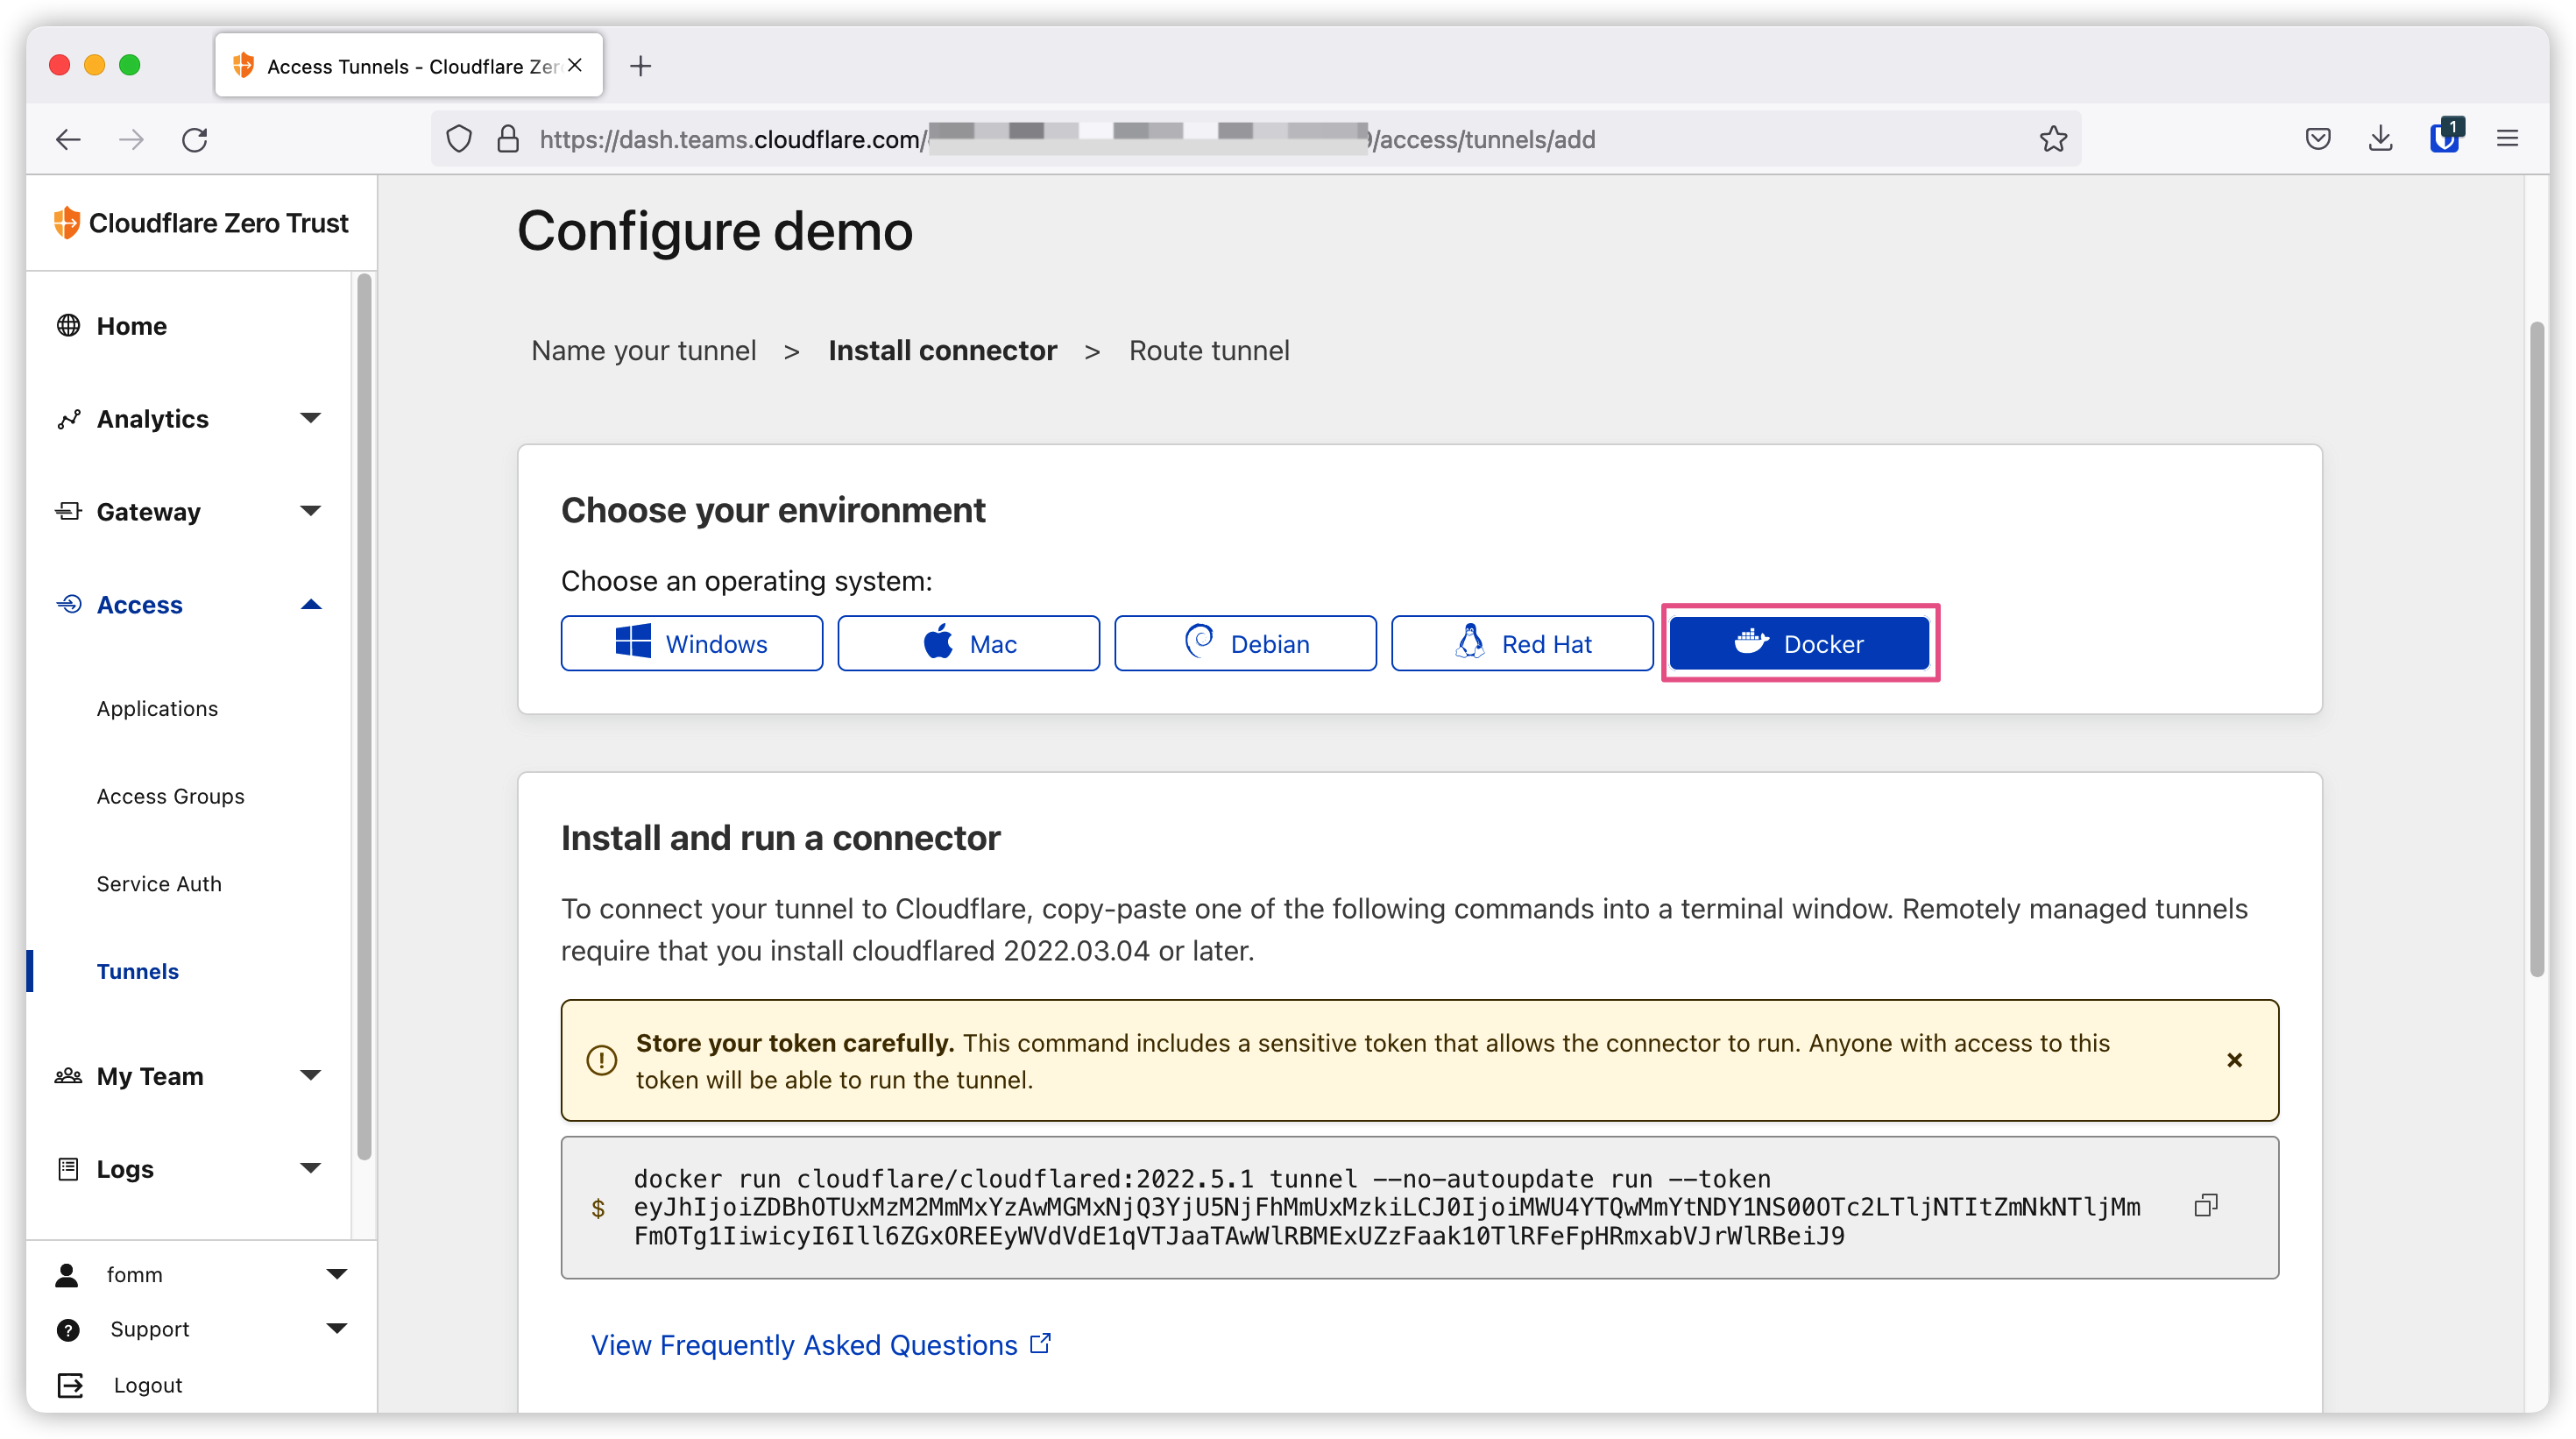
This command is pretty straight forward, it runs cloudflared tunnel run command with a credential token.
I will add two flags to the command.
--detachflag will run this container in detached mode.--network tunnelflag will run this container in an external network tunnel. The reason for doing this is to segregate containers that we don’t want to expose to Cloudflared container. We can use below command to create docker network tunnel1
docker network create tunnel
My final command looks like below:
1 | docker run --detach \ |
Once the container is up and running, we can see the connected status on dashboard. Cloudflare will choose the closest centre to the host machine.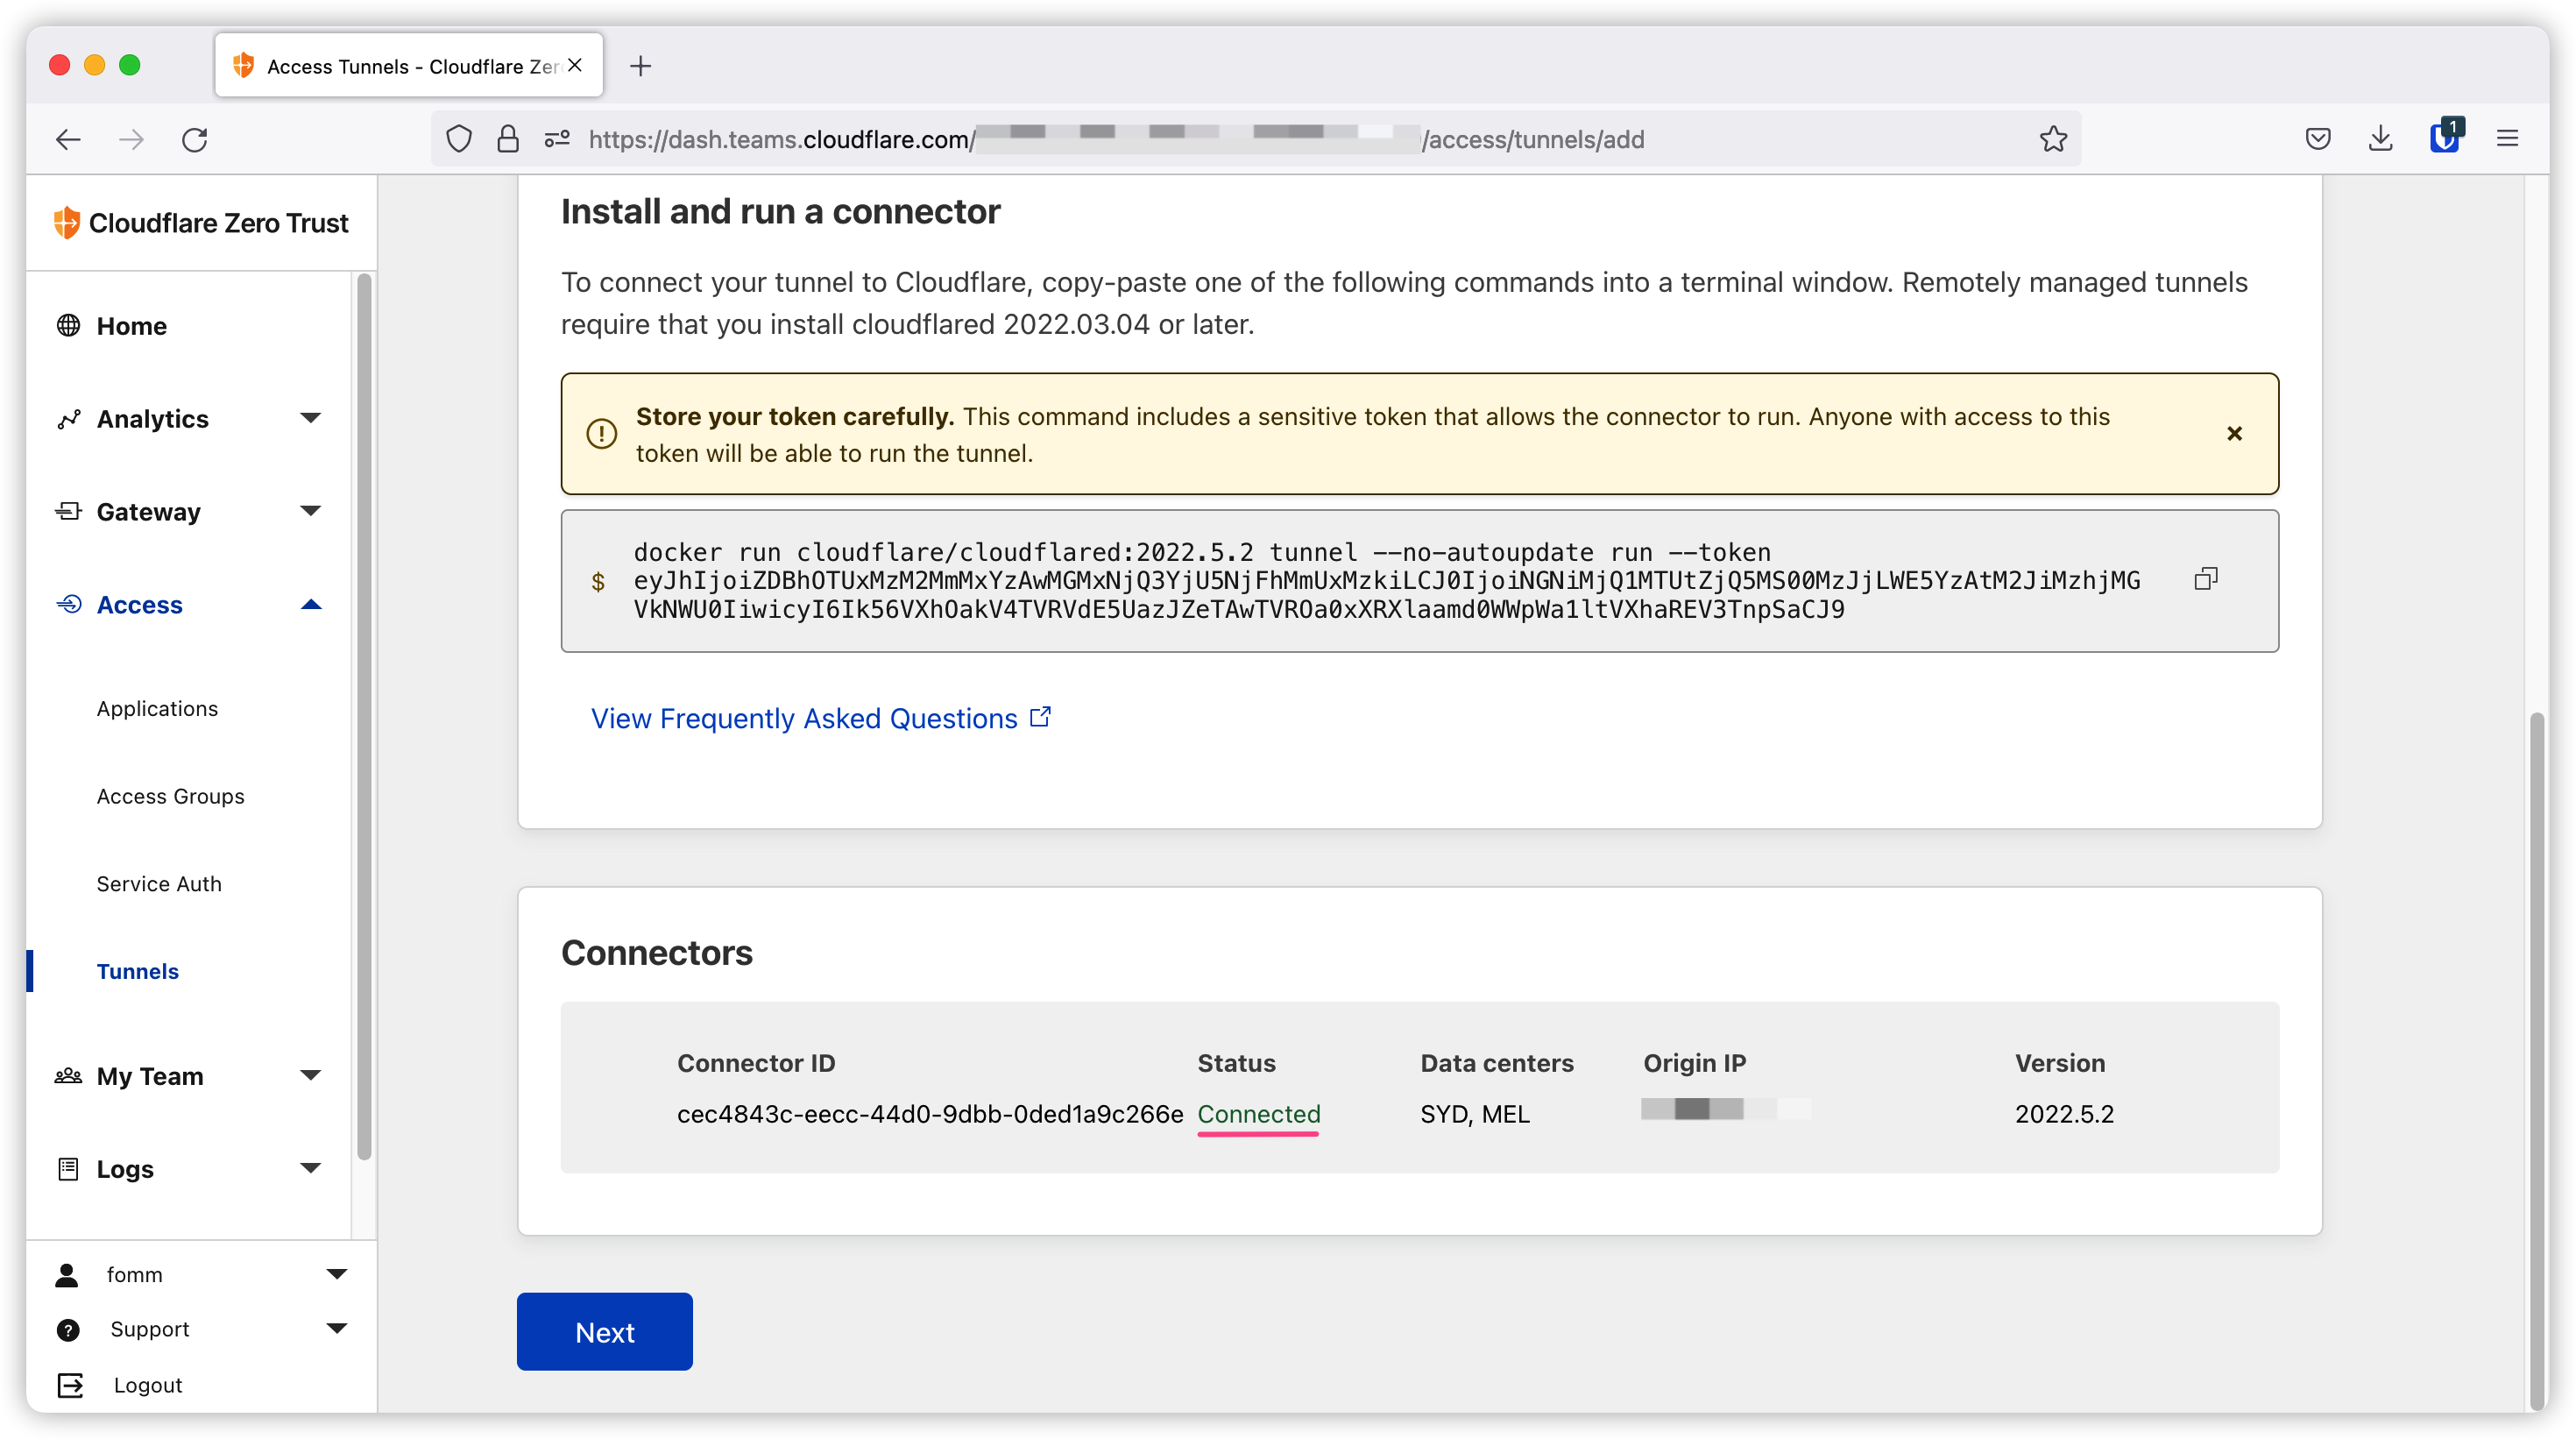
Now it is time to show you how easy it is to expose your local applications to the Internet.
Tunnel Apps
Click Next on the previous screen and we would be taken to below page to create our first route.
Nginx
Let me use nginx as our first demo application.
As you can see I need to provide domain name and path as the ingress rule. The service section is to define the backend service you want your request to be routed to. I will start my nginx container in the same docker netwrok tunnel so I can rely on docker service discovery to let cloudflare container to find nginx with hostname nginx.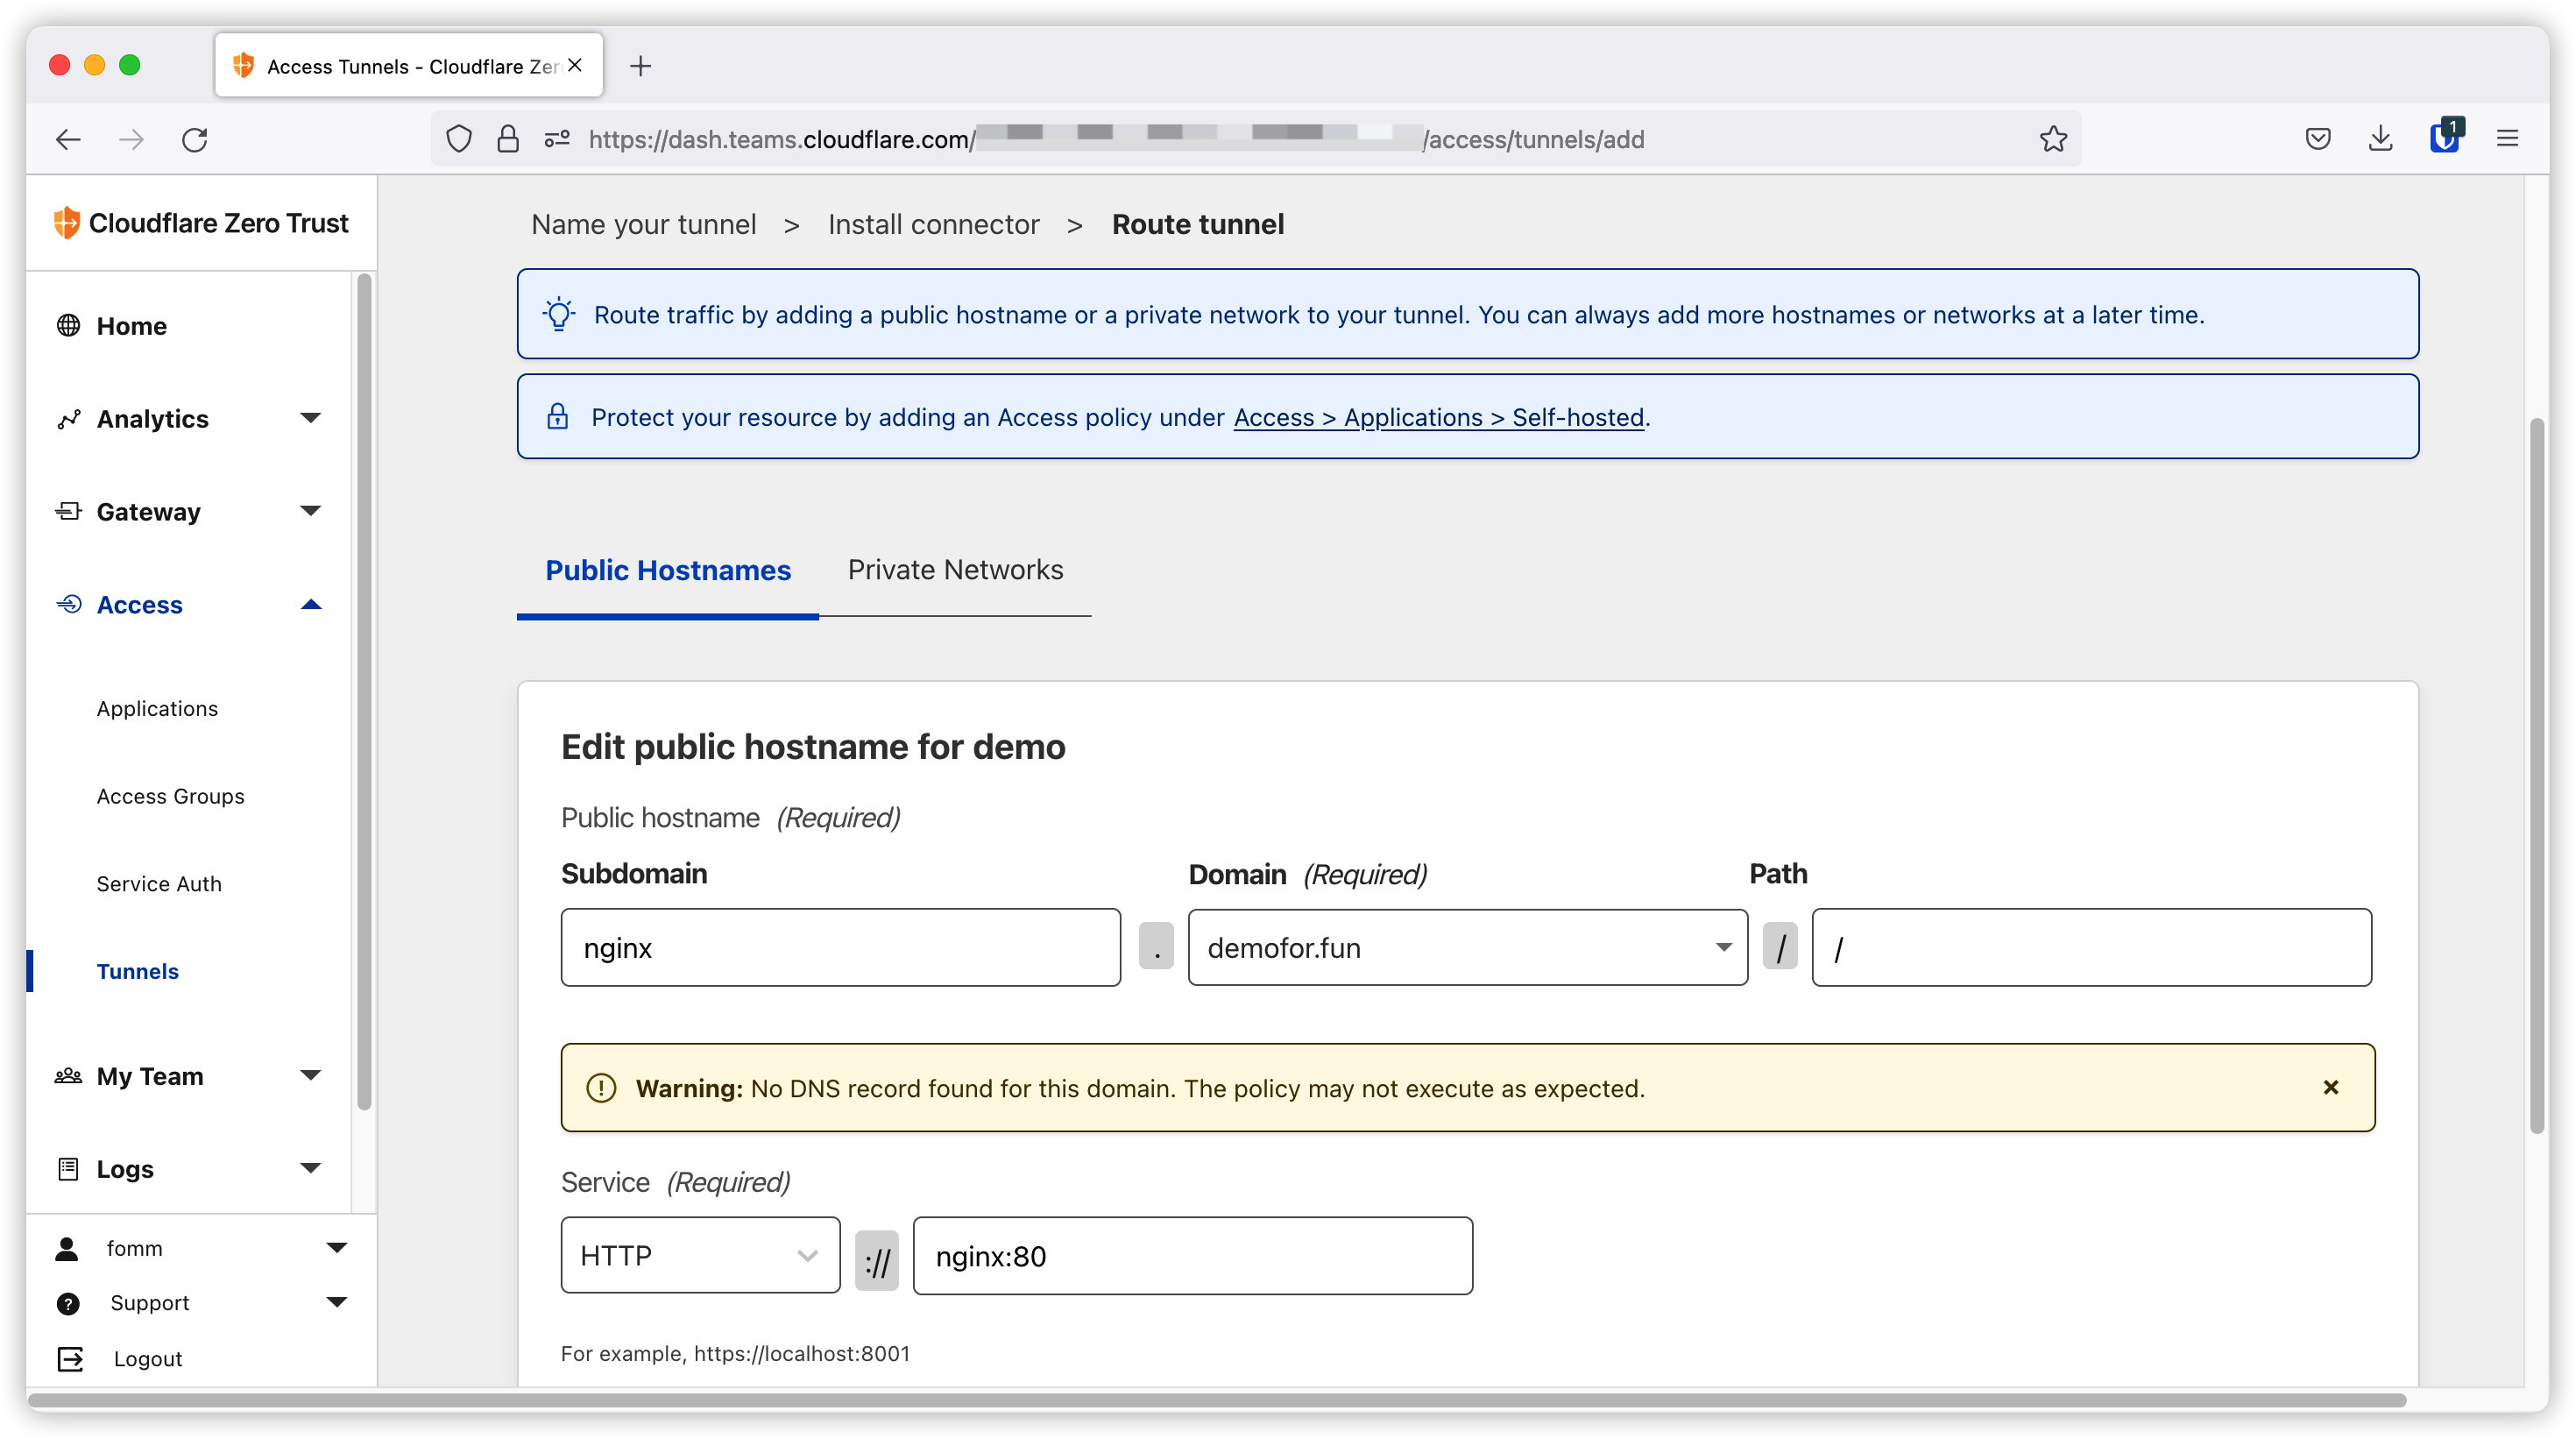
There are additional ingress settings you can use. You can find these ingress settings on official doc here.
After we save the settings, we will be redirected back to the tunnels page and we can see the tunnel is active and our route here.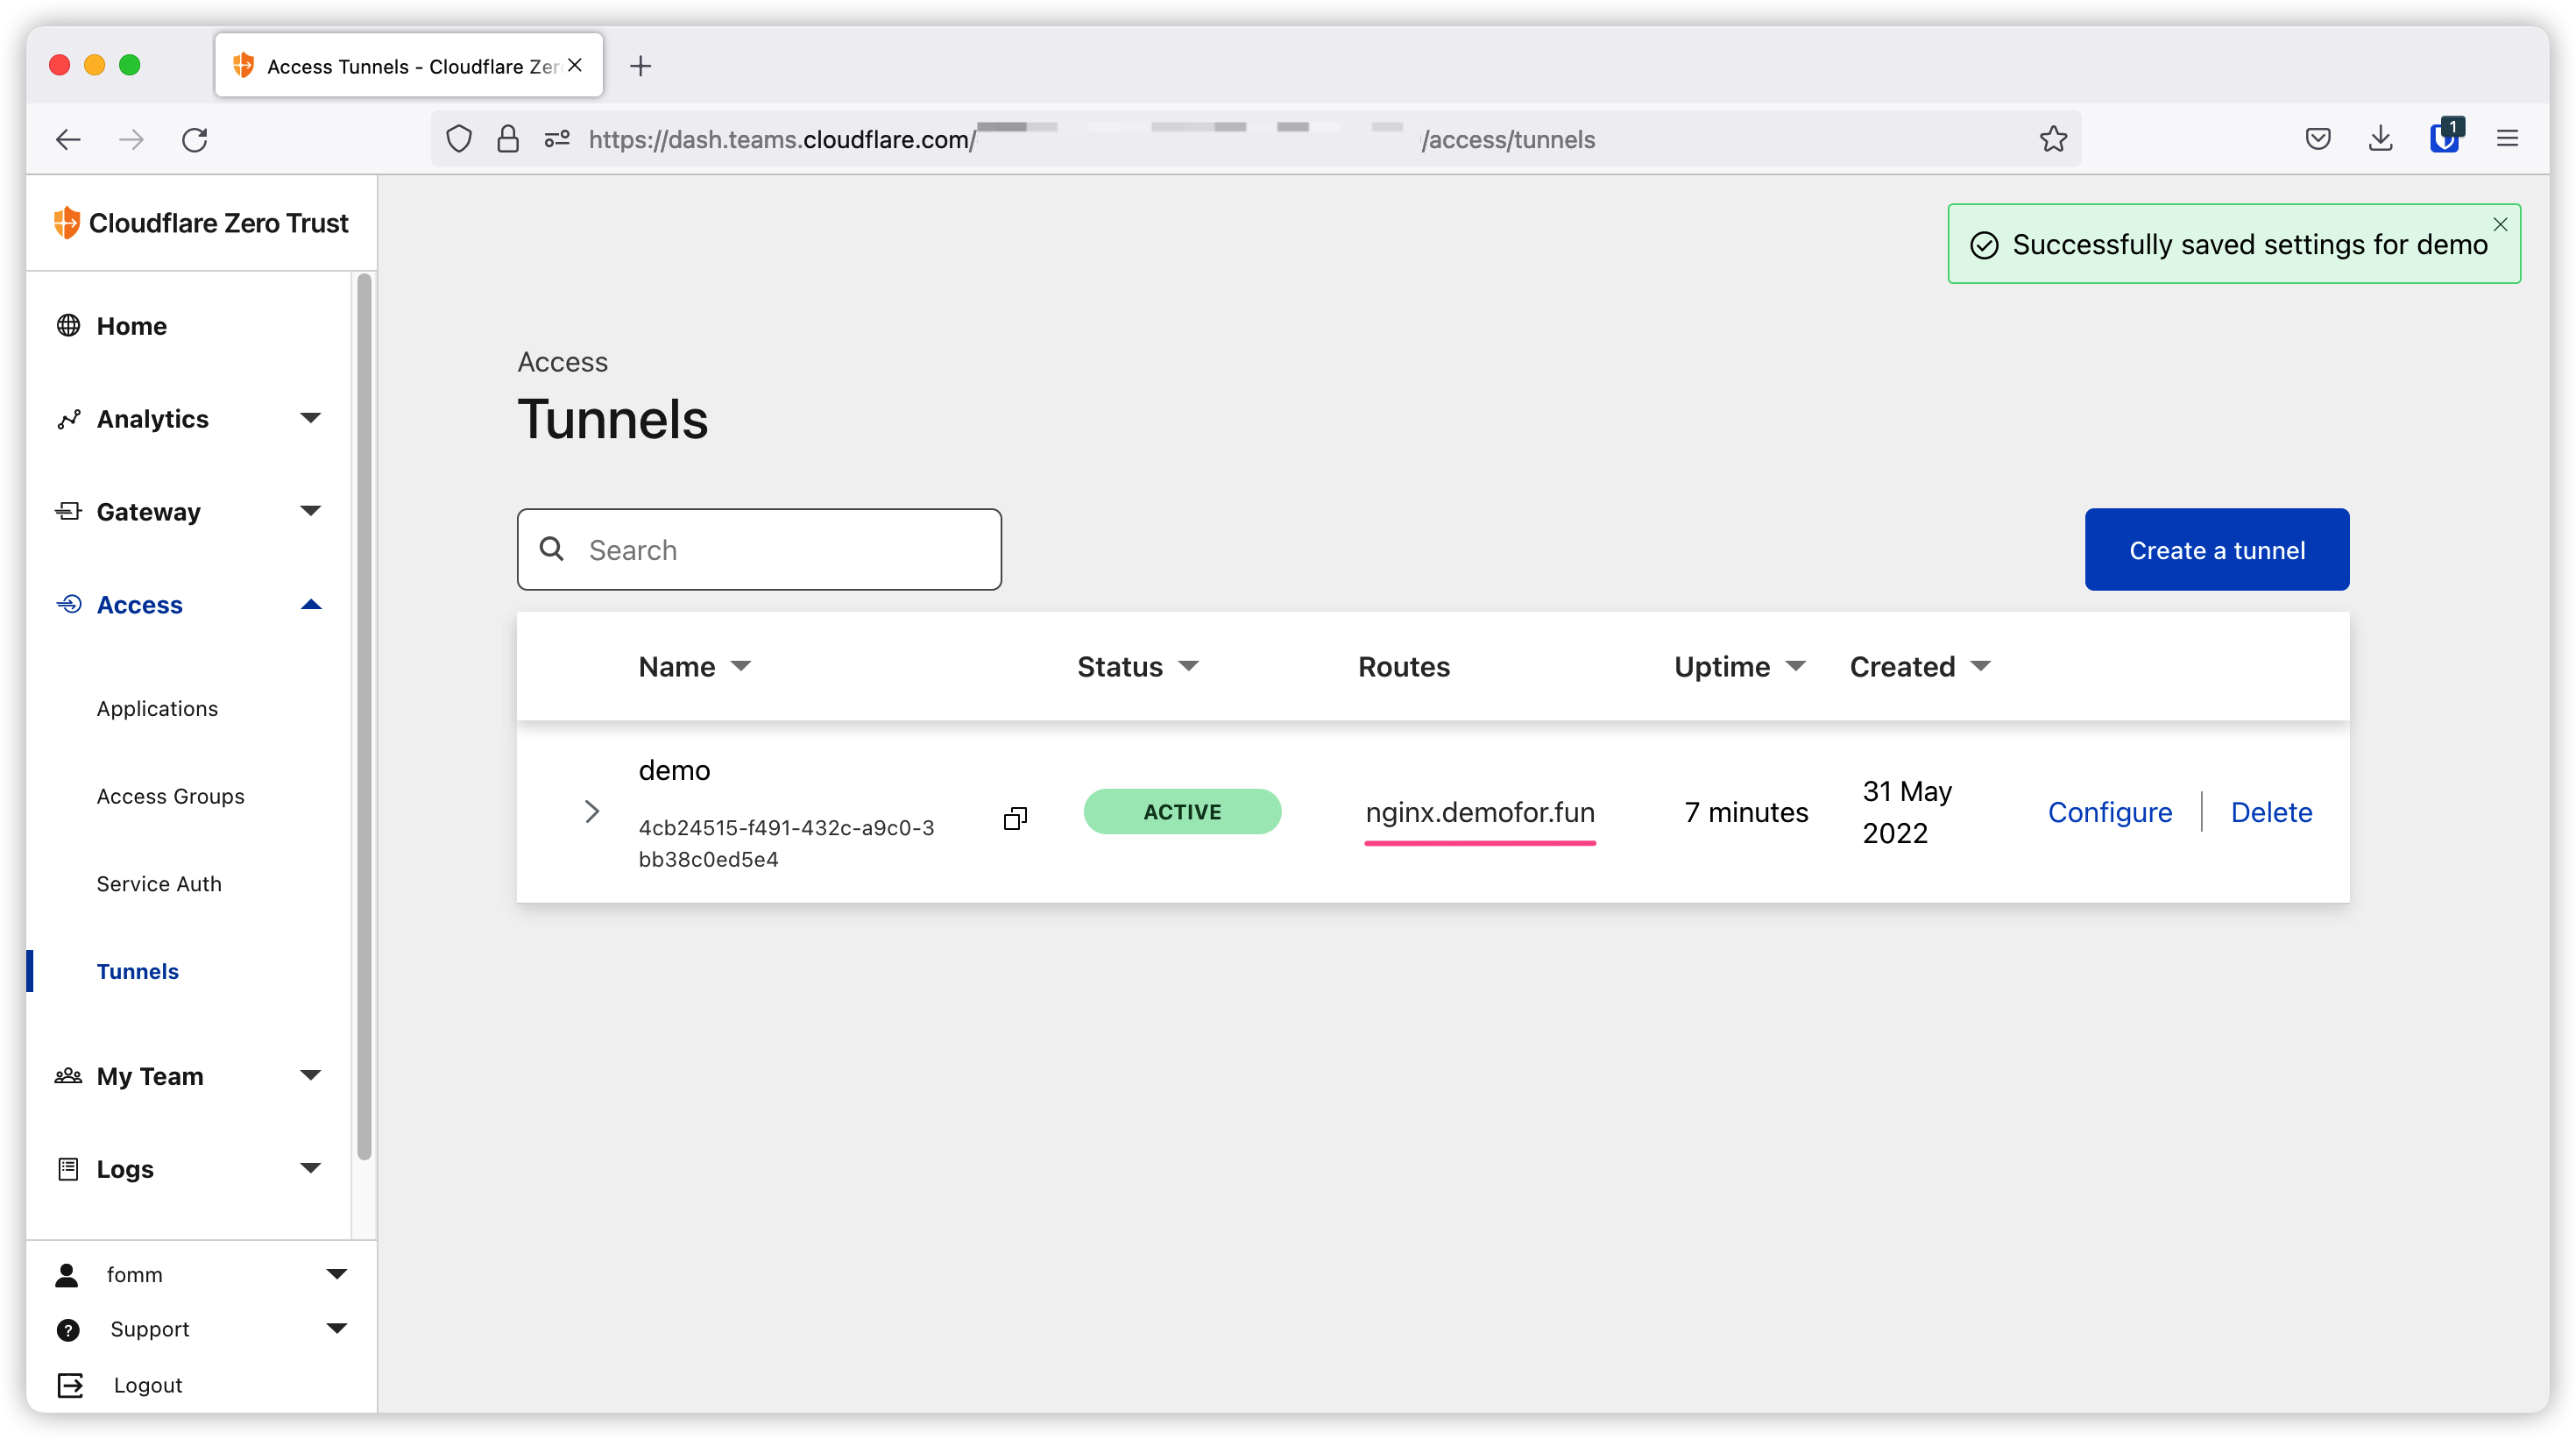
If we access https://nginx.demofor.fun, we will get the 502 error because we have not started our application yet.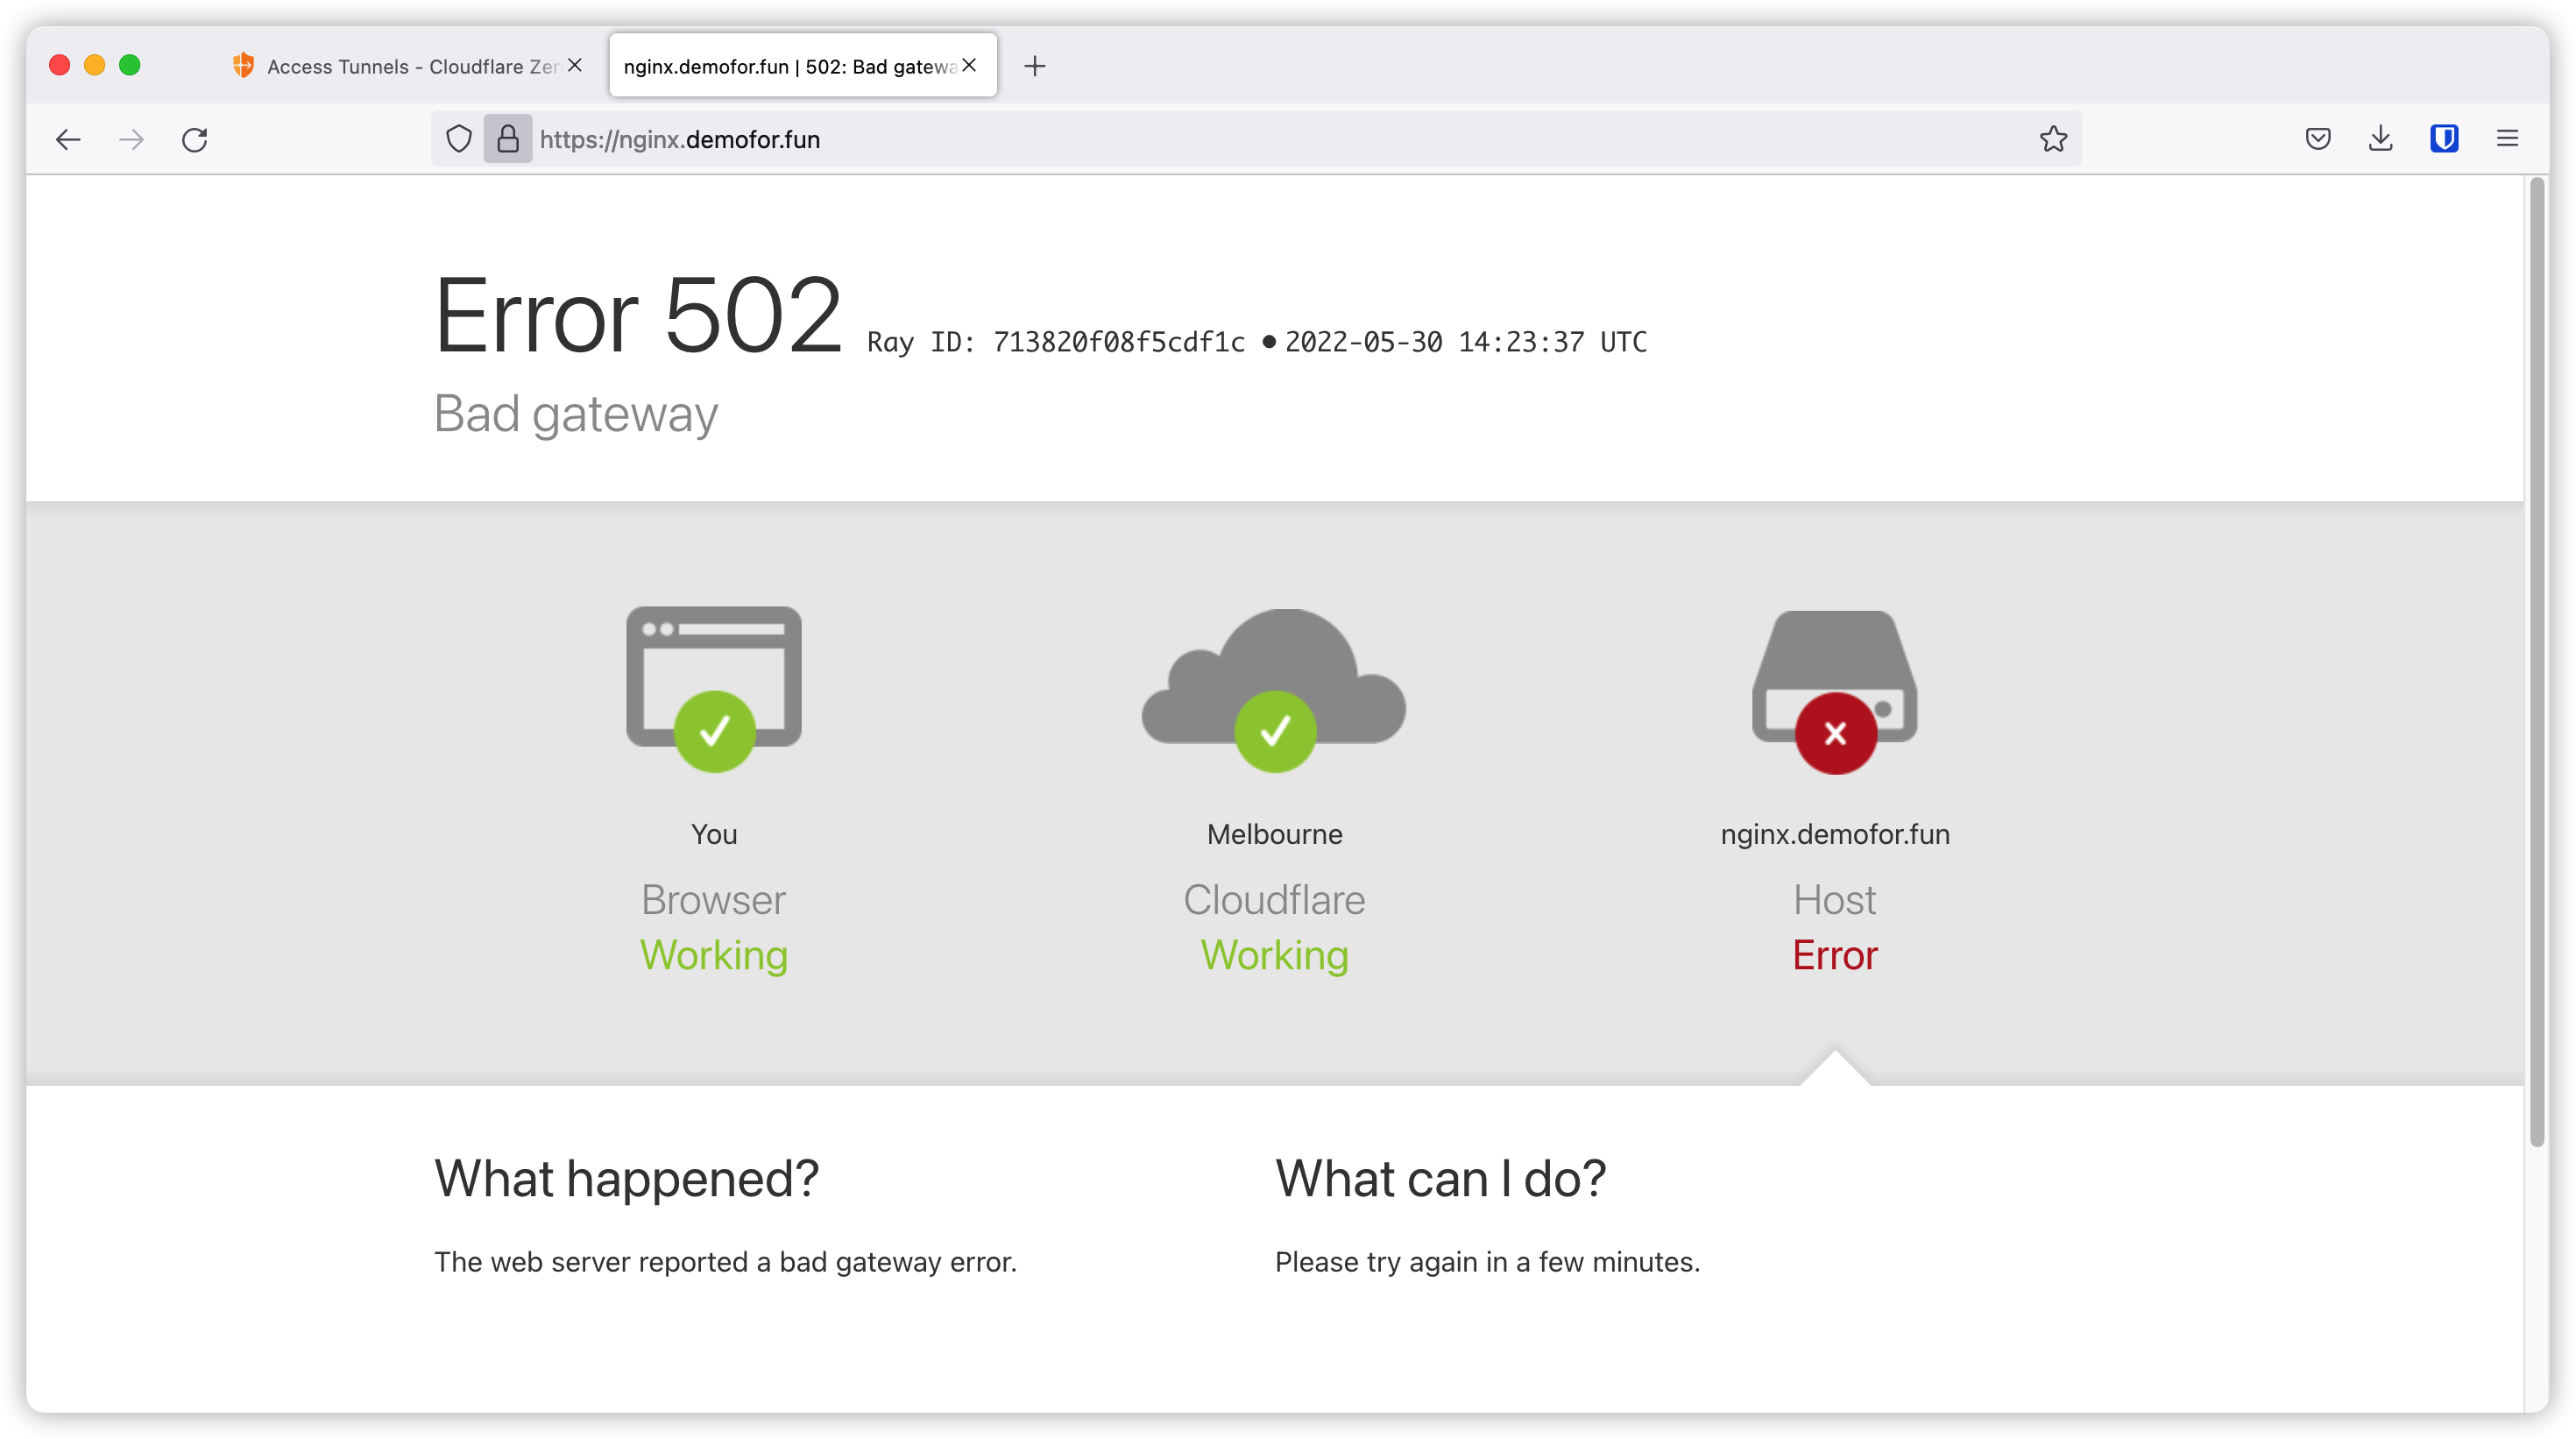
Let’s create the nginx container as below.
1 | docker run --detach \ |
If we refresh the page, we can see the default nginx page.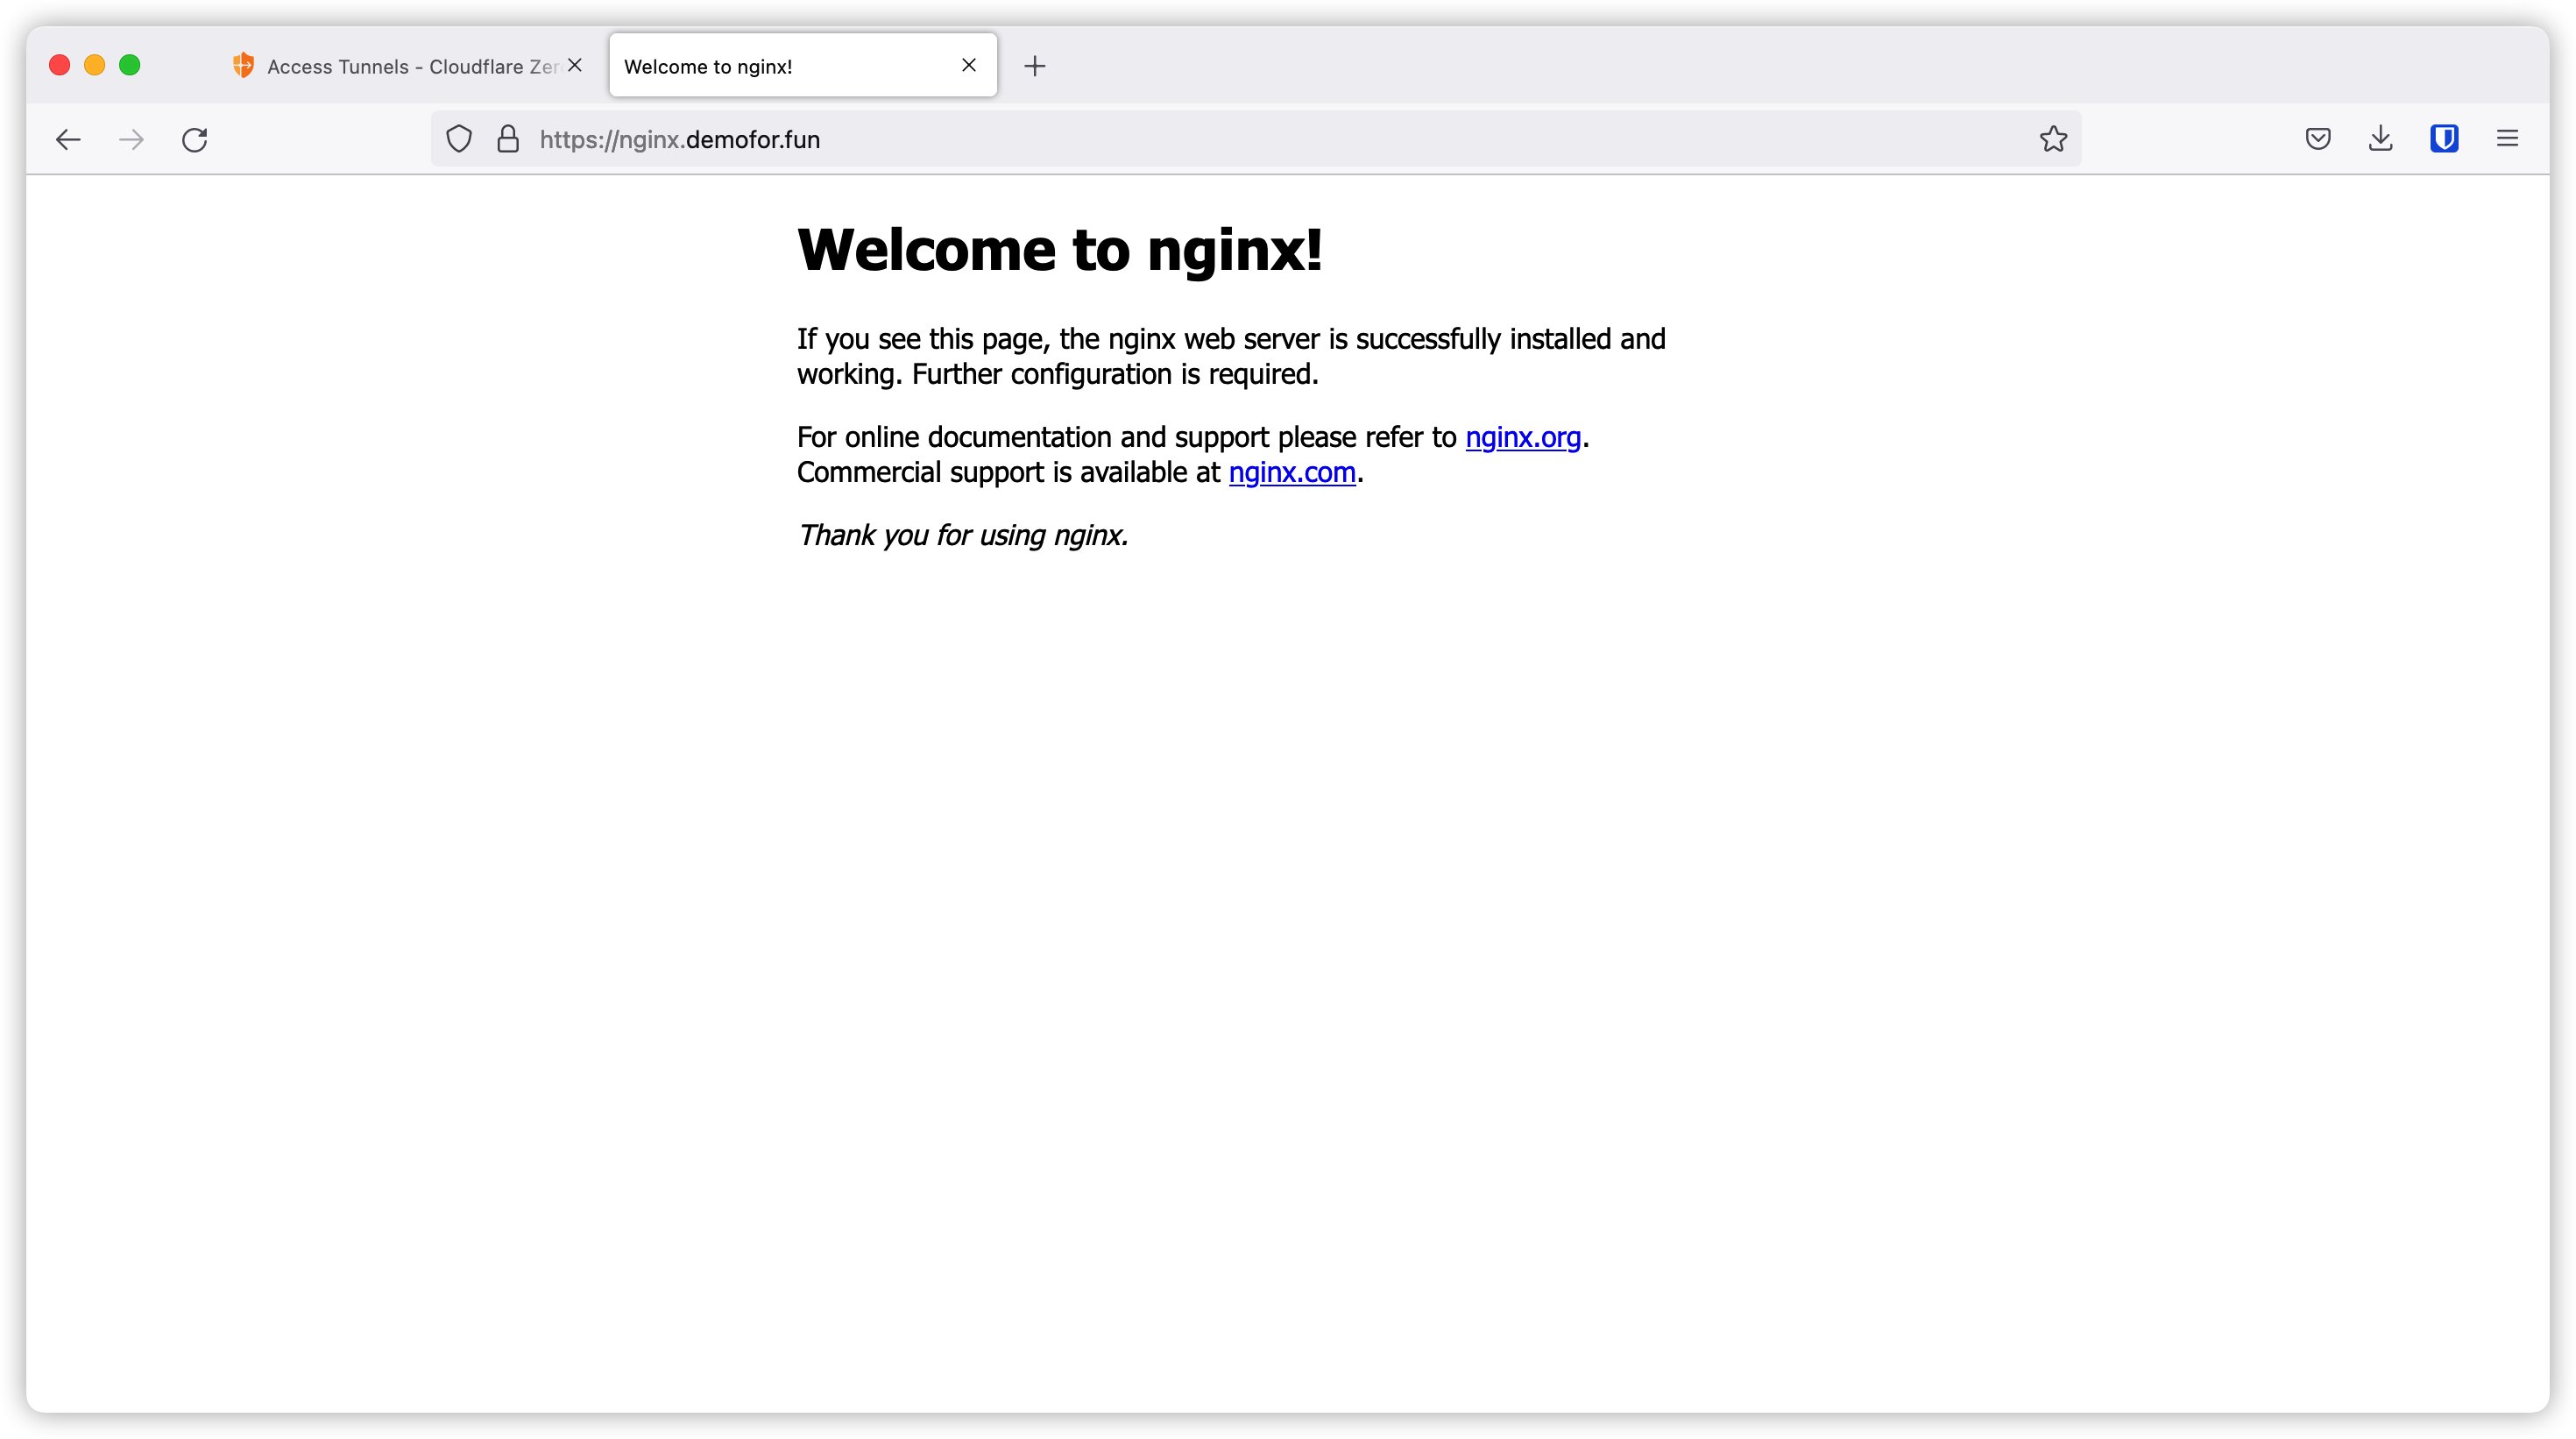
App on different port
Let’s try another one. This time our app listen on port 8080. Let’s click Add a public hostname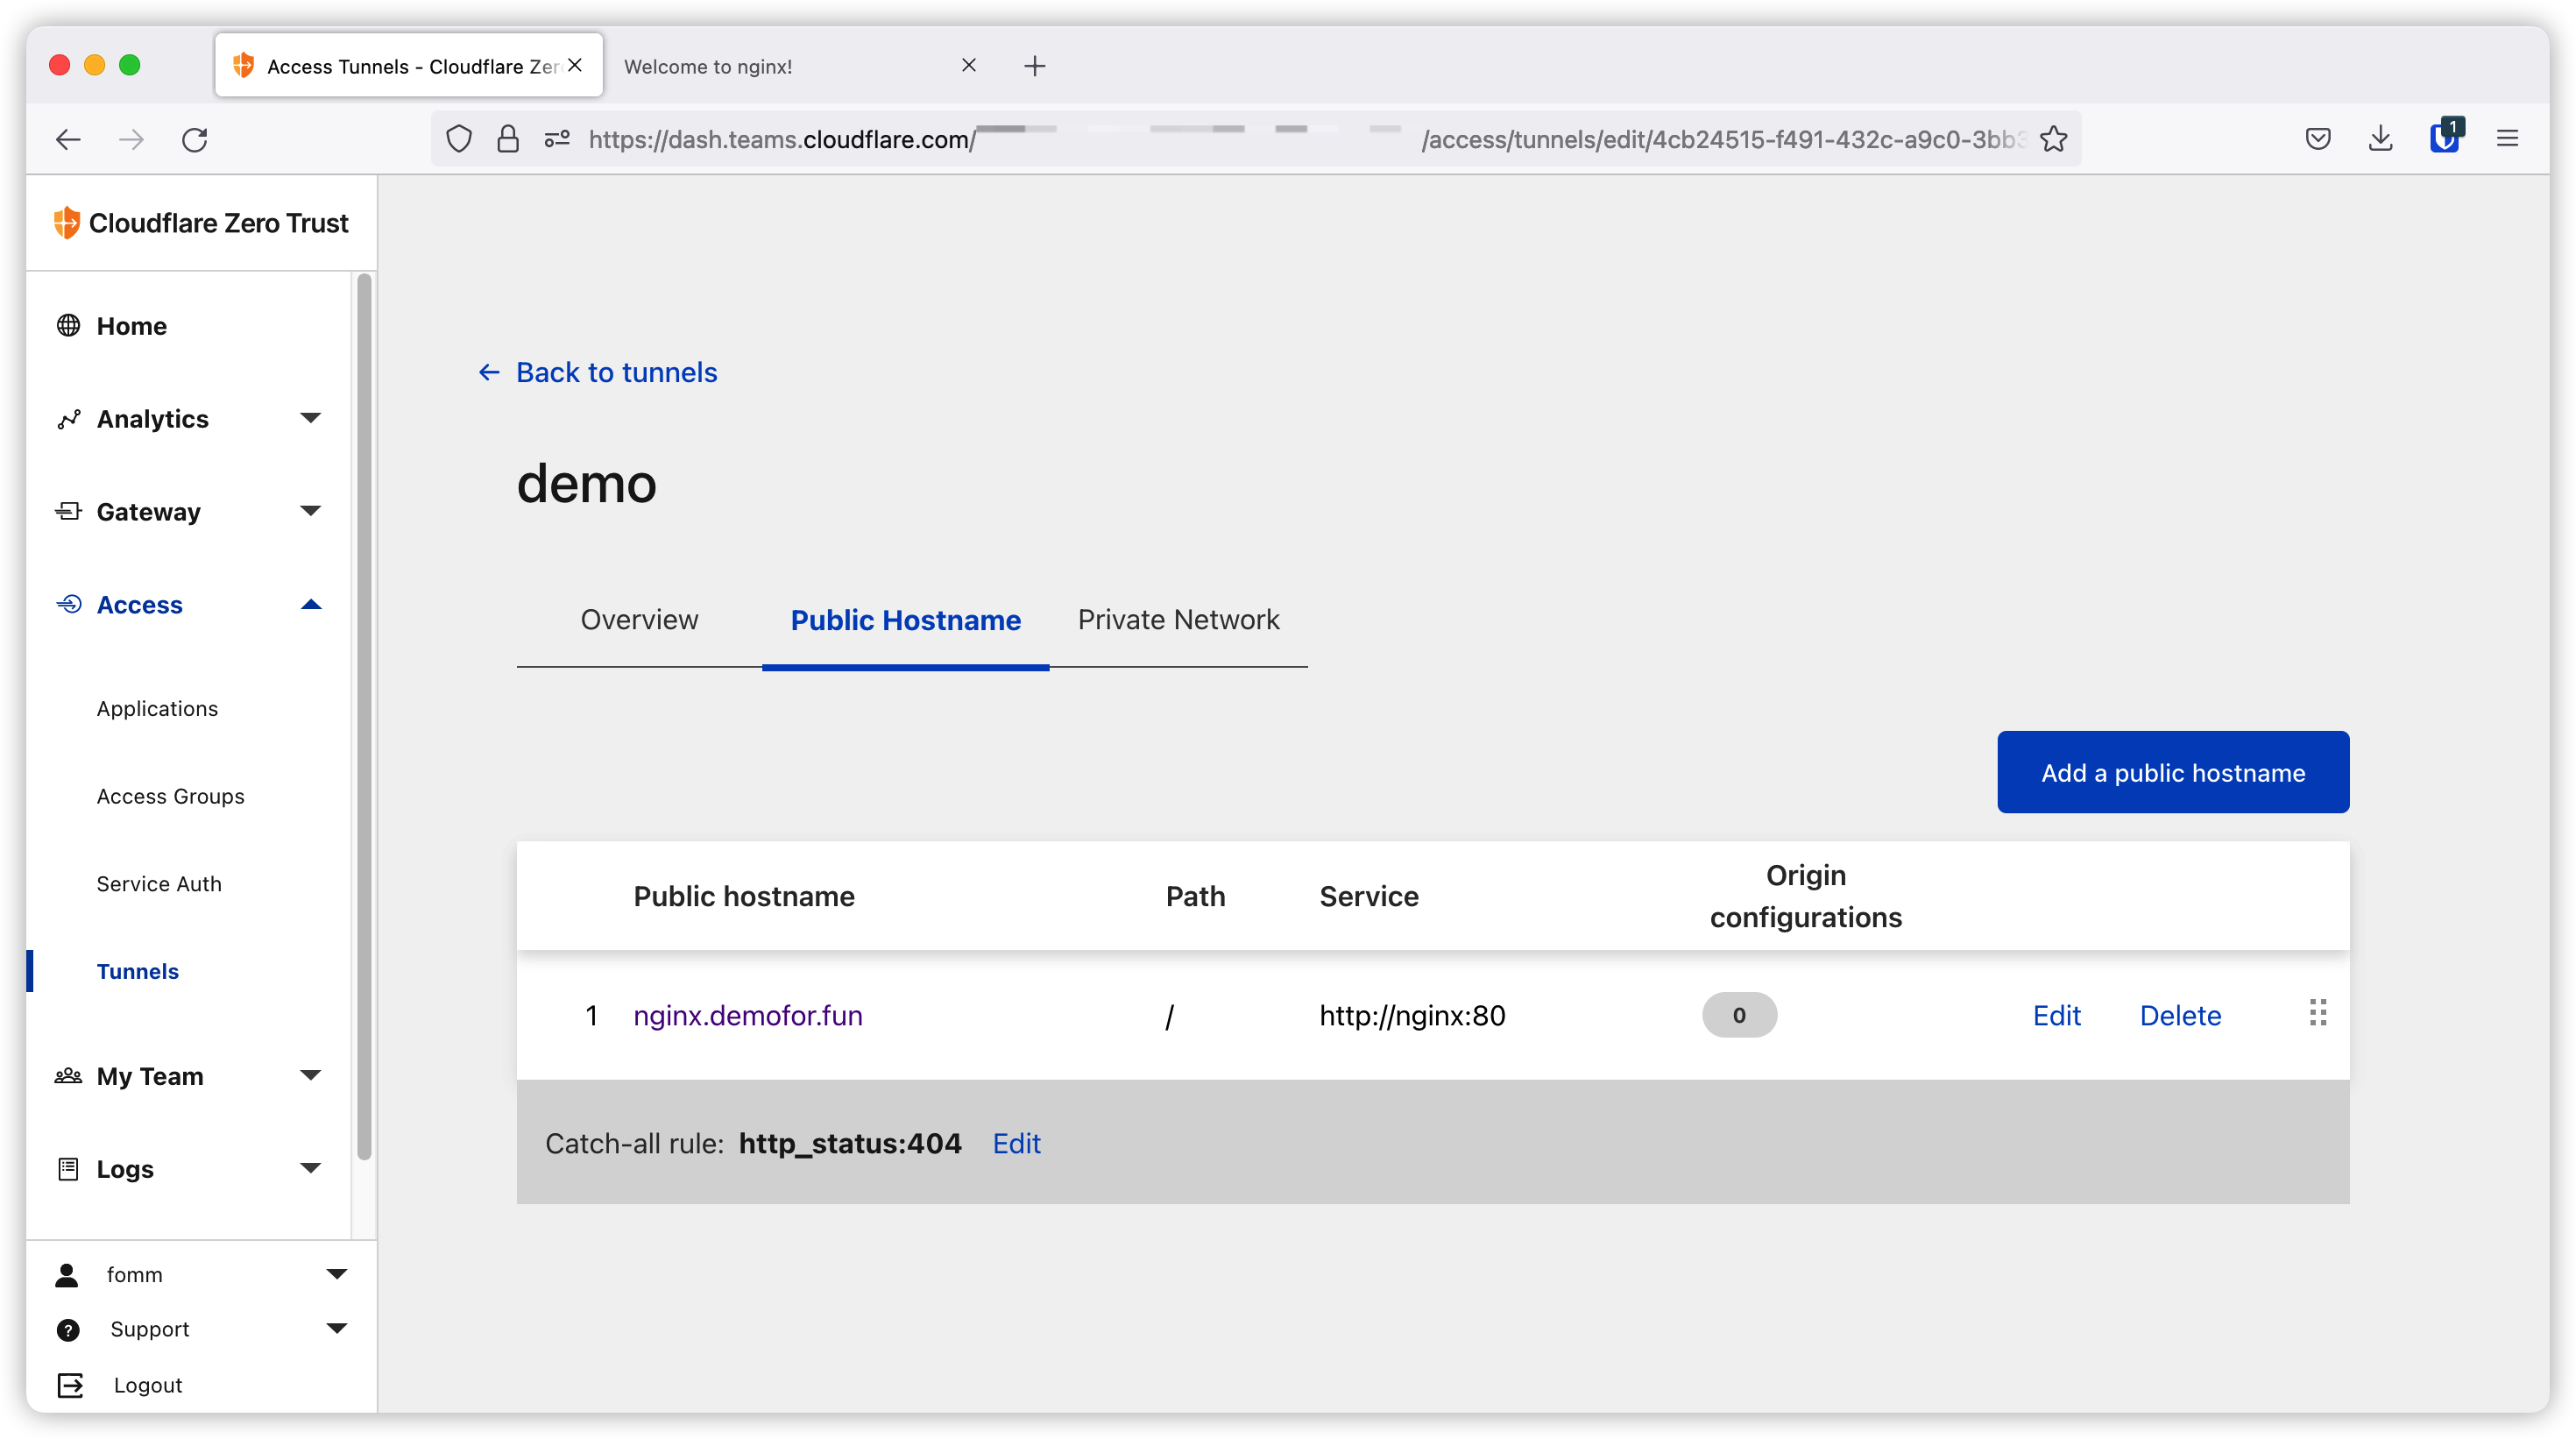
Put in our domain, path and backend and then save.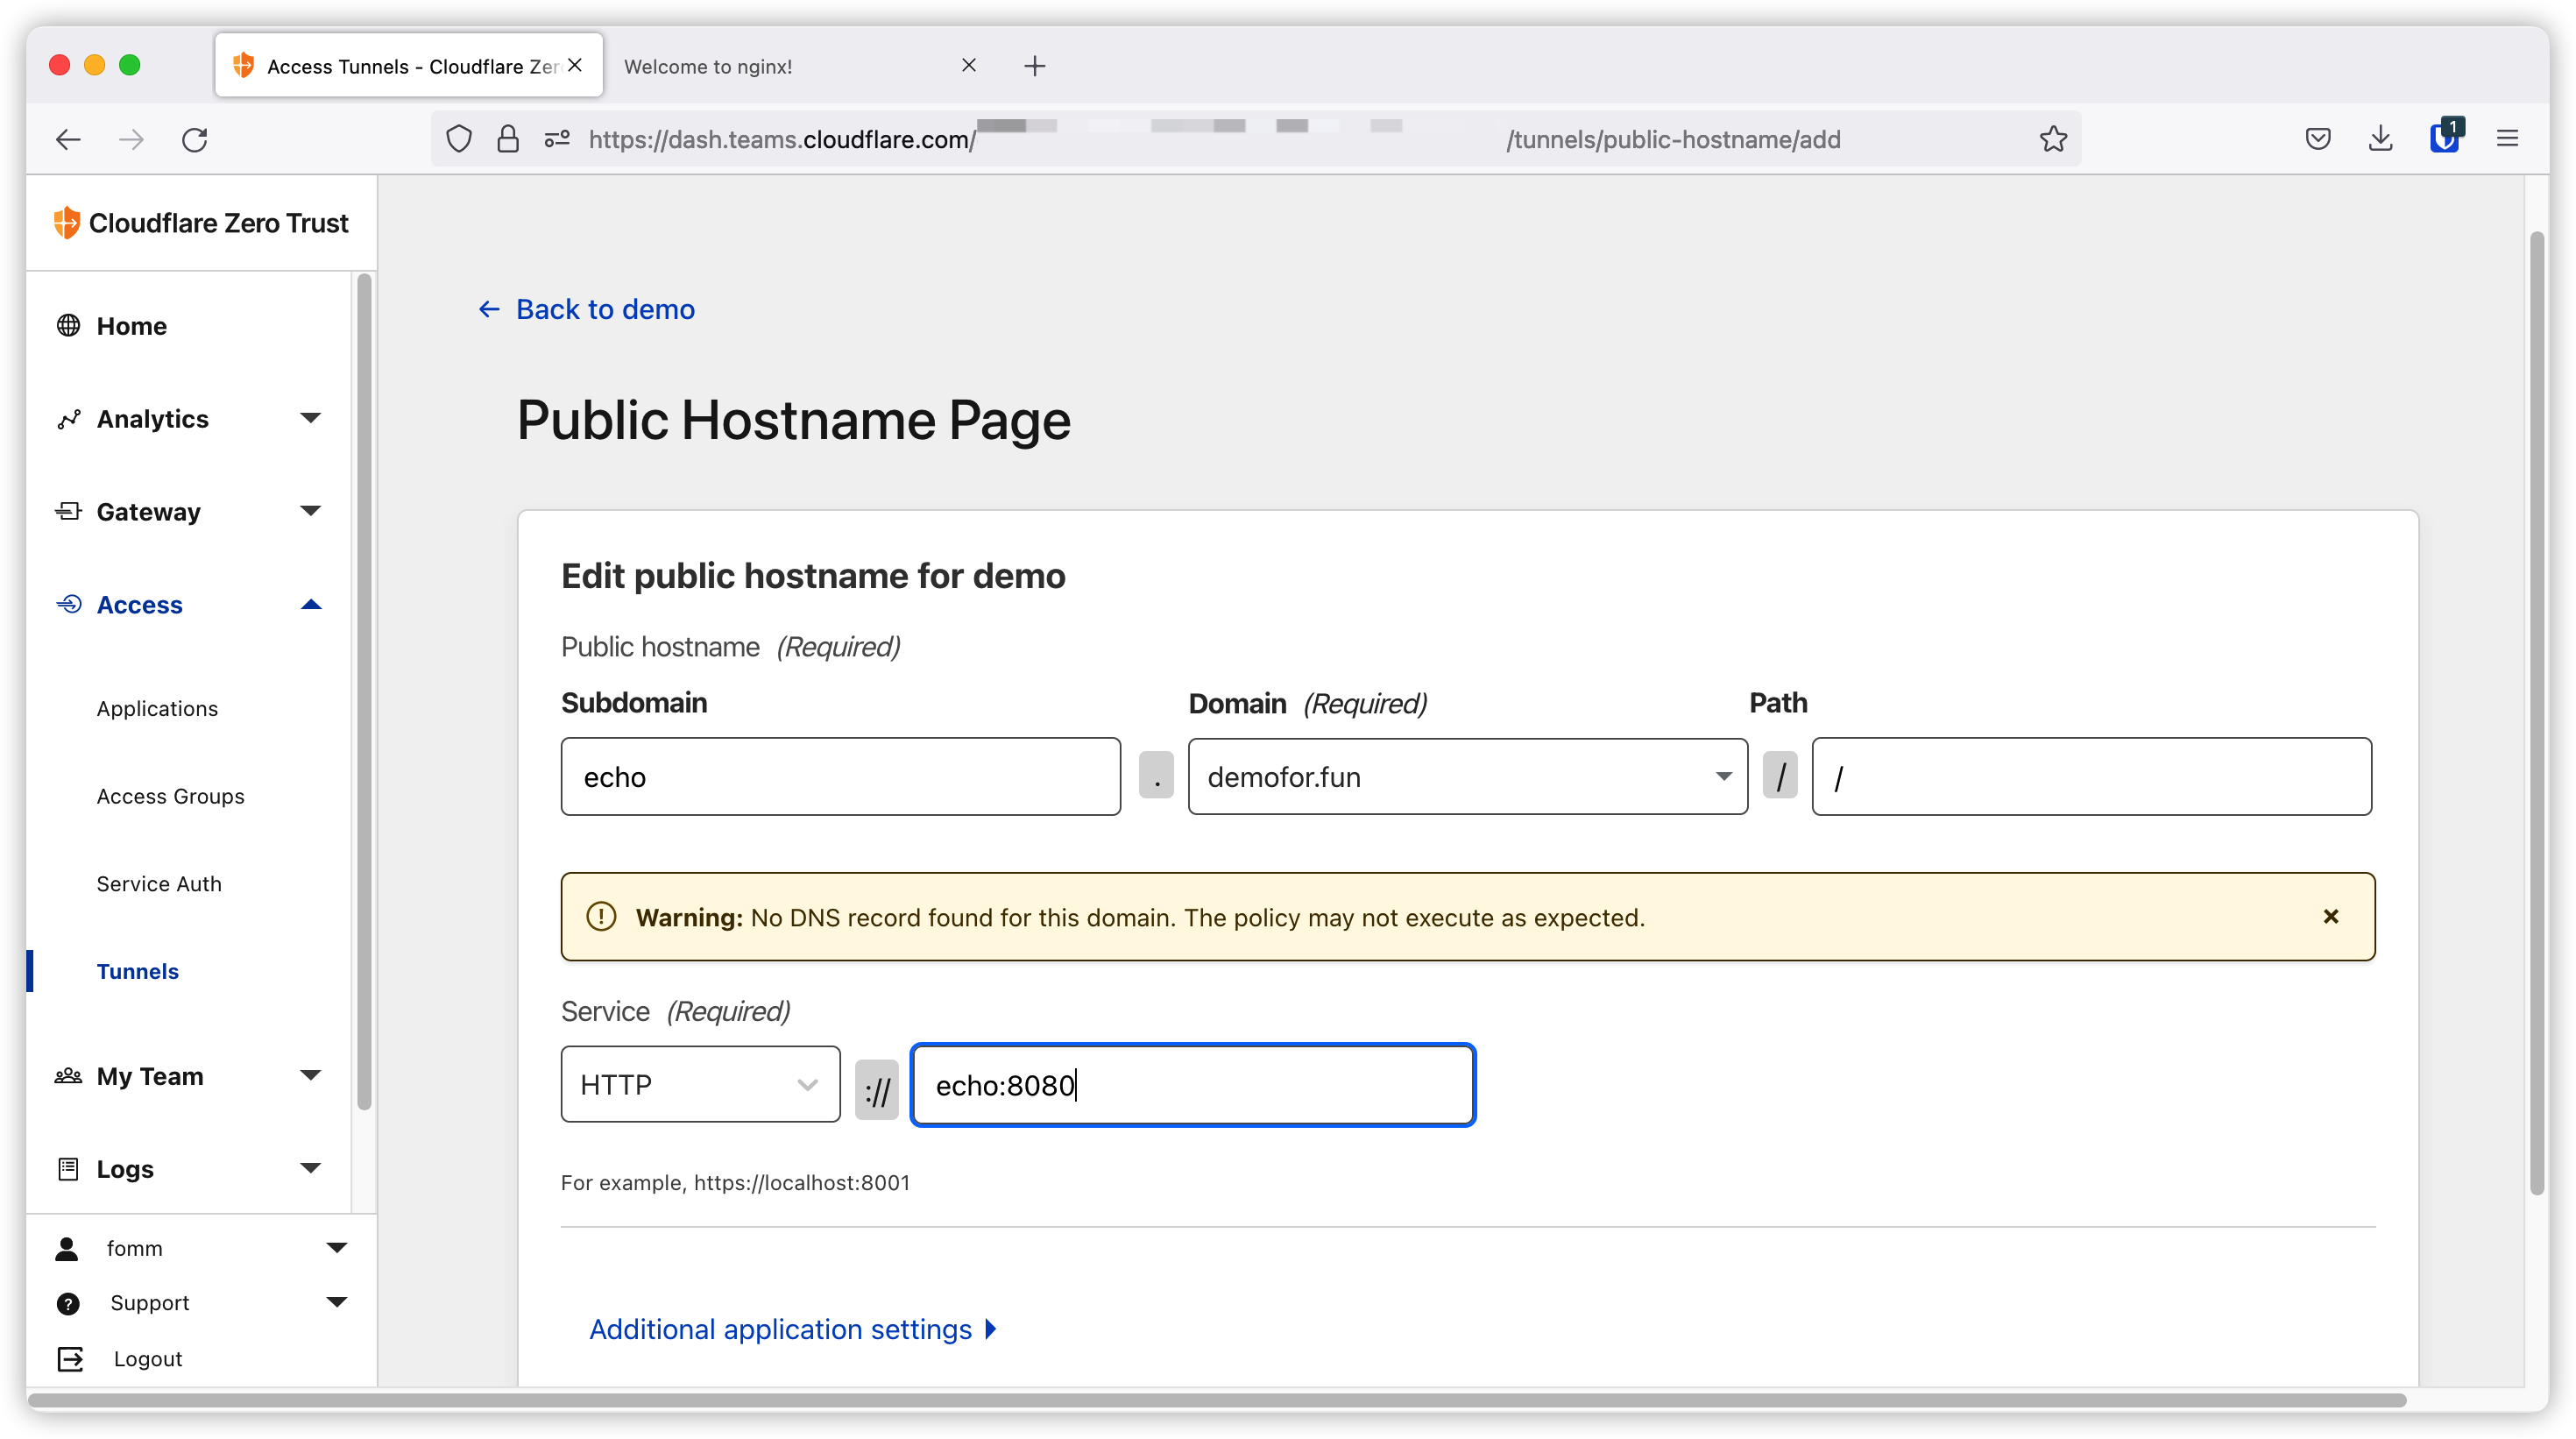
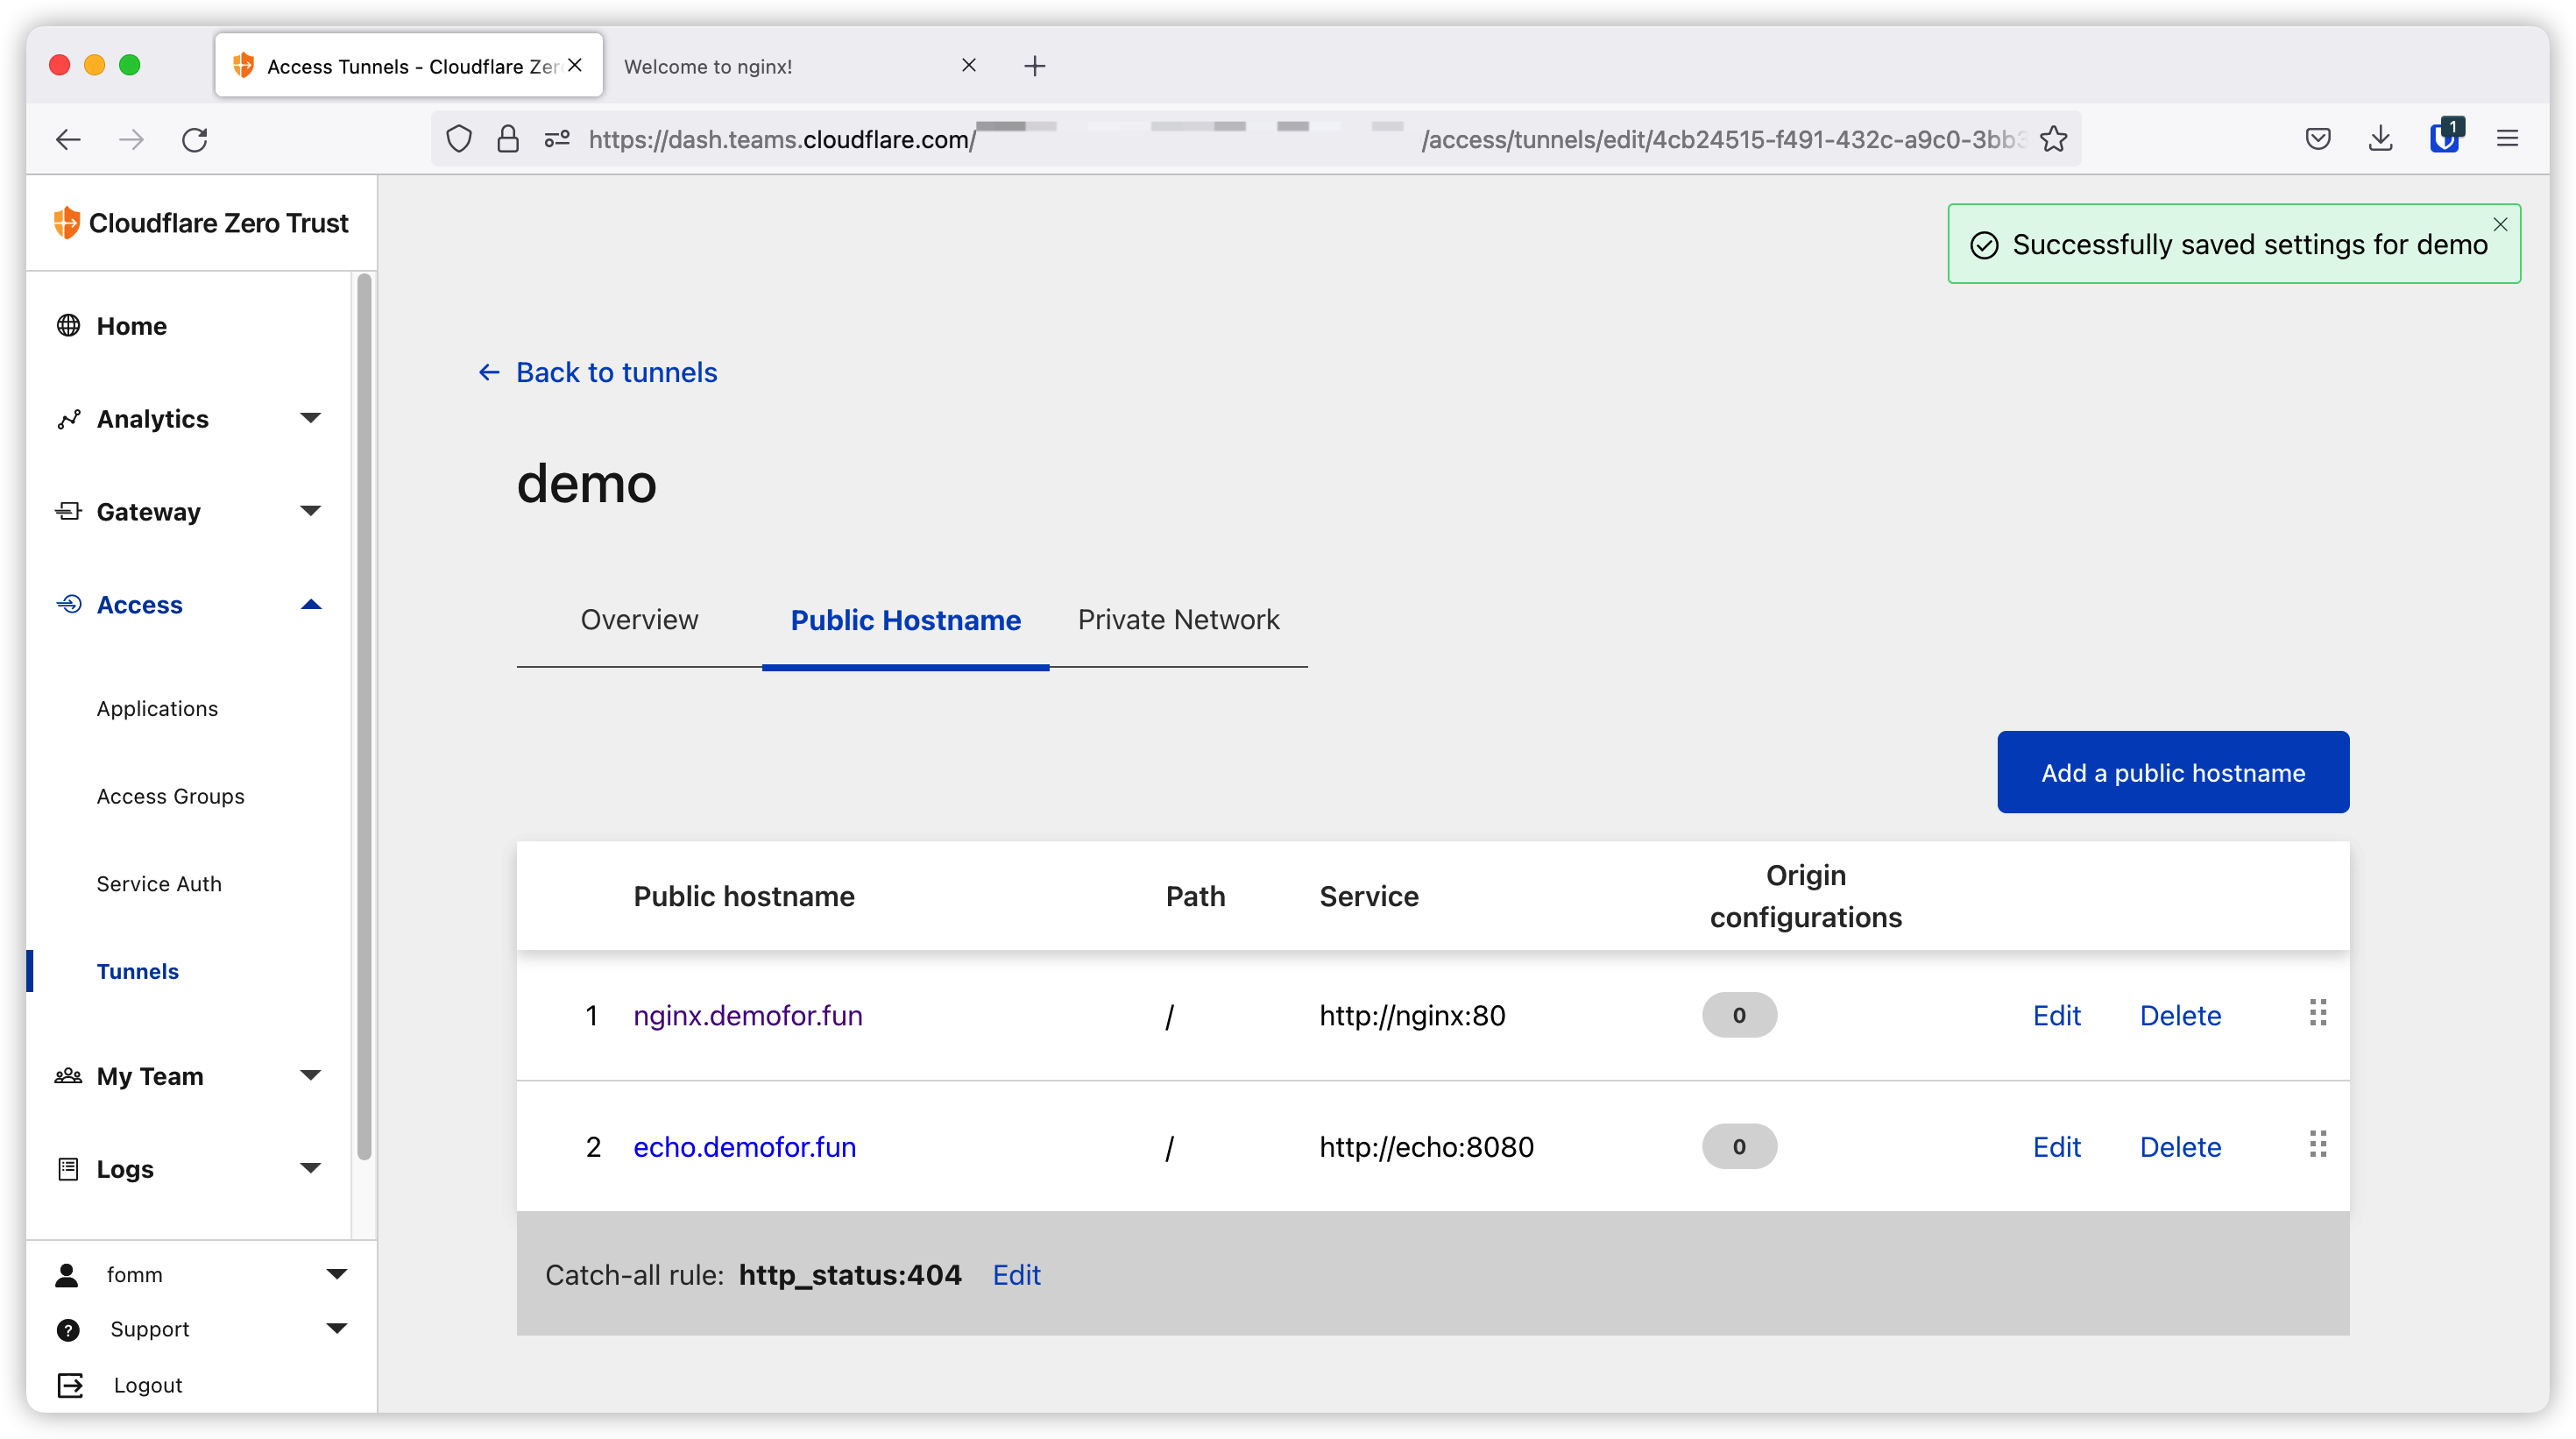
Now let’s create our container as below.
1 | docker run --detach \ |
Then we can access this app on browser.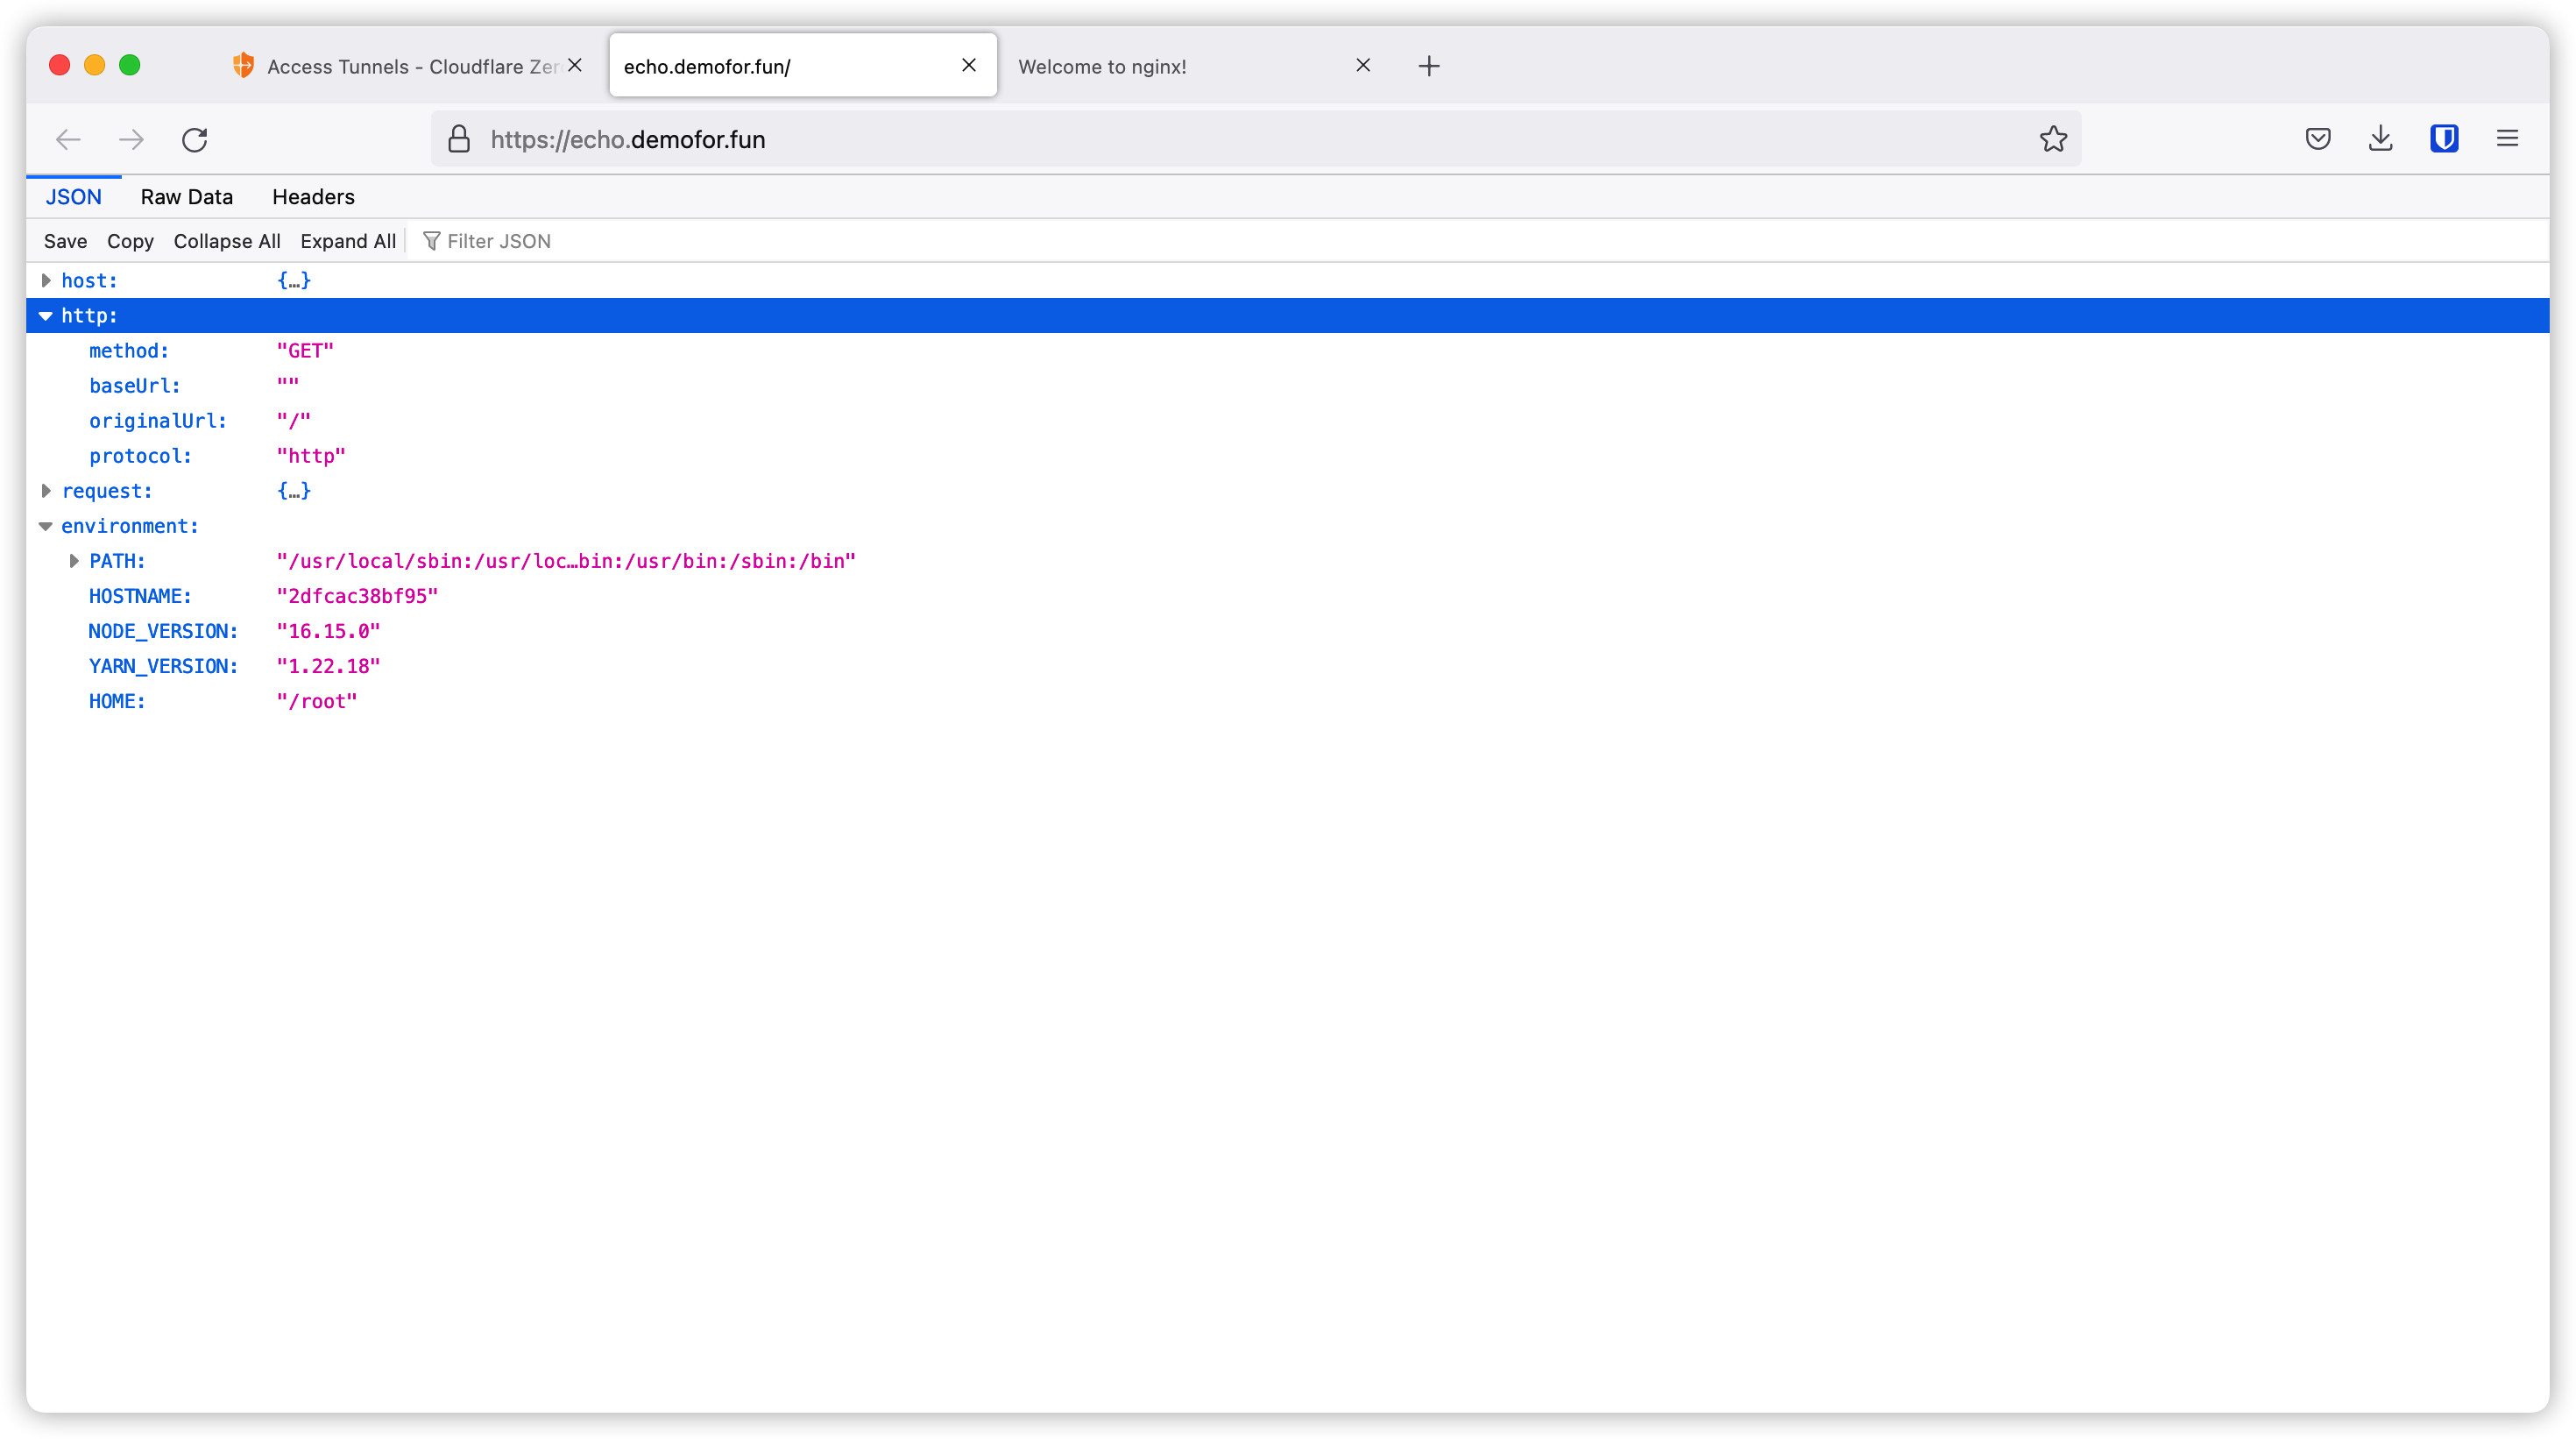
Application on host
You are not limited to the application running in containers. This also works for the application running on host.
Start Python server
Let me use below python script as an example. Let’s save below code to server.py.
If you are not sure if this code is safe or not, you can start a docker application in host network to test this out. For example, you can use
docker run --detach --network host --name whoami traefik/whoami --port 8080to start a whoami container listen at port 8080. After that you can skip to next section.
1 | import json |
Then we can run below to start the server.
1 | python3 server.py & |
To kill this process, please run
kill -9 ${PROC_ID}
Now we can try curl http://localhost:8080 -i and we should get
1 | HTTP/1.0 200 OK |
Find Gateway IP
Now, let’s see how we can use cloudflared tunnel to expose this application running on host. As cloudflared is running as a container, it needs to access host machine through docker bridge network gateway.
On Mac or Windows platform, we can simply use host.docker.internal and on linux we need to find the gateway ip.
One way to get the gateway ip is to inspect the docker network. In our case we need to run docker network inspect tunnel command. We should get something similar to below back. The Gateway IP is 172.19.0.1 in this example.
1 | ... |
We can also check routing table with below command. This will start a new alpine container and run ip route command.
1 | docker run --rm --network tunnel alpine ip route |
The result also shows 172.19.0.1 as the gateway ip.
1 | default via 172.19.0.1 dev eth0 |
On some virtual machines you might see the gateway as hostname. I am using multipass to create my VM. If I run the route or netstat -r command, I am getting below table back.
I’ve tested multipass on both Linux and Mac, this method works for Mac but not for Linux. I strongly recommend using Gateway IP.
1 | docker run --rm --network tunnel alpine route |
This means I can use cf.local as gateway hostname. If we ping this hostname from any containers inside tunnel network, this hostname will be resolved to 172.19.0.1.
1 | Kernel IP routing table |
Let’s create our new route on Cloudflare dashboard. I am using the Gateway IP here.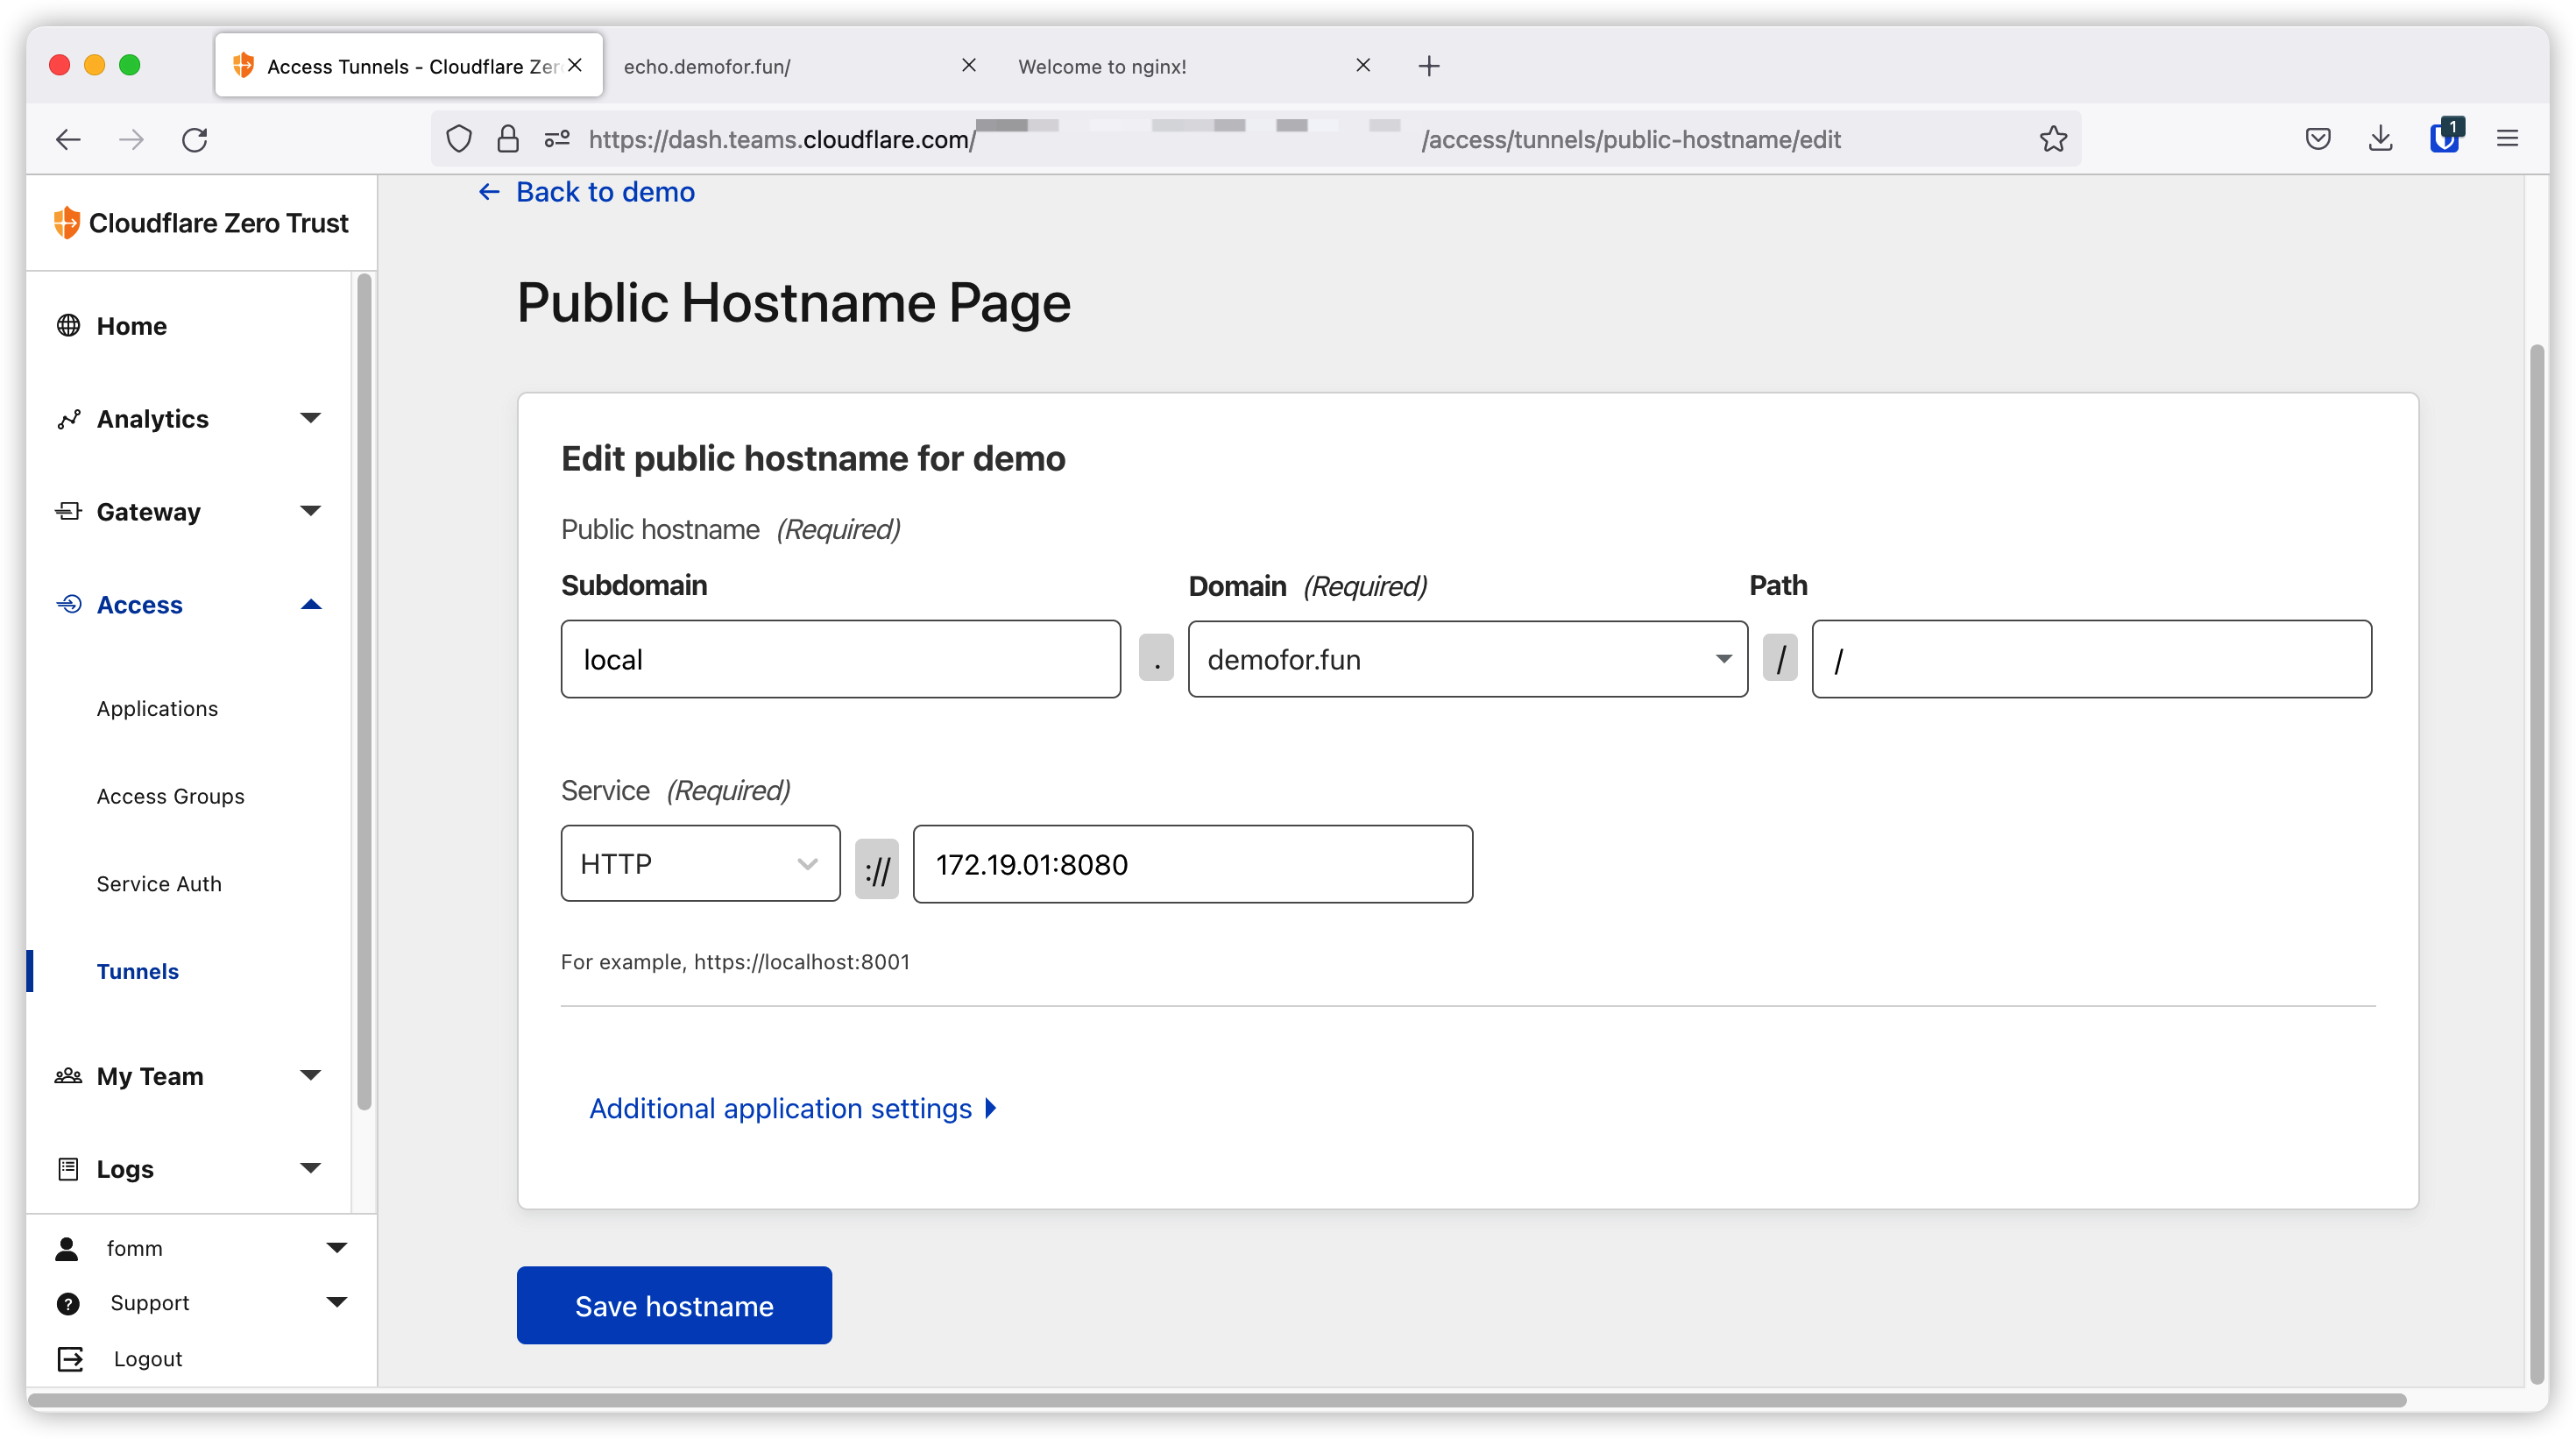
Then we can access our local app on the internet.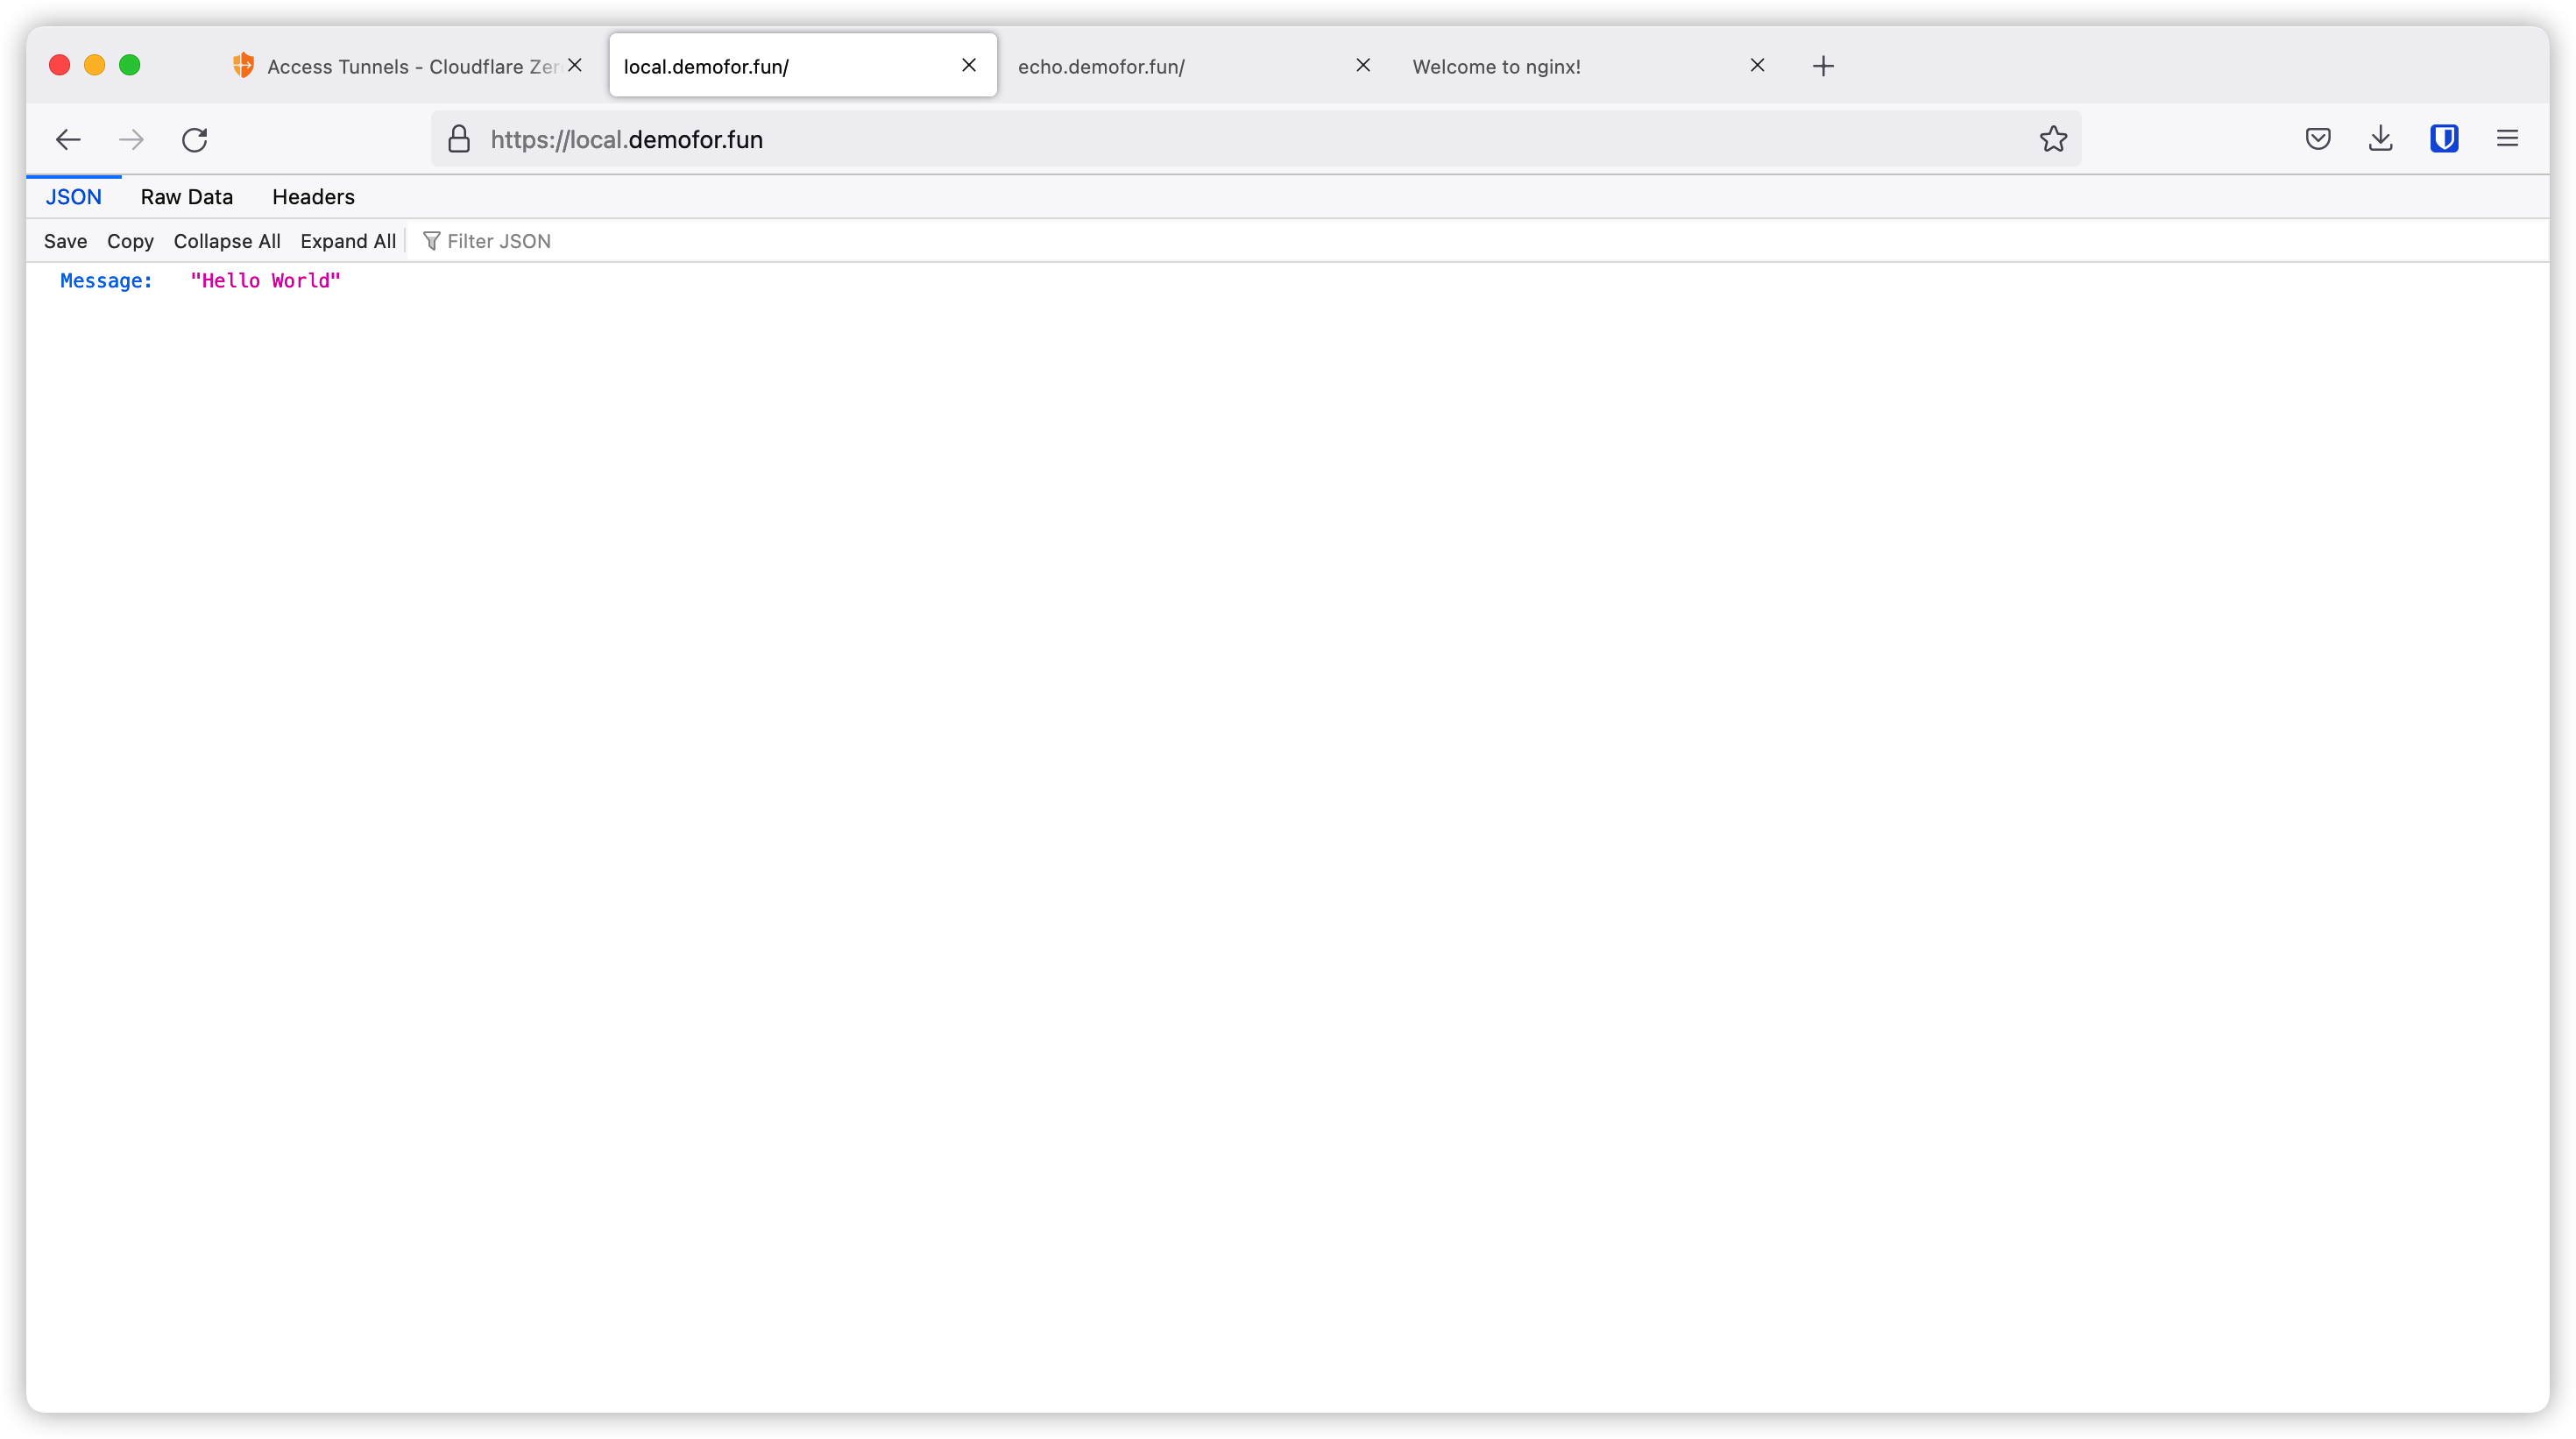
As we can see from above examples, Cloudflare tunnel is very easy to use. You can think of it as a reverse proxy to expose your local applications to the internet. No DNS record needs to be created, no more SSL certificate management, everything just works with a few clicks and it is FREE!
That’s all I want to cover today, see you next time.