Introduction of Okta - From Account Set Up to Auth Flows
I’ve cover both self-hosted solution keycloak and online solution Azure AD previously. One of my viewers asked me if there is an online provider that does not requires credit card. Well, there are quite a few out there but I think you should try Okta first. In today’s post, I would show you how to register an account, create an app, modify scope and claims to authorization server and some OIDC flows.
Set up
Registration
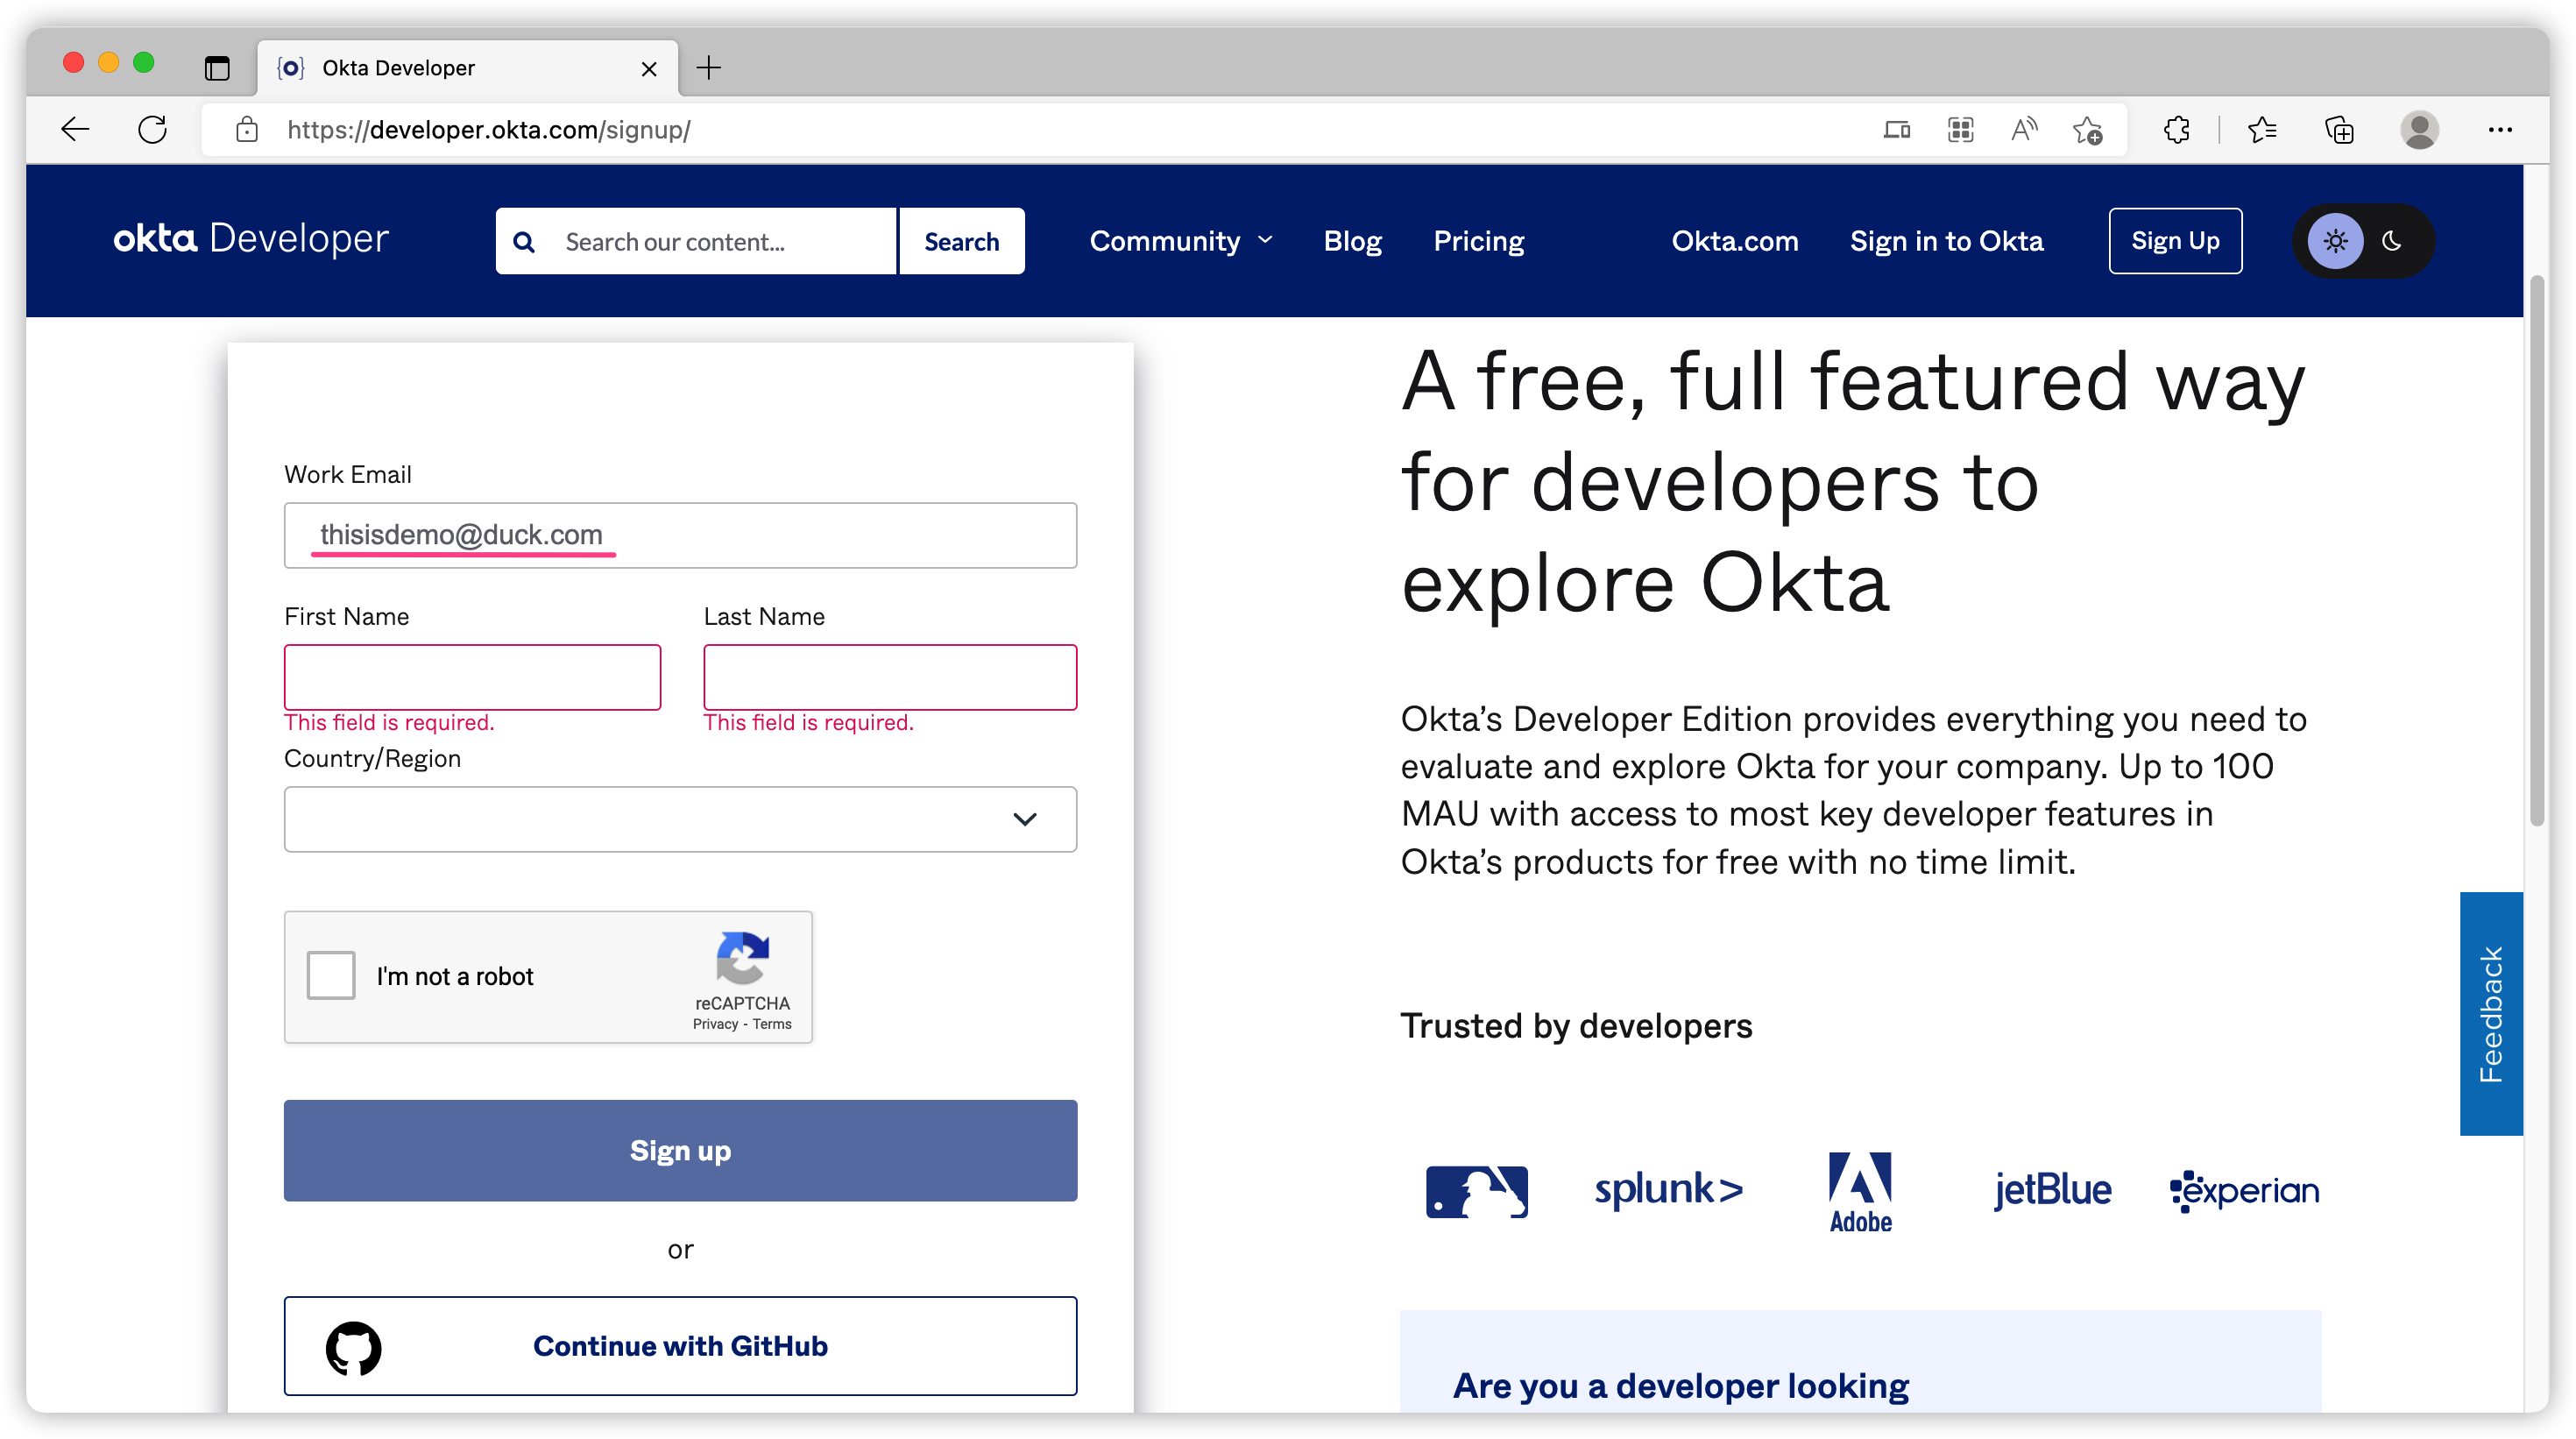
You can register a free account at https://developer.okta.com/signup/. The process is pretty easy. What you need is an email that is not from well-known provider. As you can see, it does not complain a duckduckgo email.
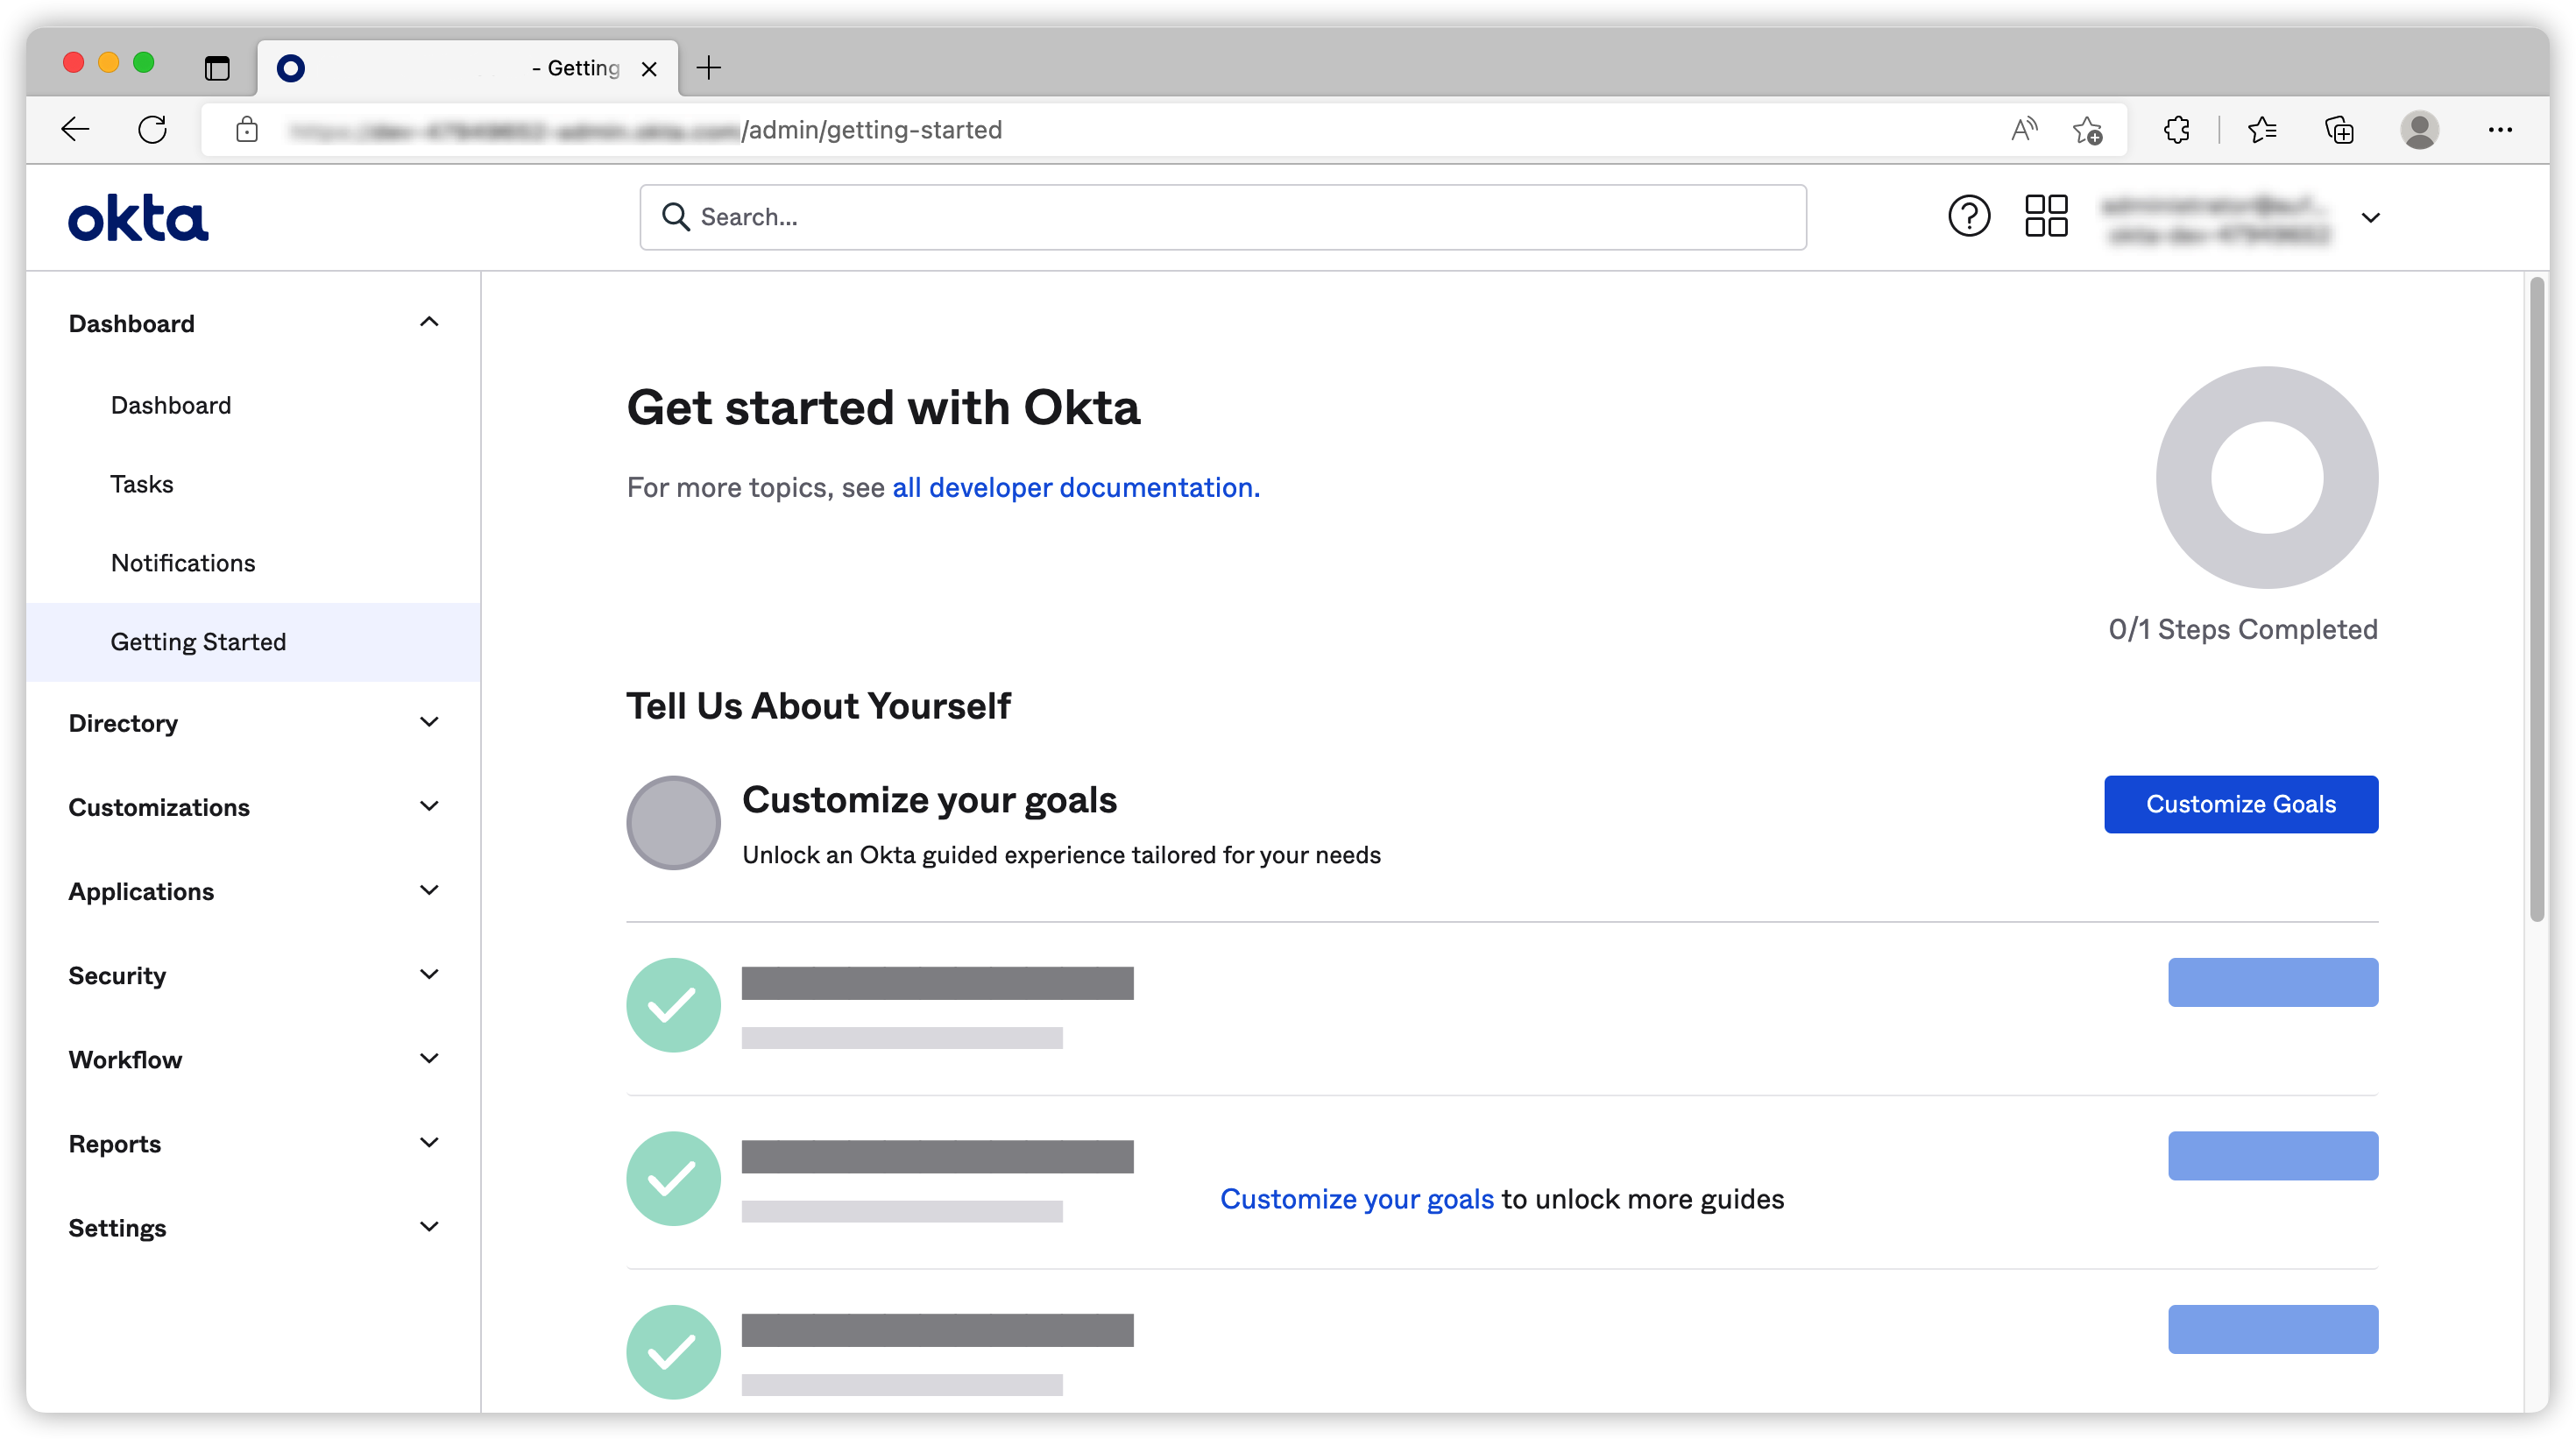
Once you’ve verified your email, you should be able to log in.
Okta is highly customizable. You can change the colour theme, logo or even use your own domain for free.
Create users and groups
Before we start creating applications, let’s create some users and groups. Feel free to jump to the next section if you’ve set up users already. I love creating groups first so I can add group info when I am creating a new user.
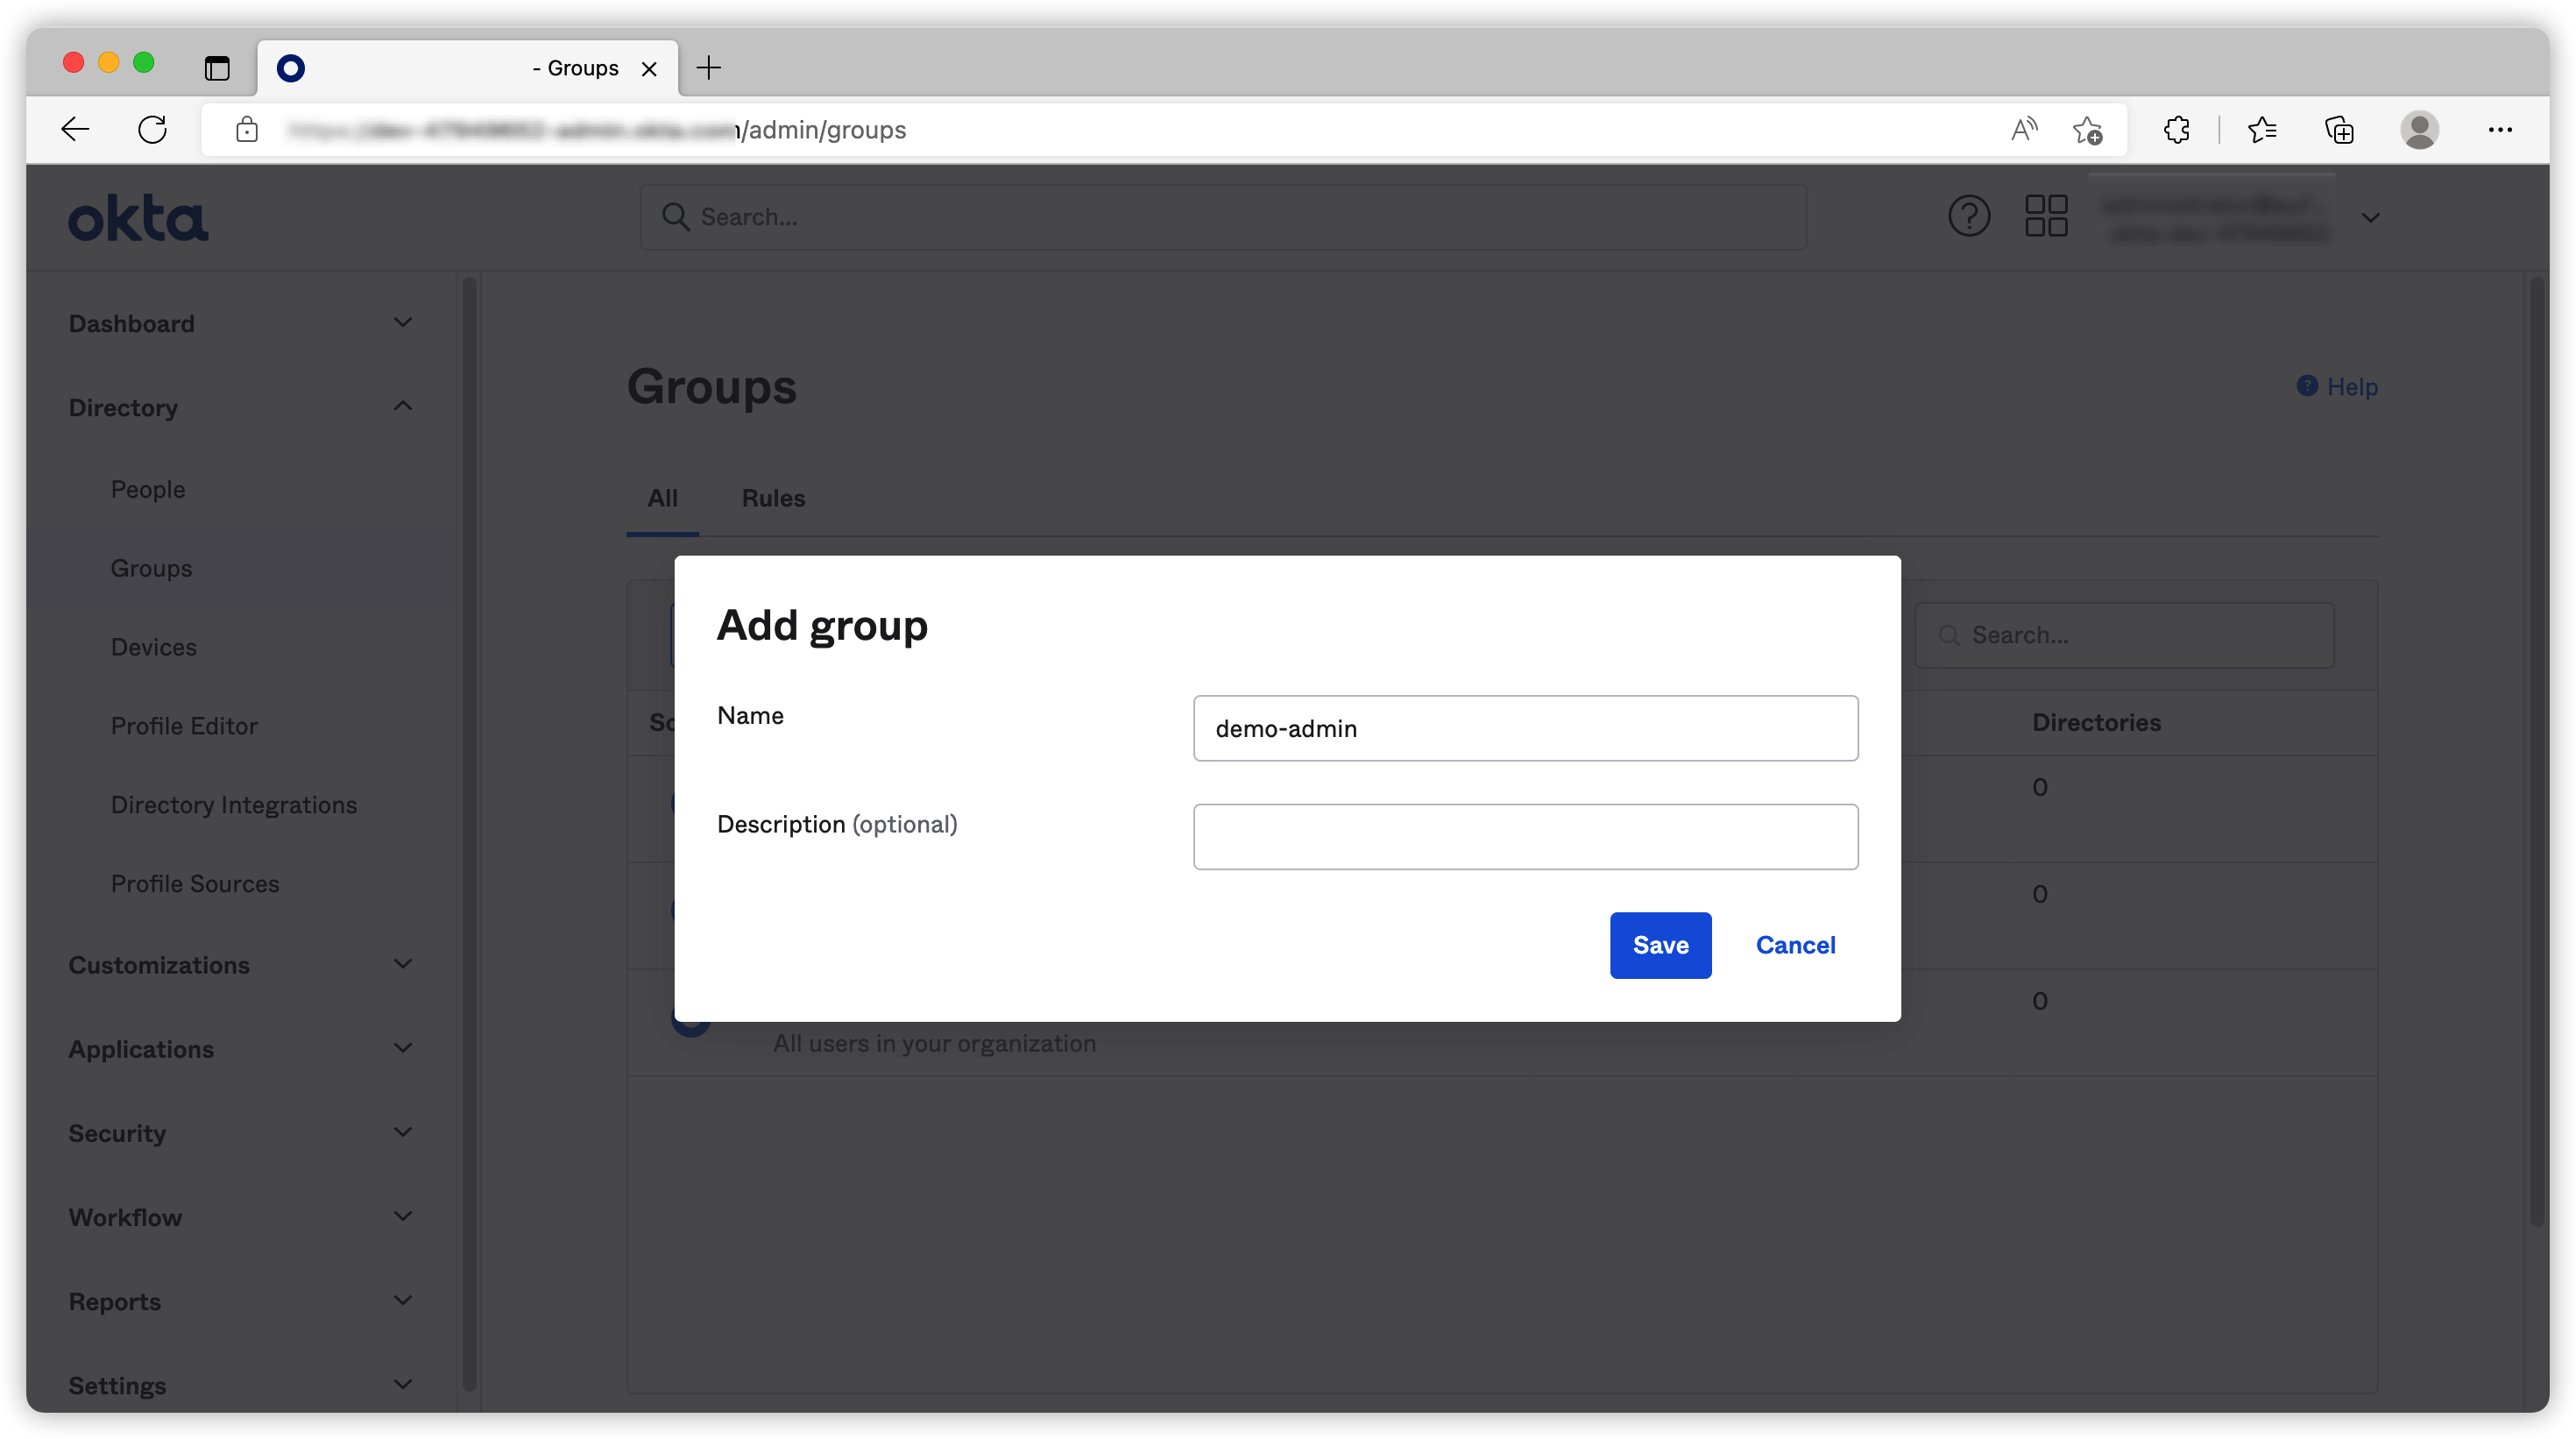
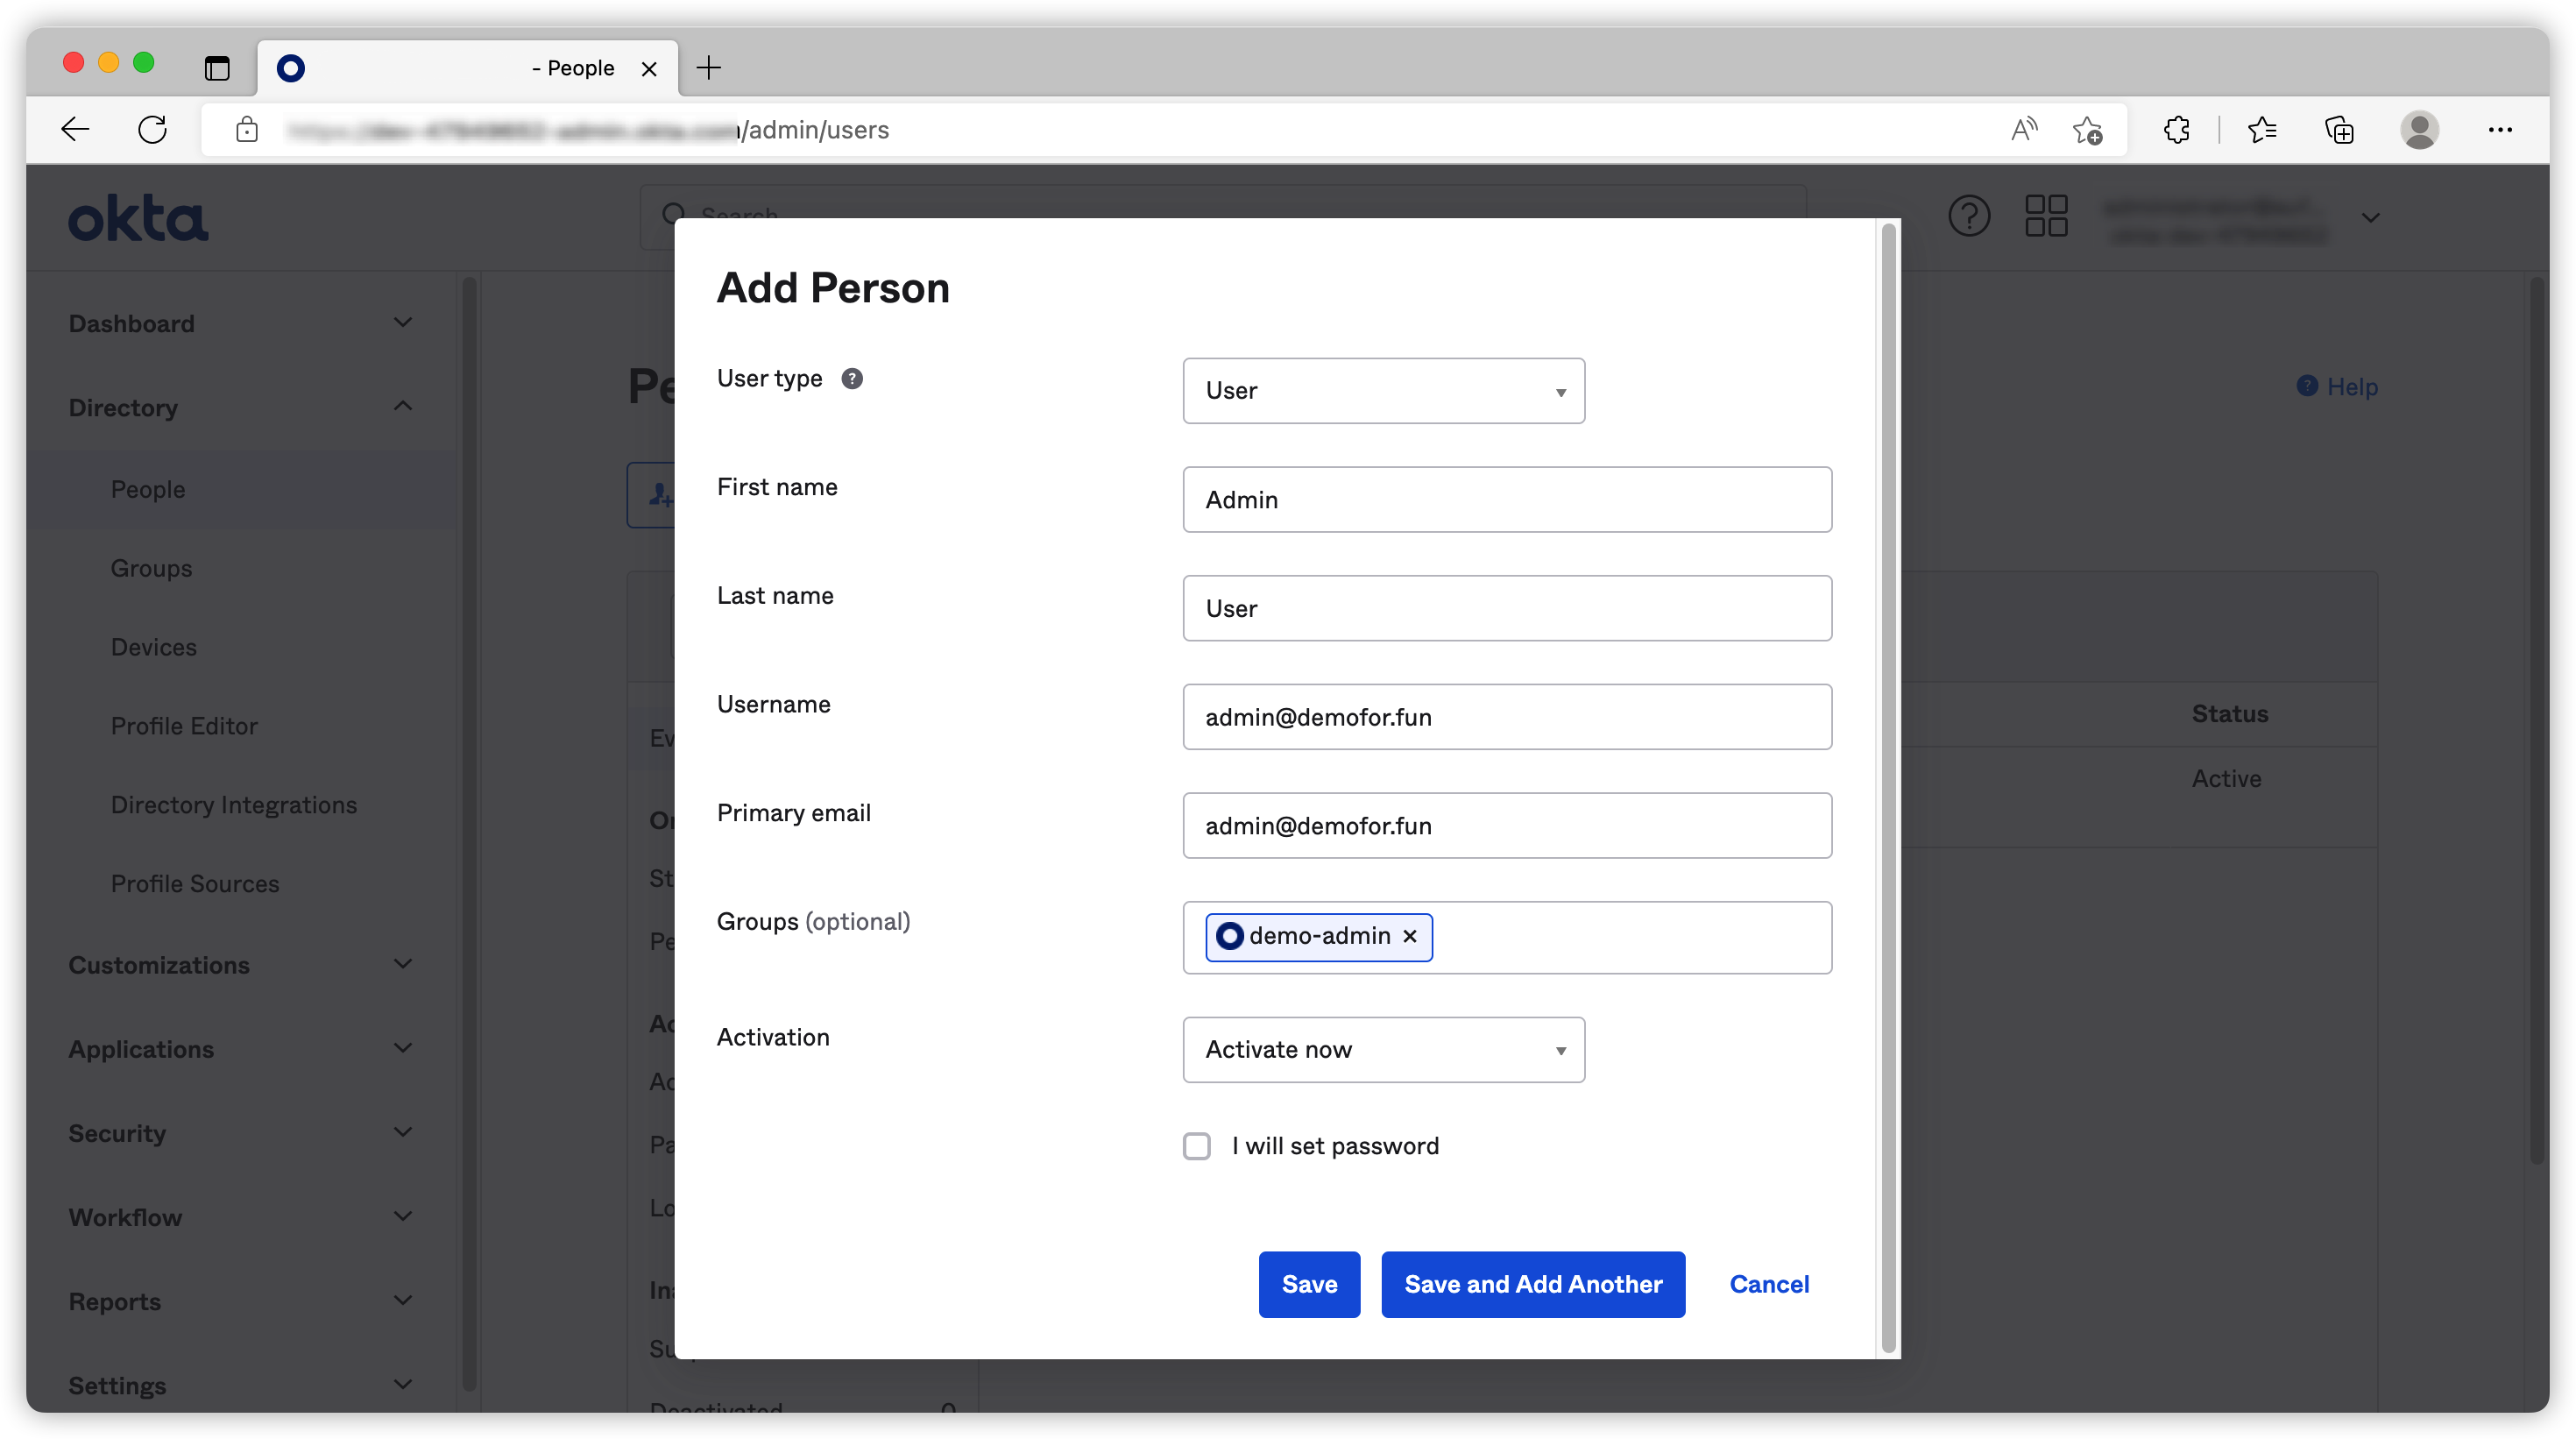
The options are pretty straight forward, normally you would want to let the users to create their own password. I’ve created Admin User, Readonly User and put them in demo-admin, demo-readonly group respectively.
Create application
You can create different applications for different use cases. For example, you can create one for single page application and another one for machine to machine API authentication.
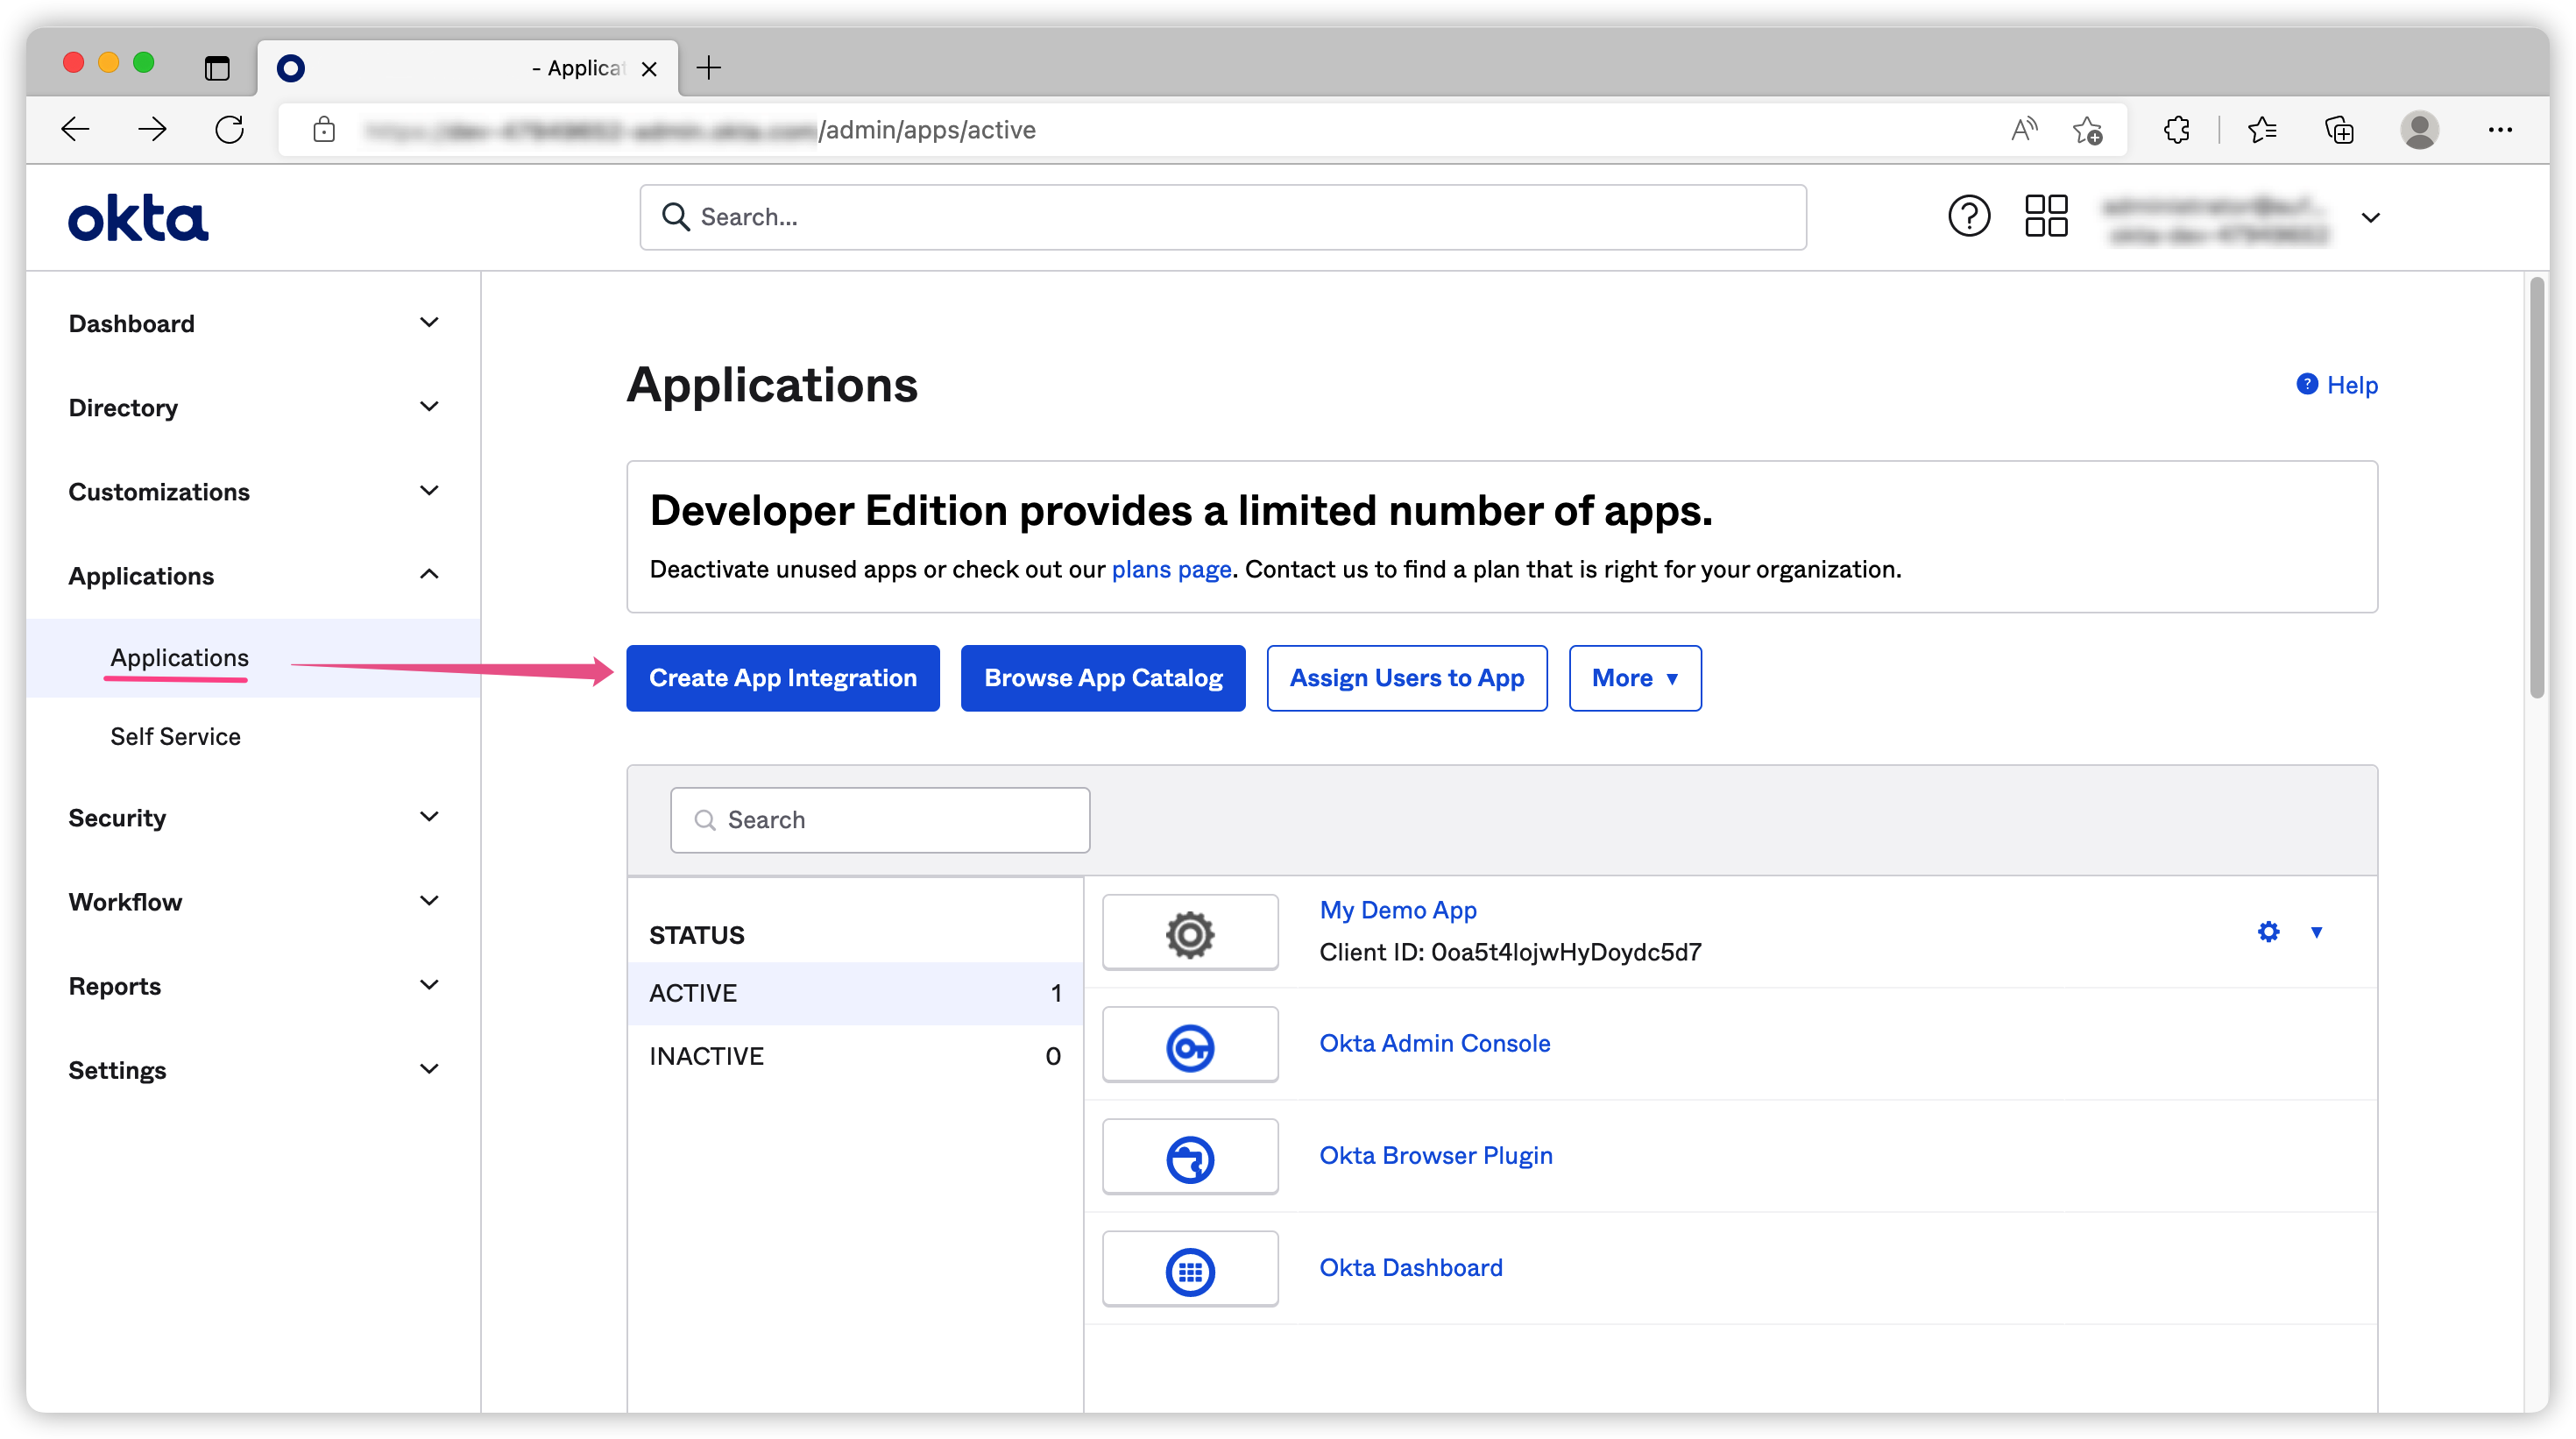
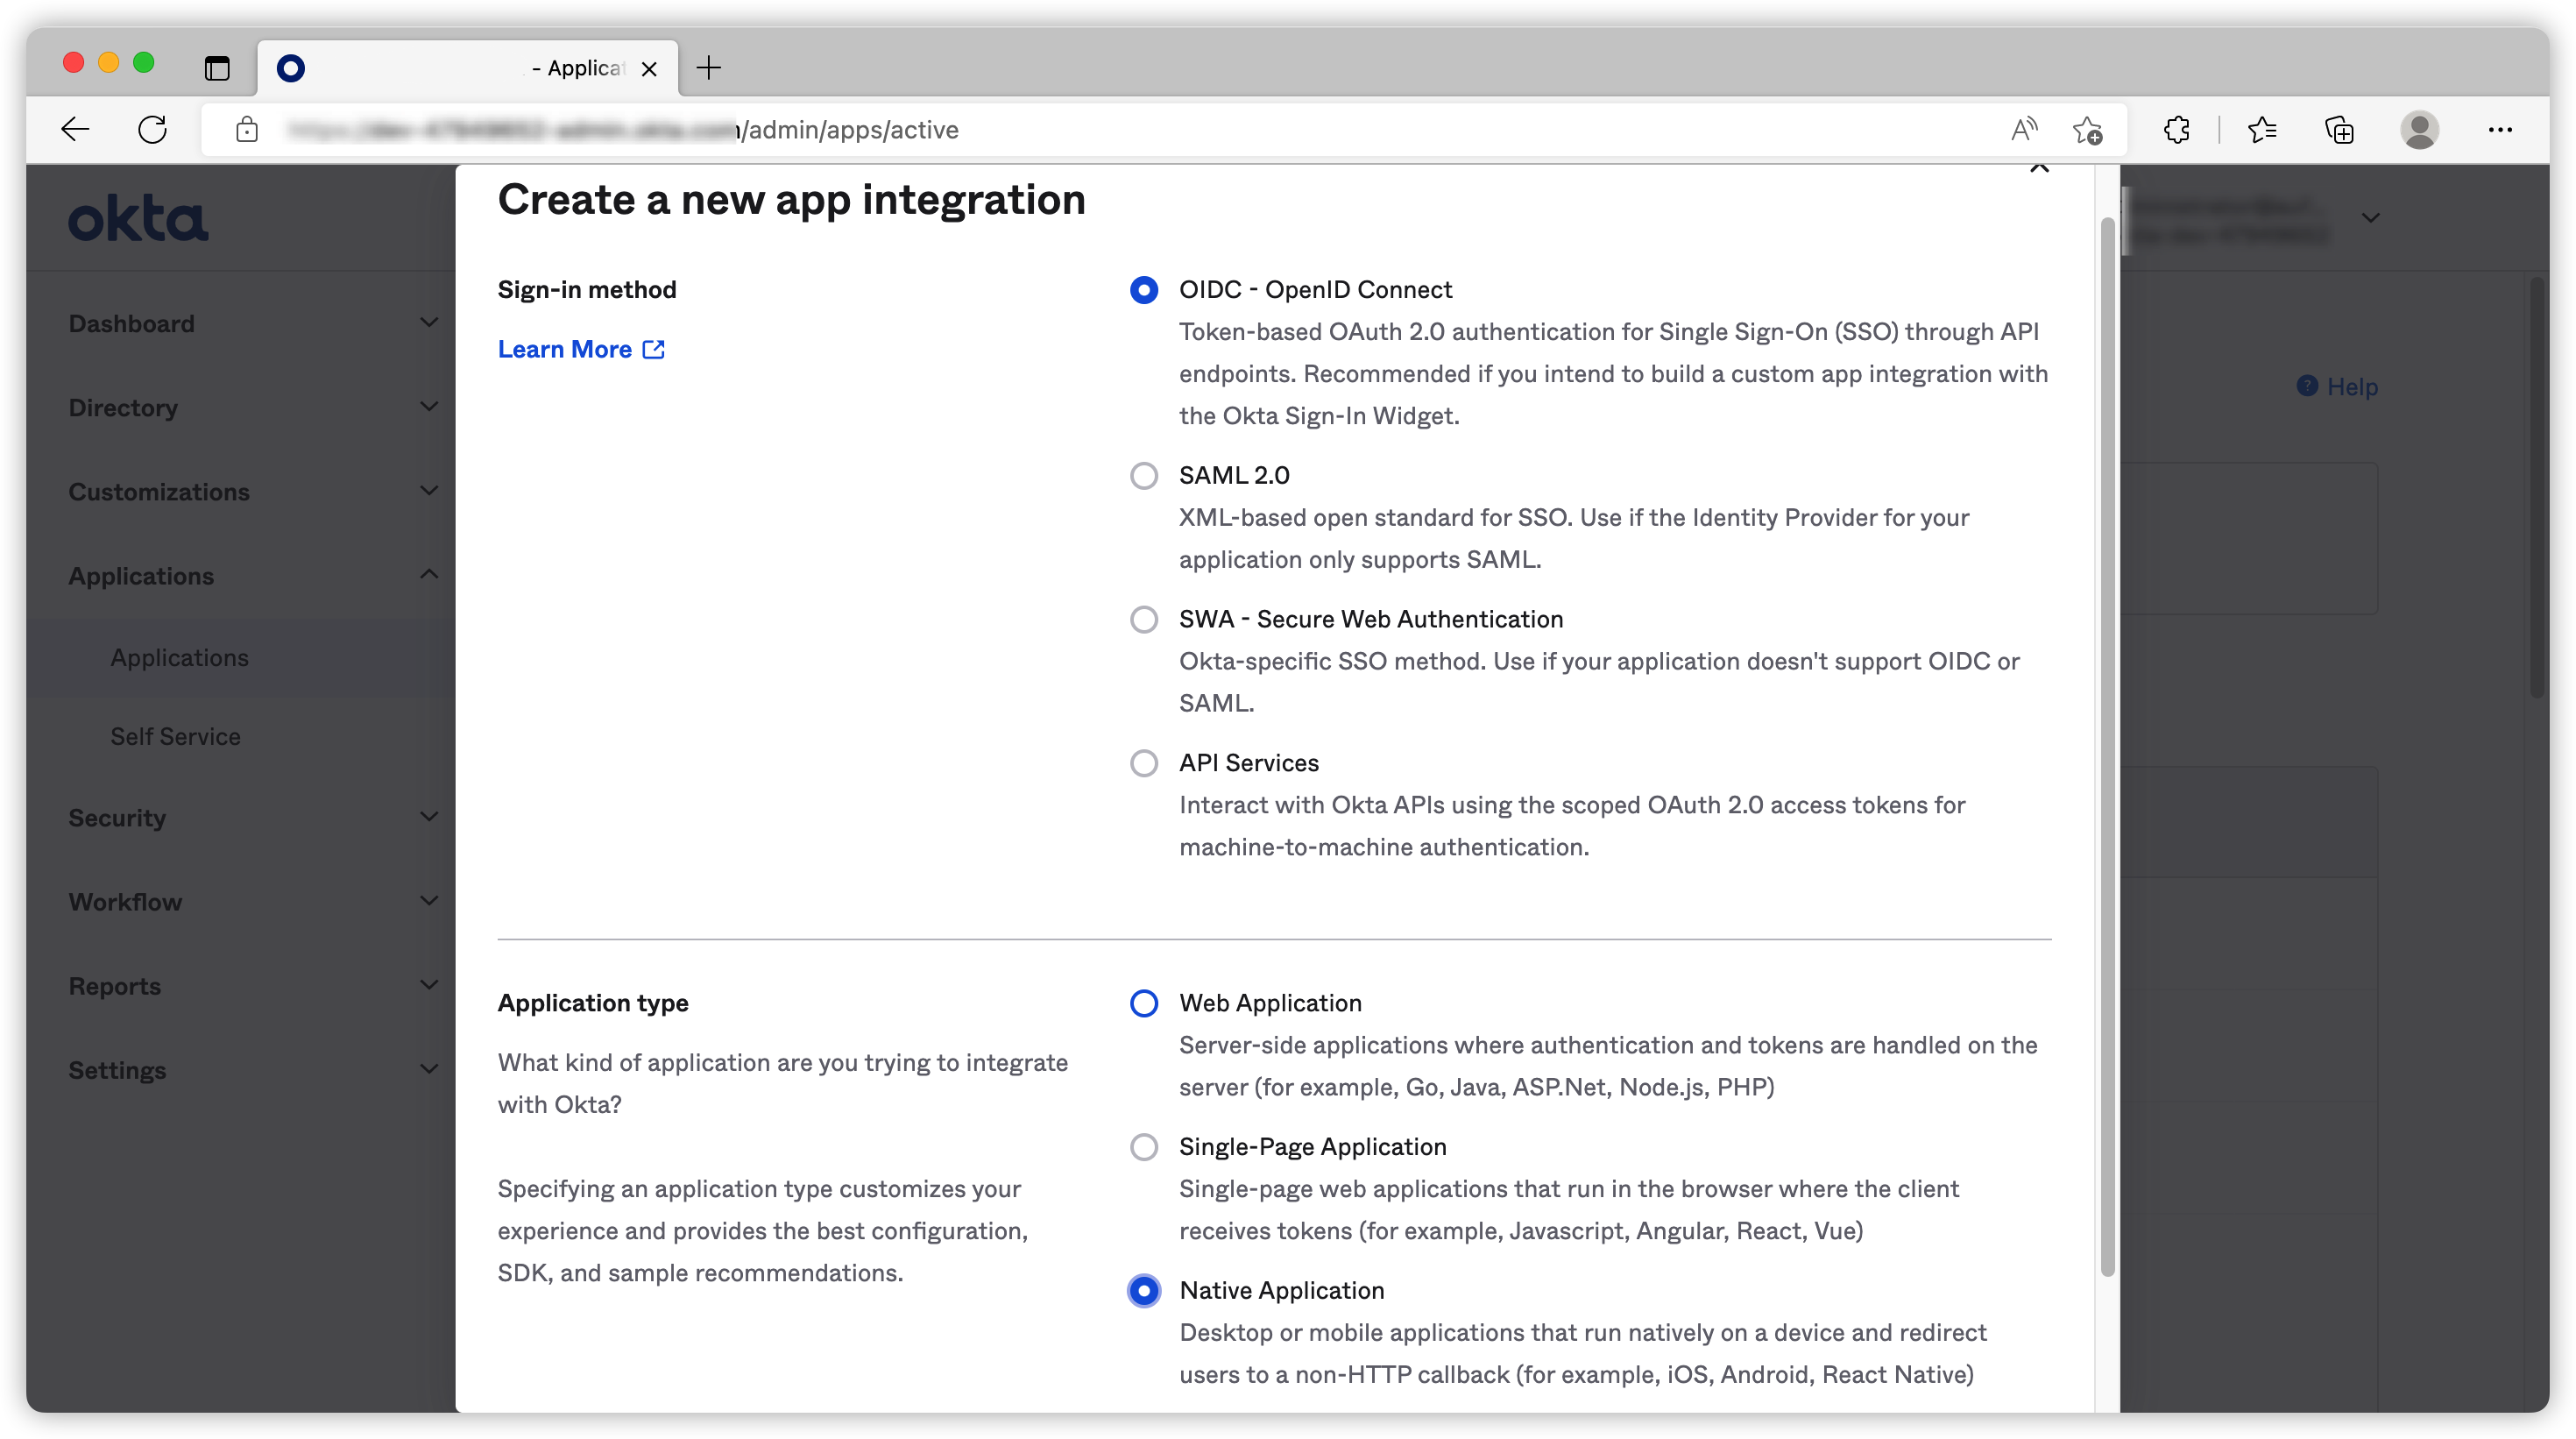
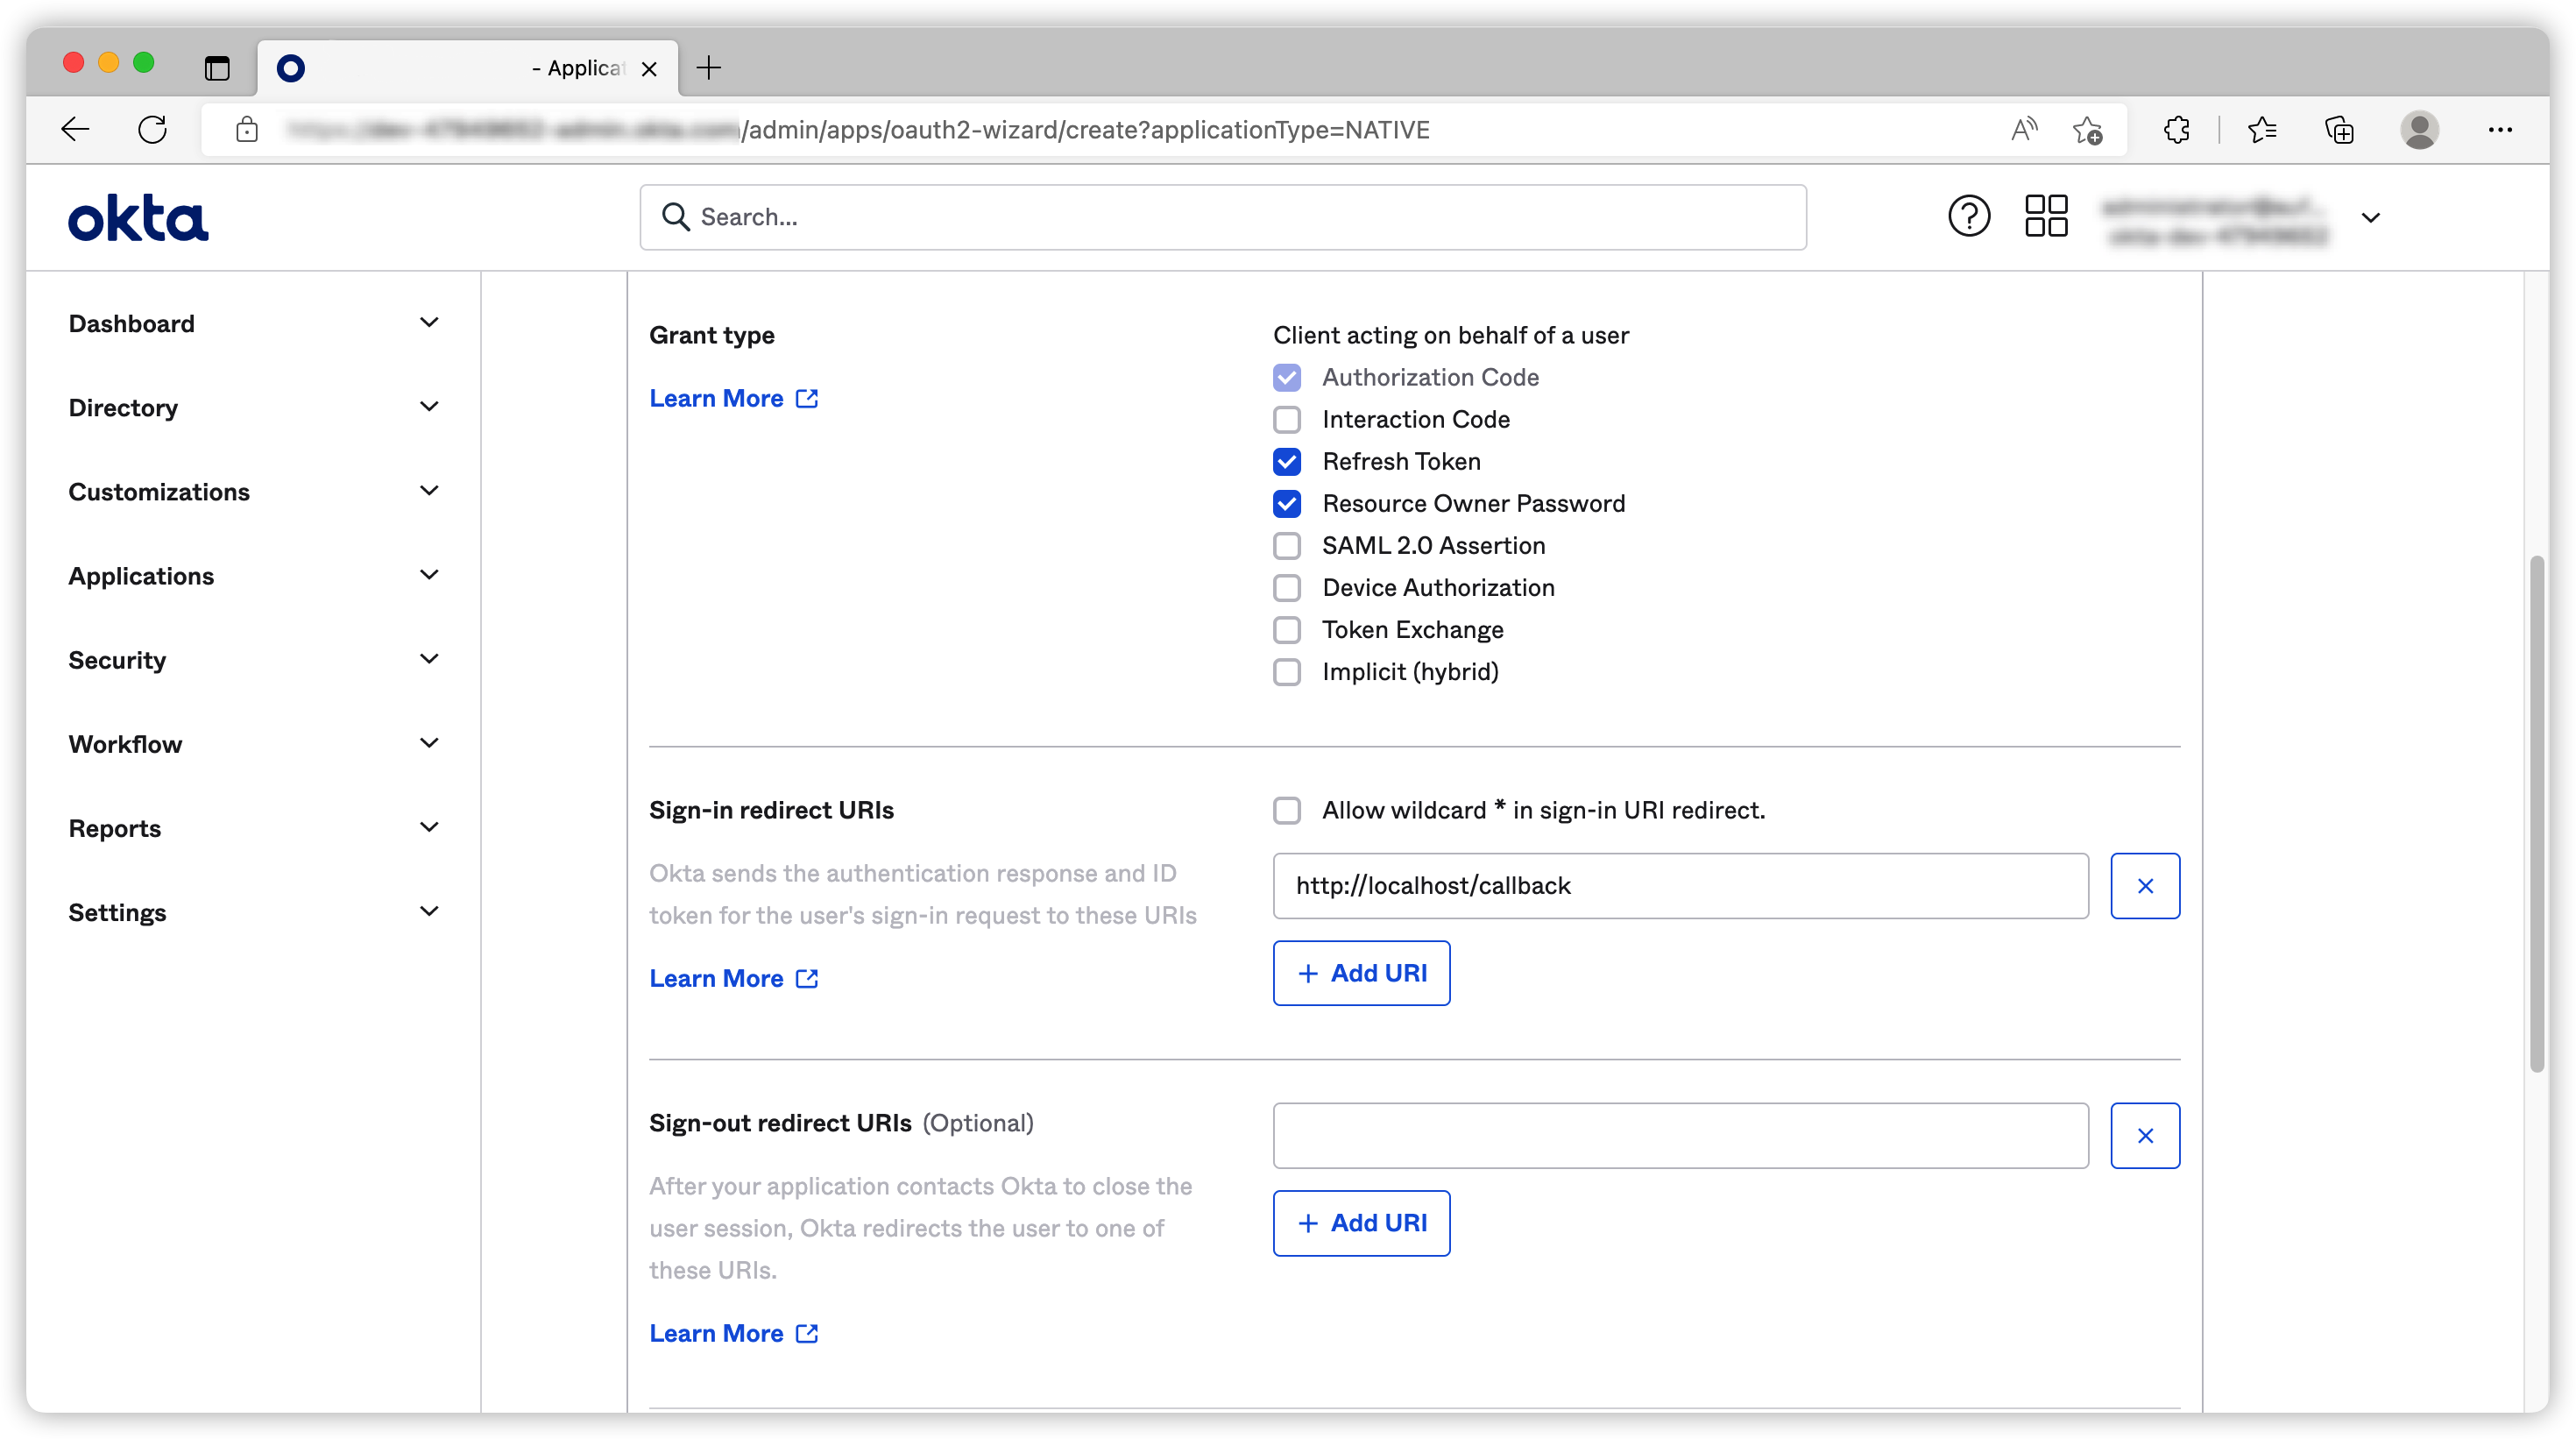
In today’s demo, I will create an OIDC application for Native Application because it has most of the flows I want to showcase.
I’ve selected auth code, refresh token and password flow and used http://localhost/callback as Sign-in redirect URIs.
We can also limit this application to be used by user groups.

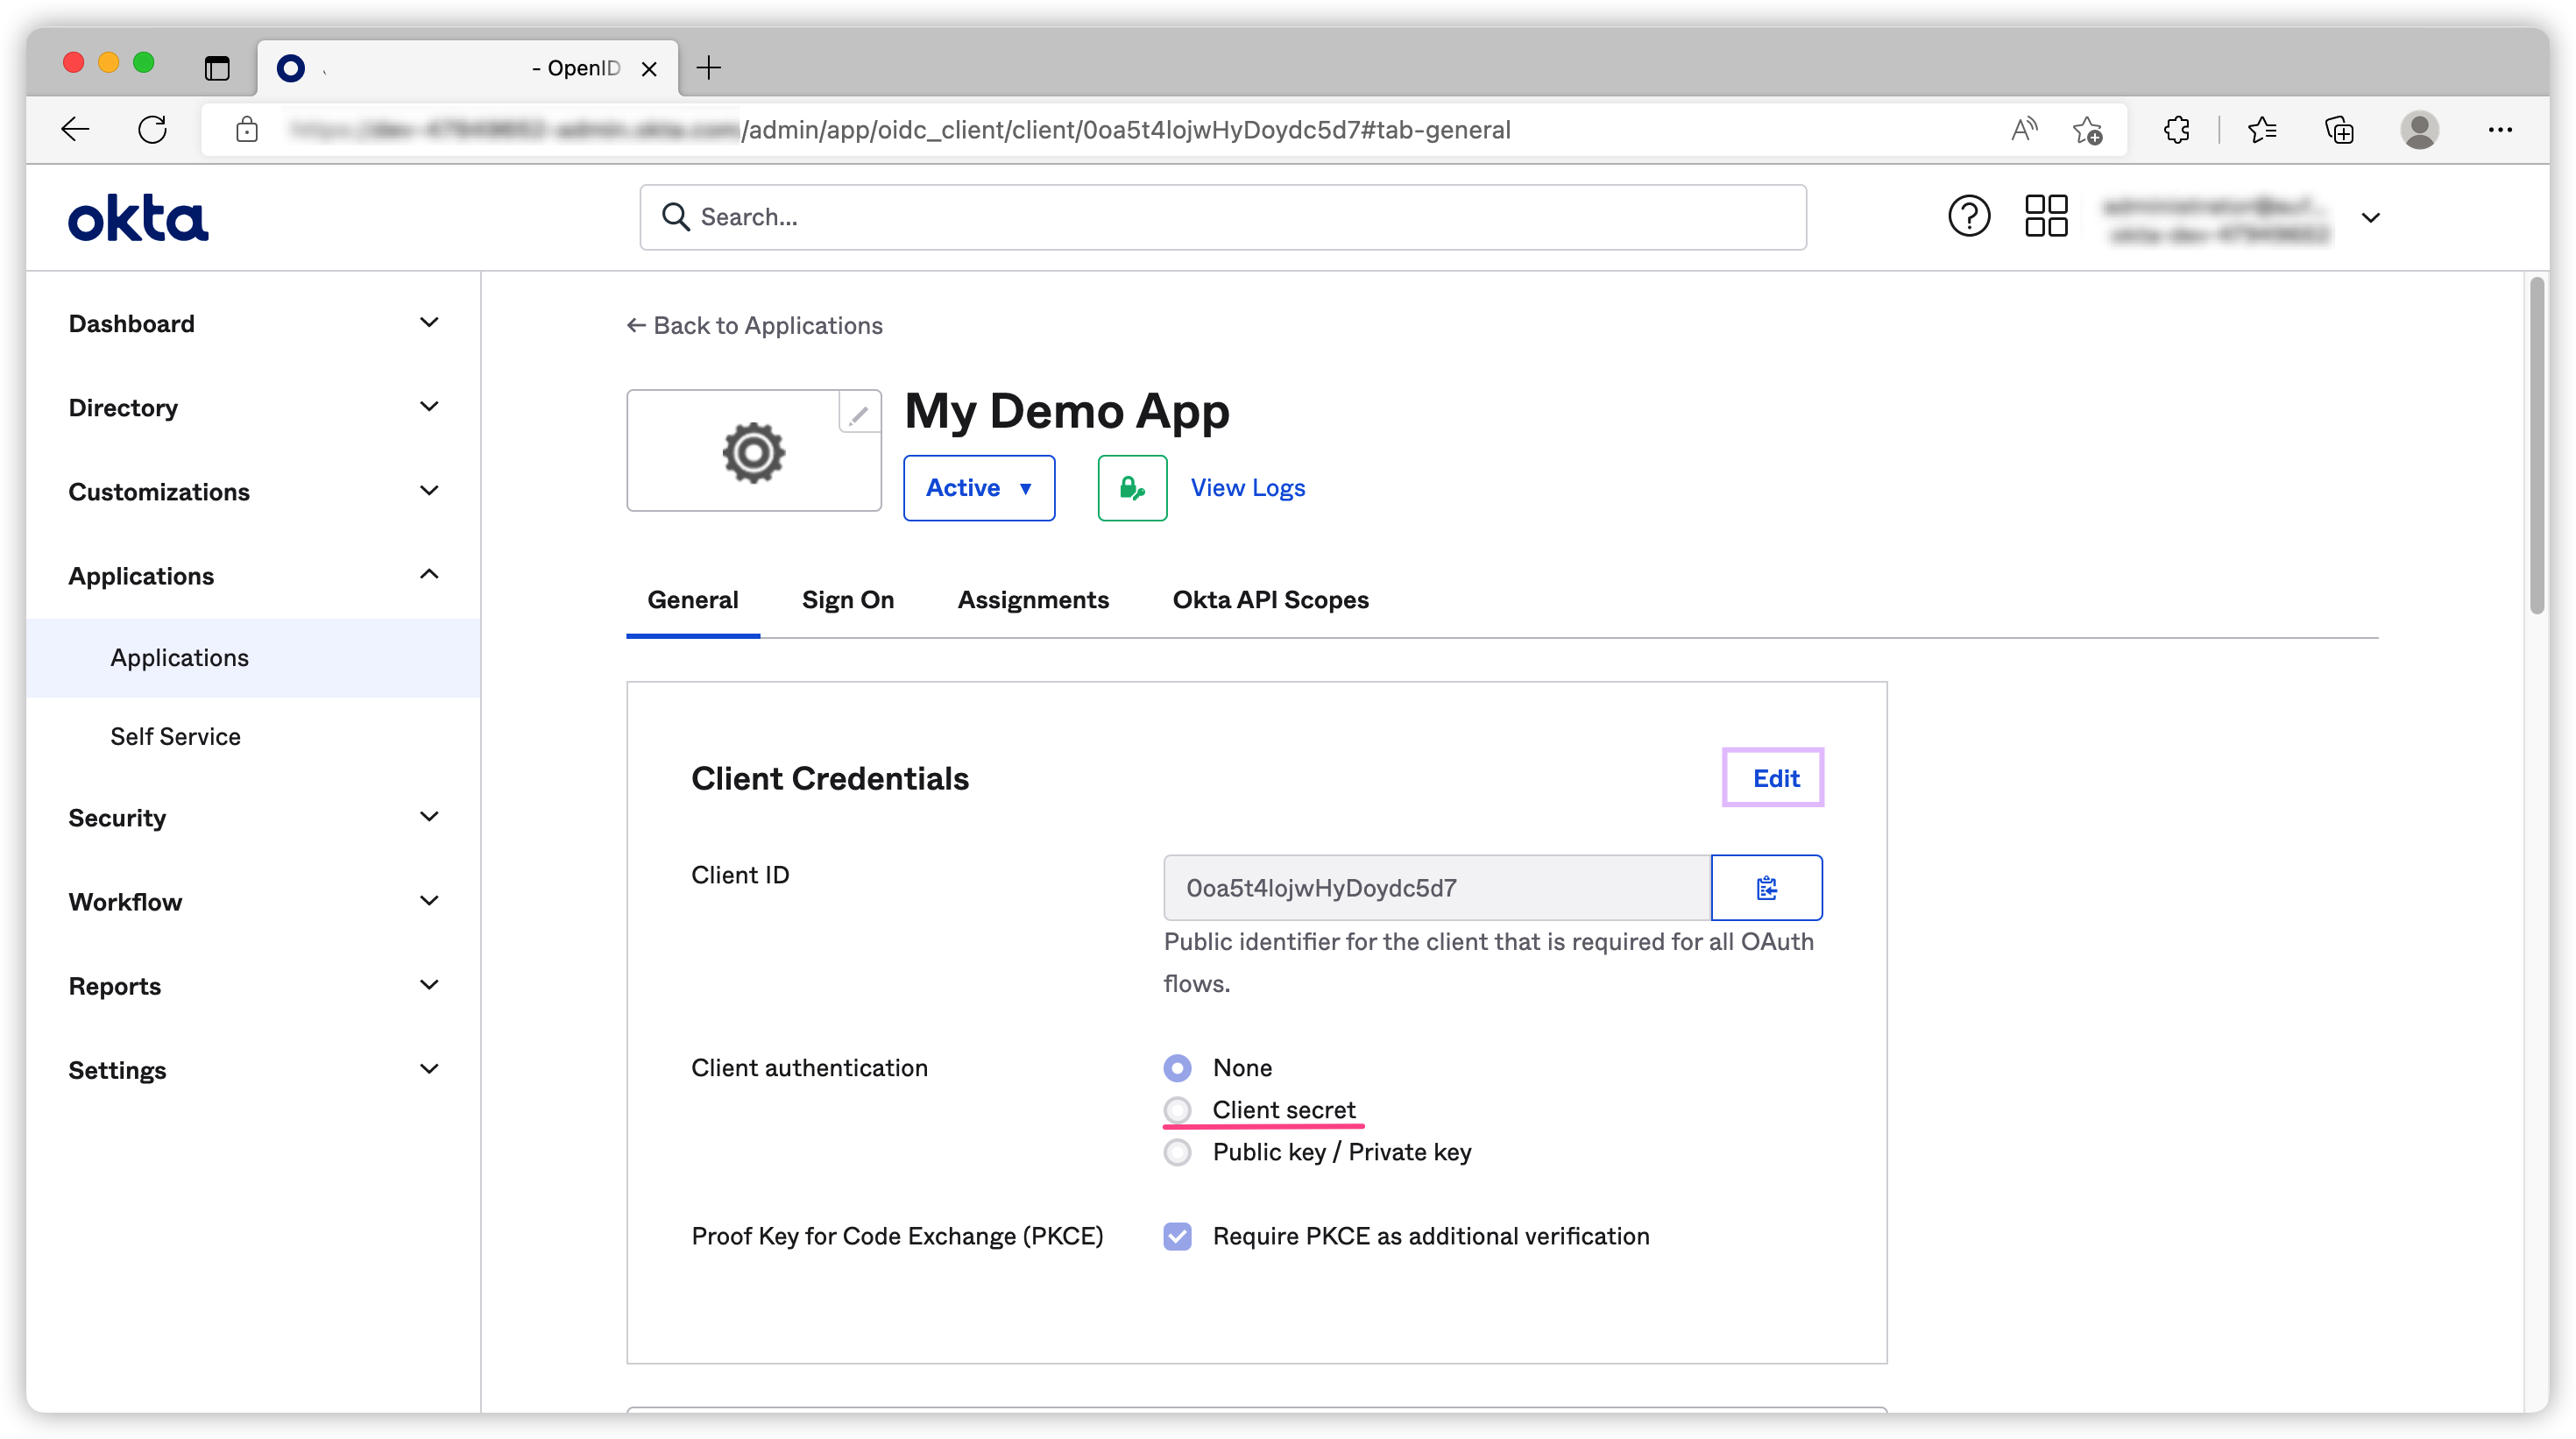
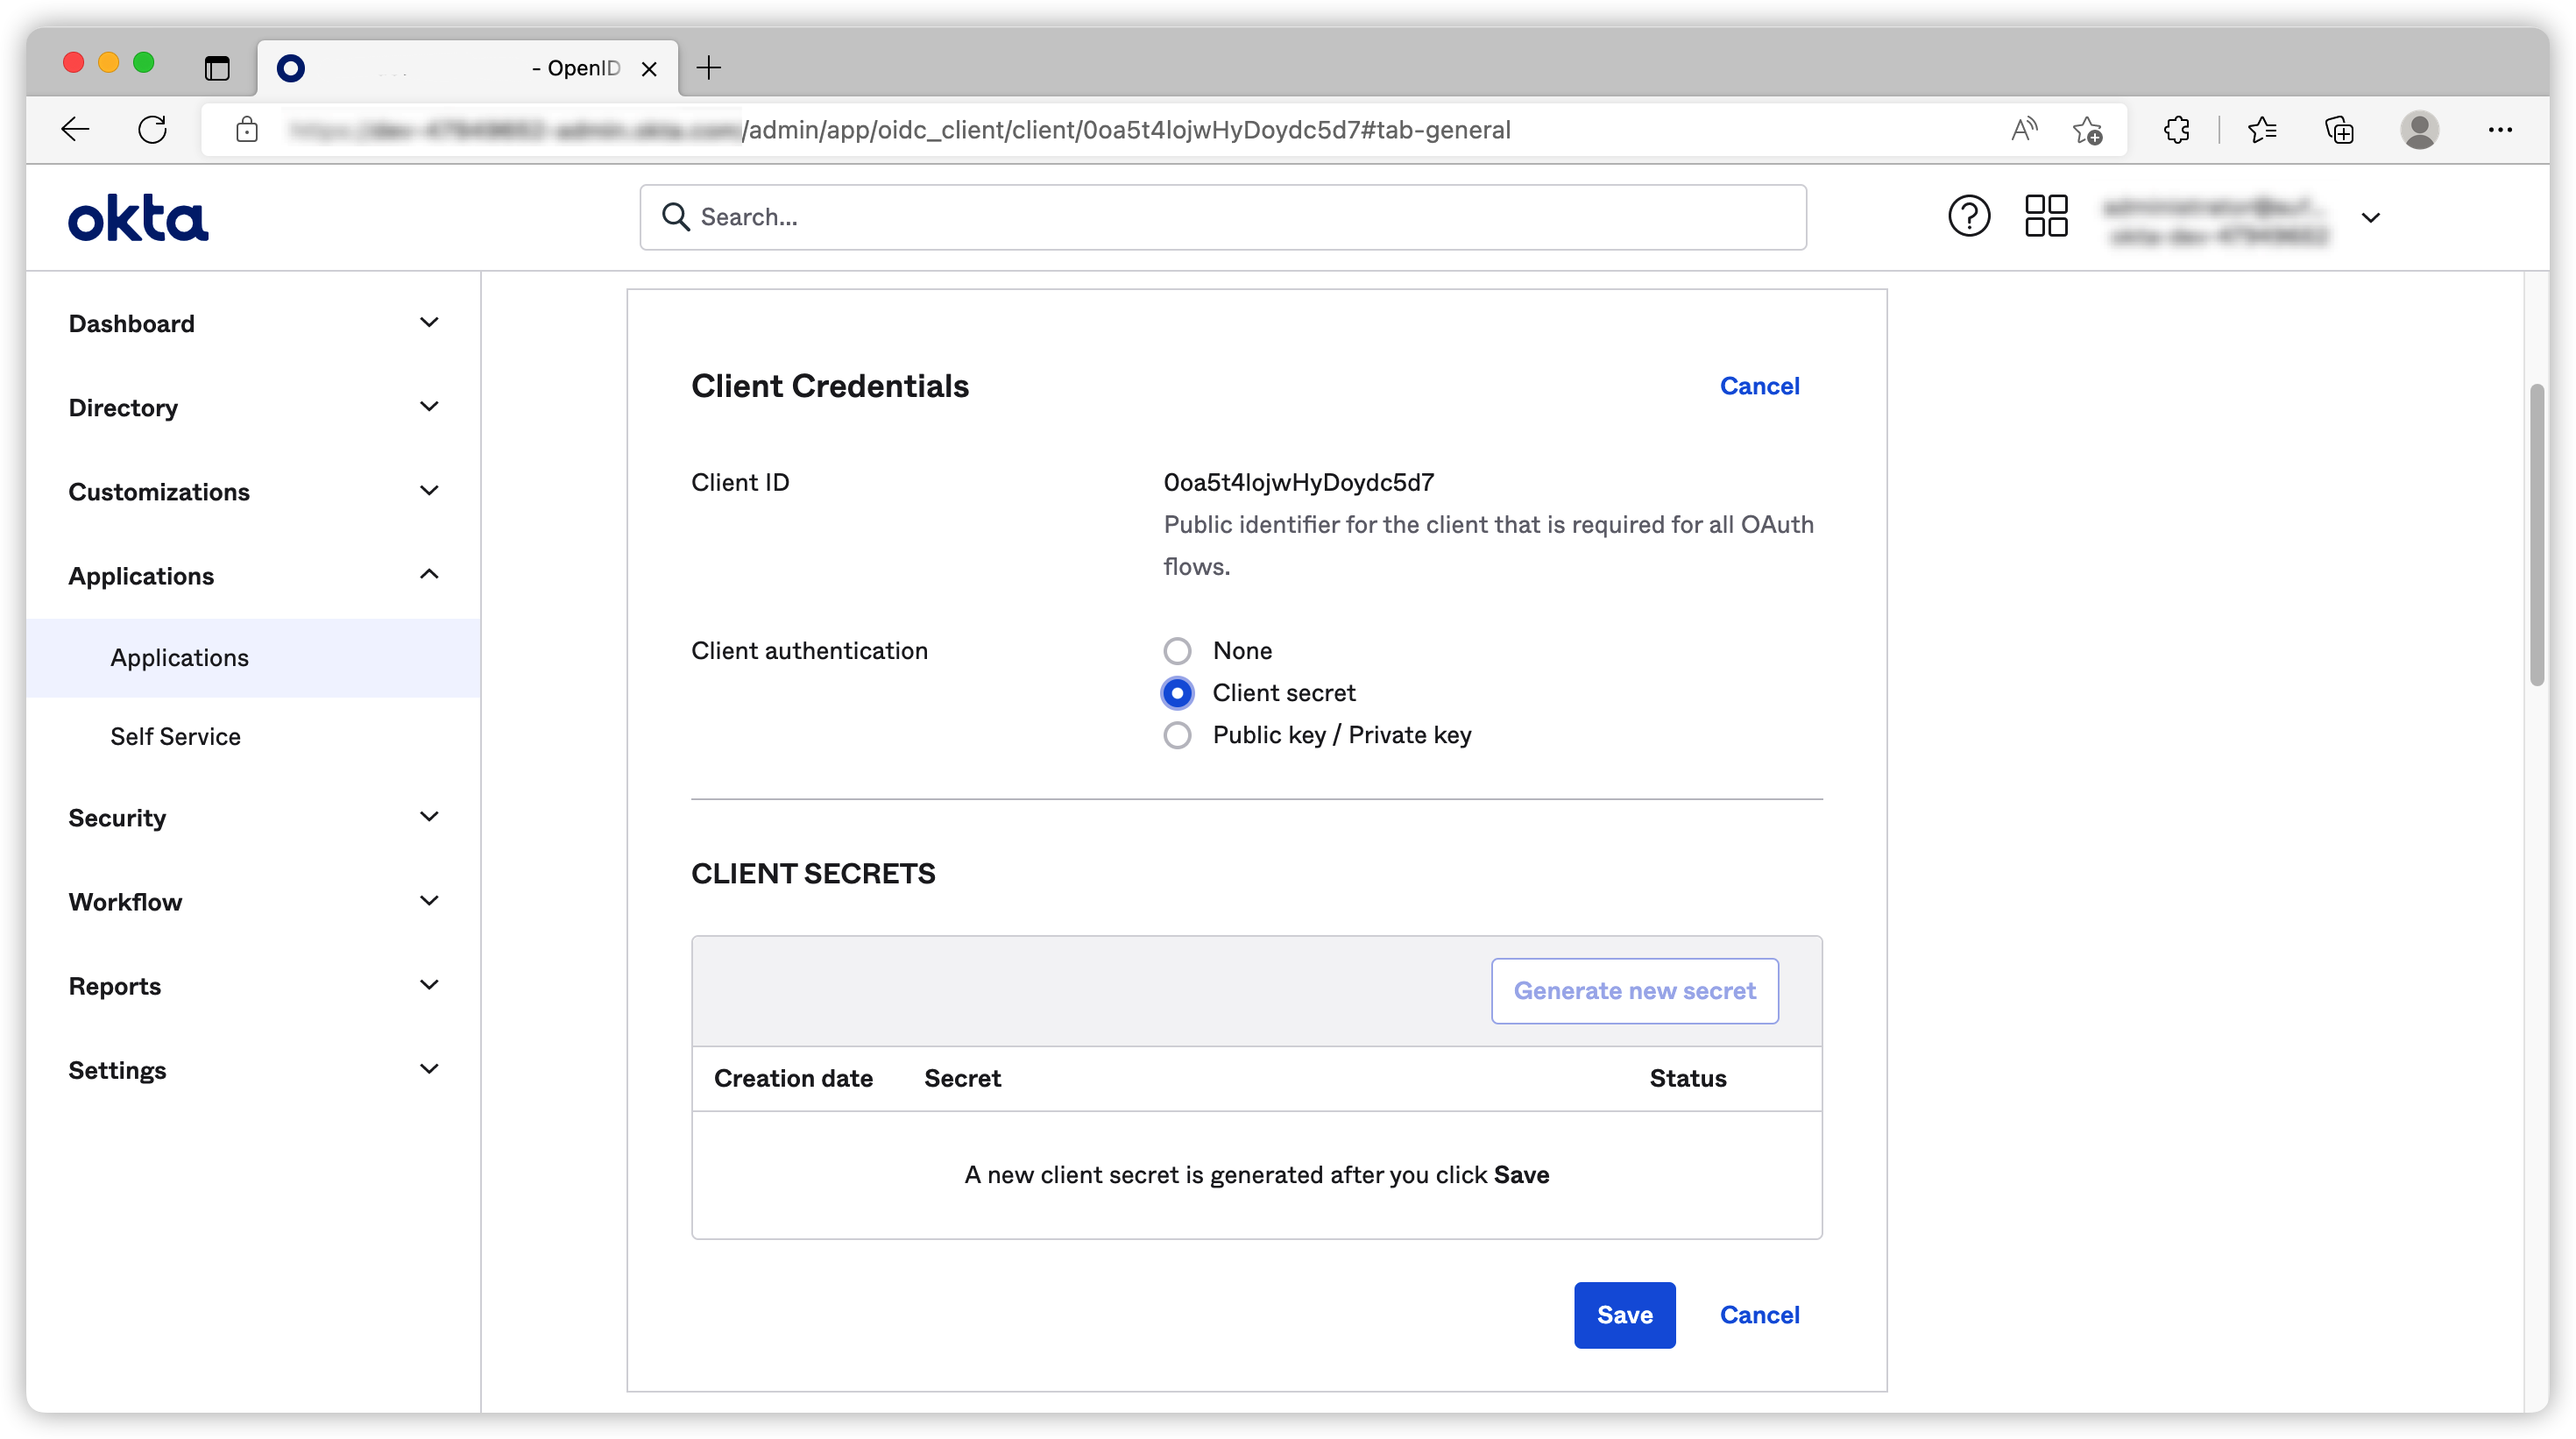
Once the application is created, we need to generate our client secret.
(Optional) Create custom authorization server
Custom authorization server = CAS
Org authorization server = OAS
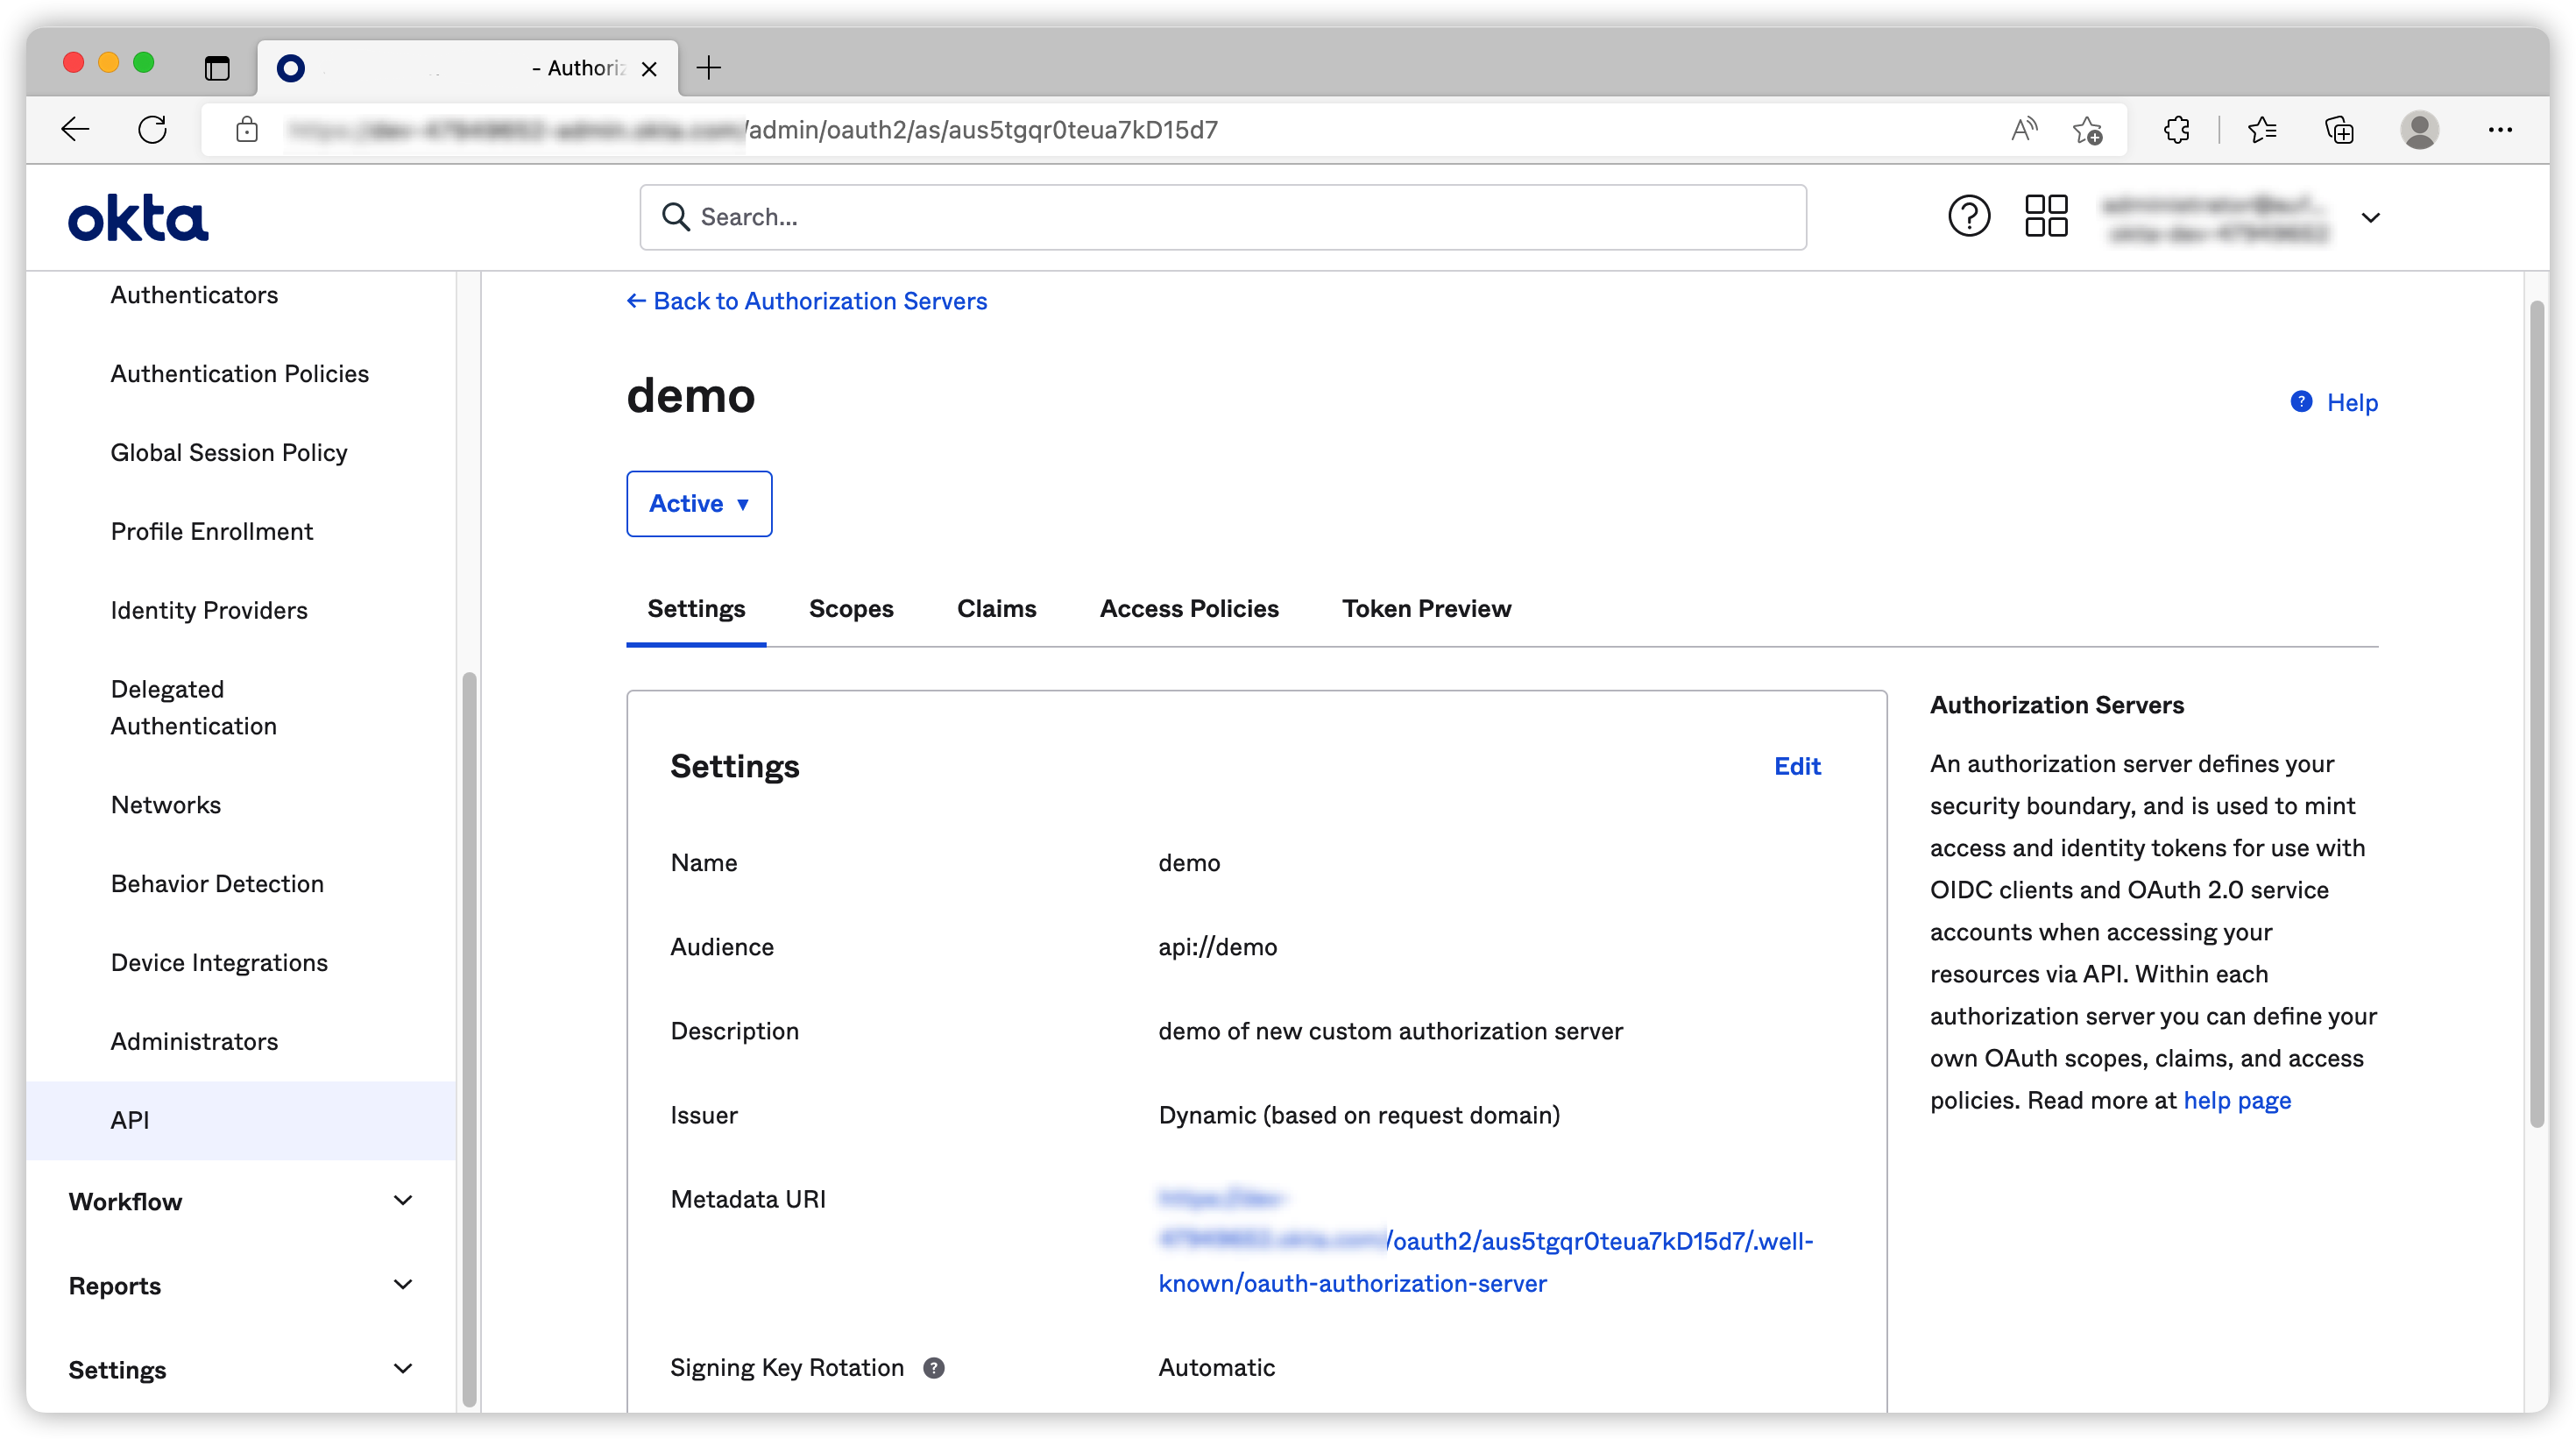
Okta has two different authorization servers. One is Org authorization server and the other one is Custom authorization server. If you want to use different scope or add custom claims, you must use CAS. Okta creates a default CAS by default, you can use it for convenience. I recommend creating different CAS for different projects as you have more flexibility with regards to custom scopes or claims.
You can go to Security ➡ API, click Add Authorization Server to create a CAS
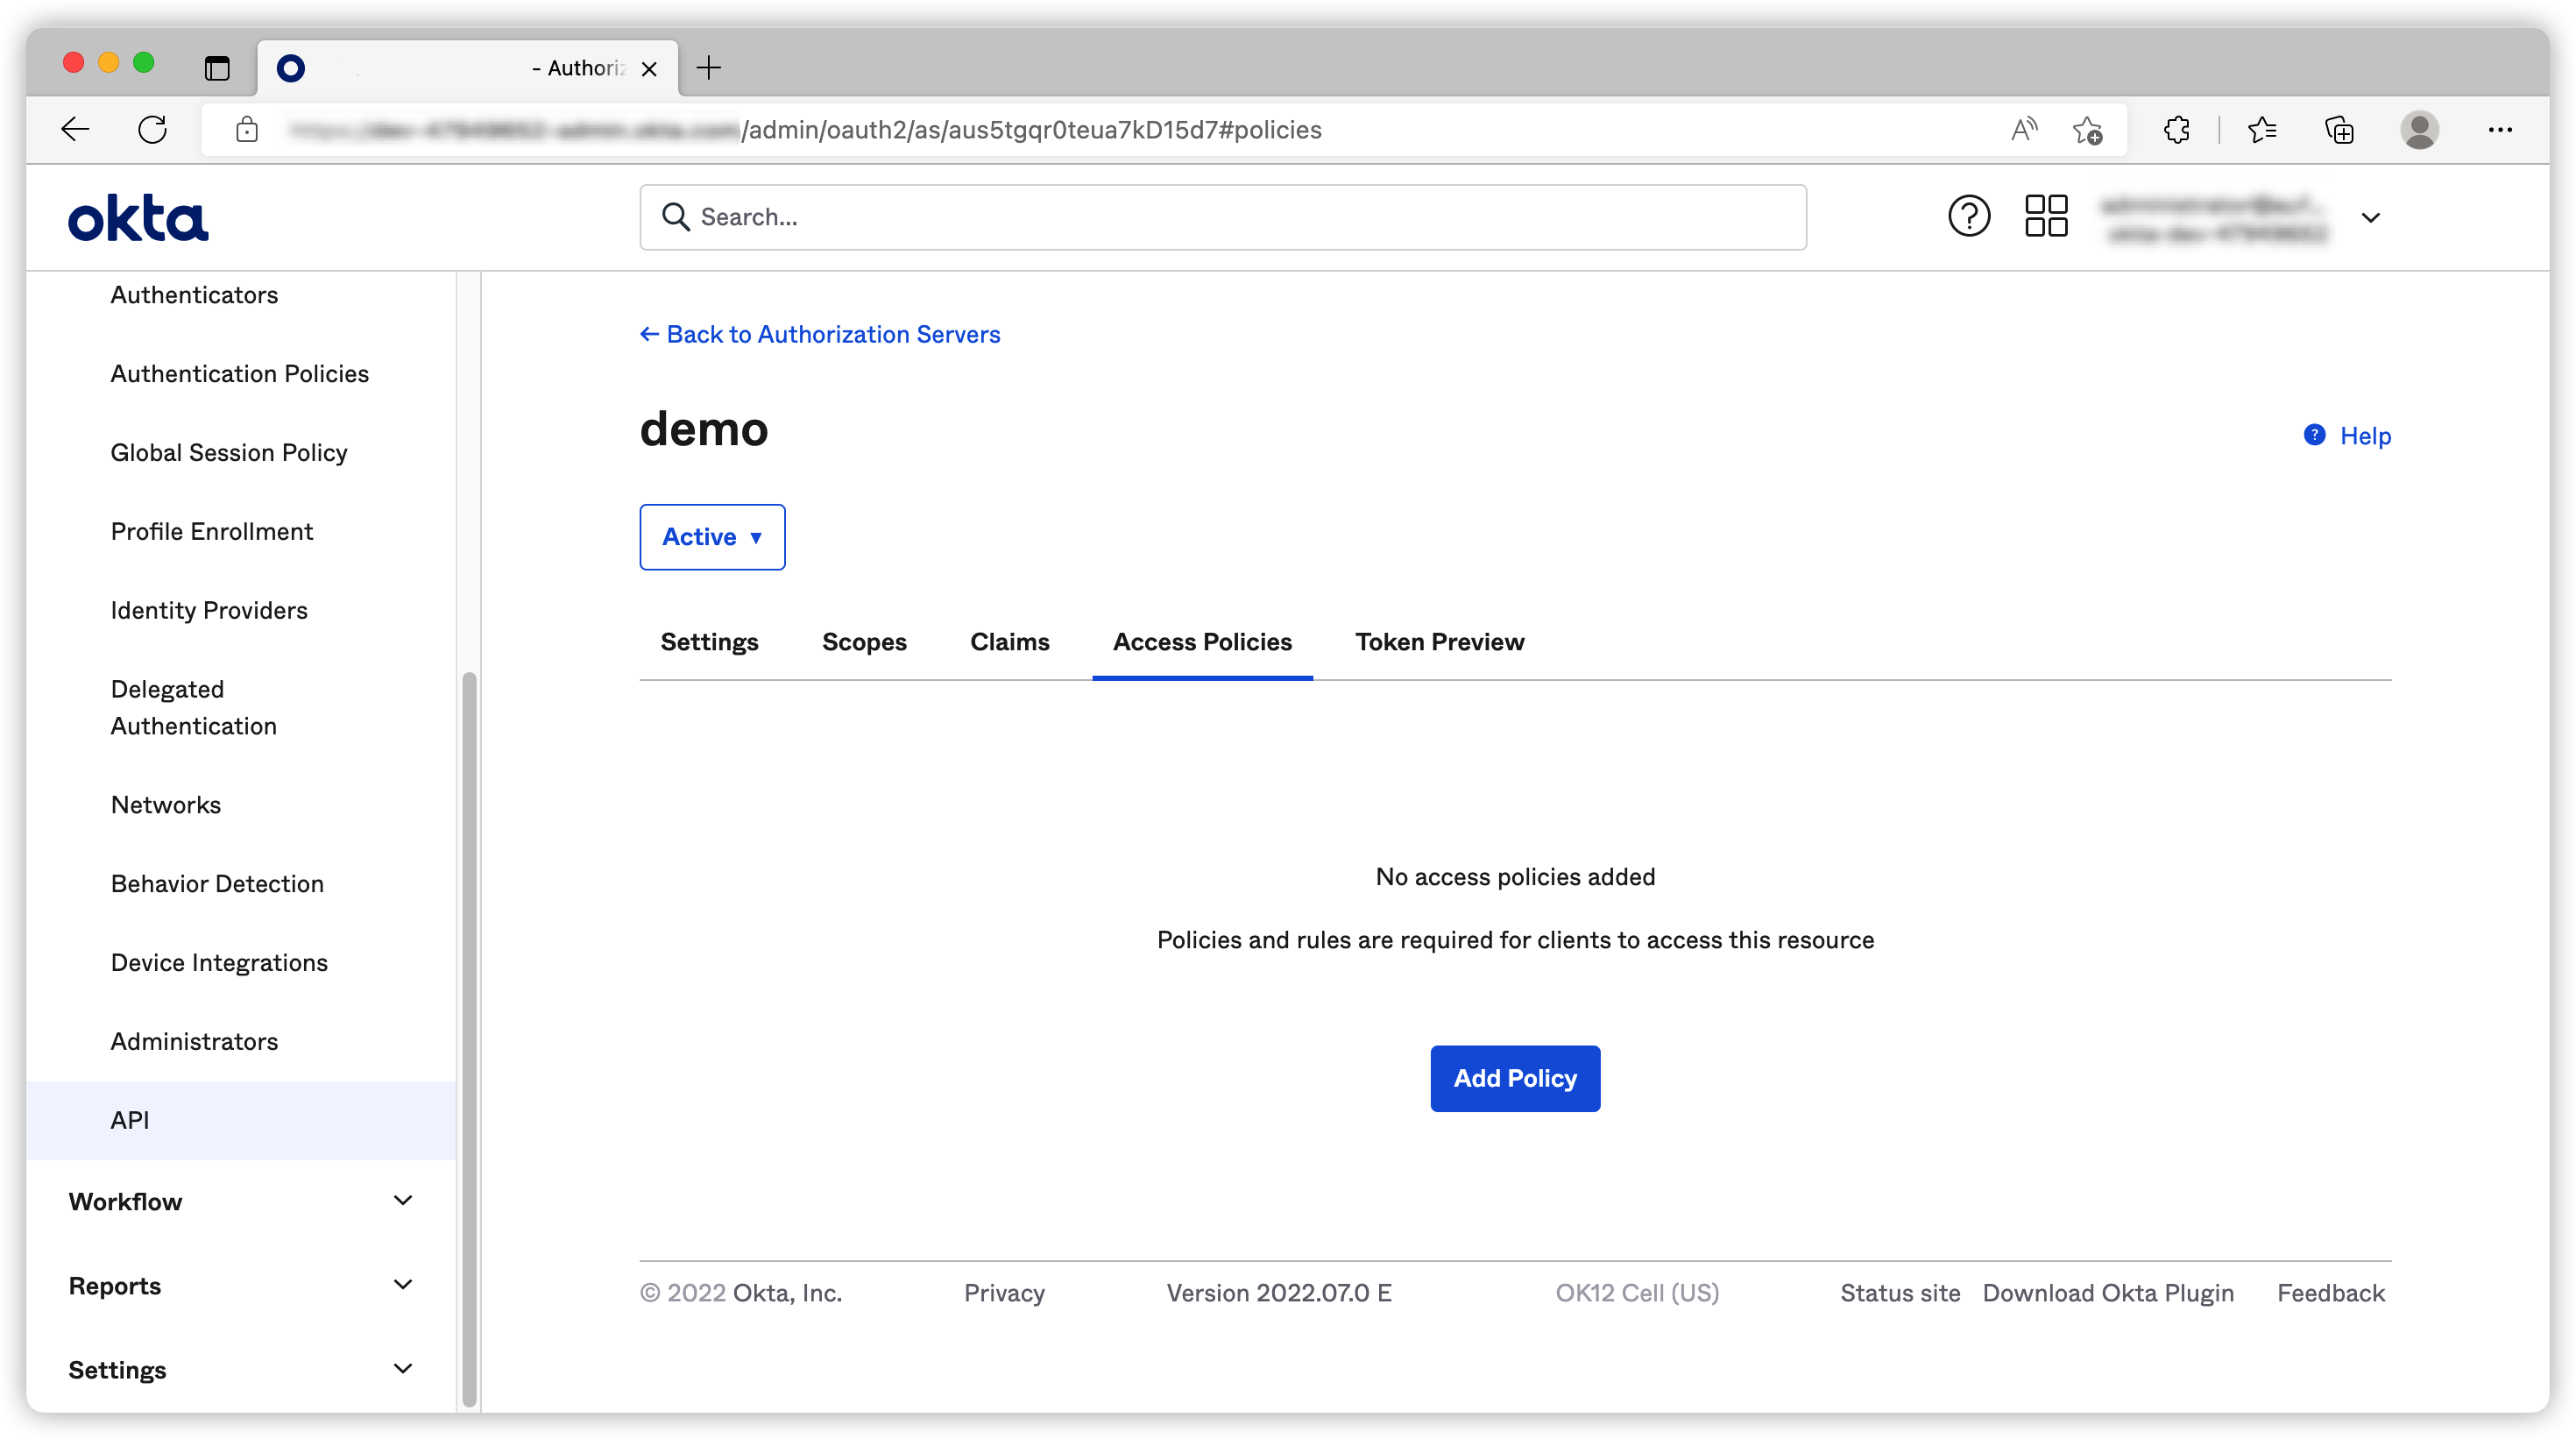
Once the new CAS is created, we need to create an Access Policies to allow our app to use it.
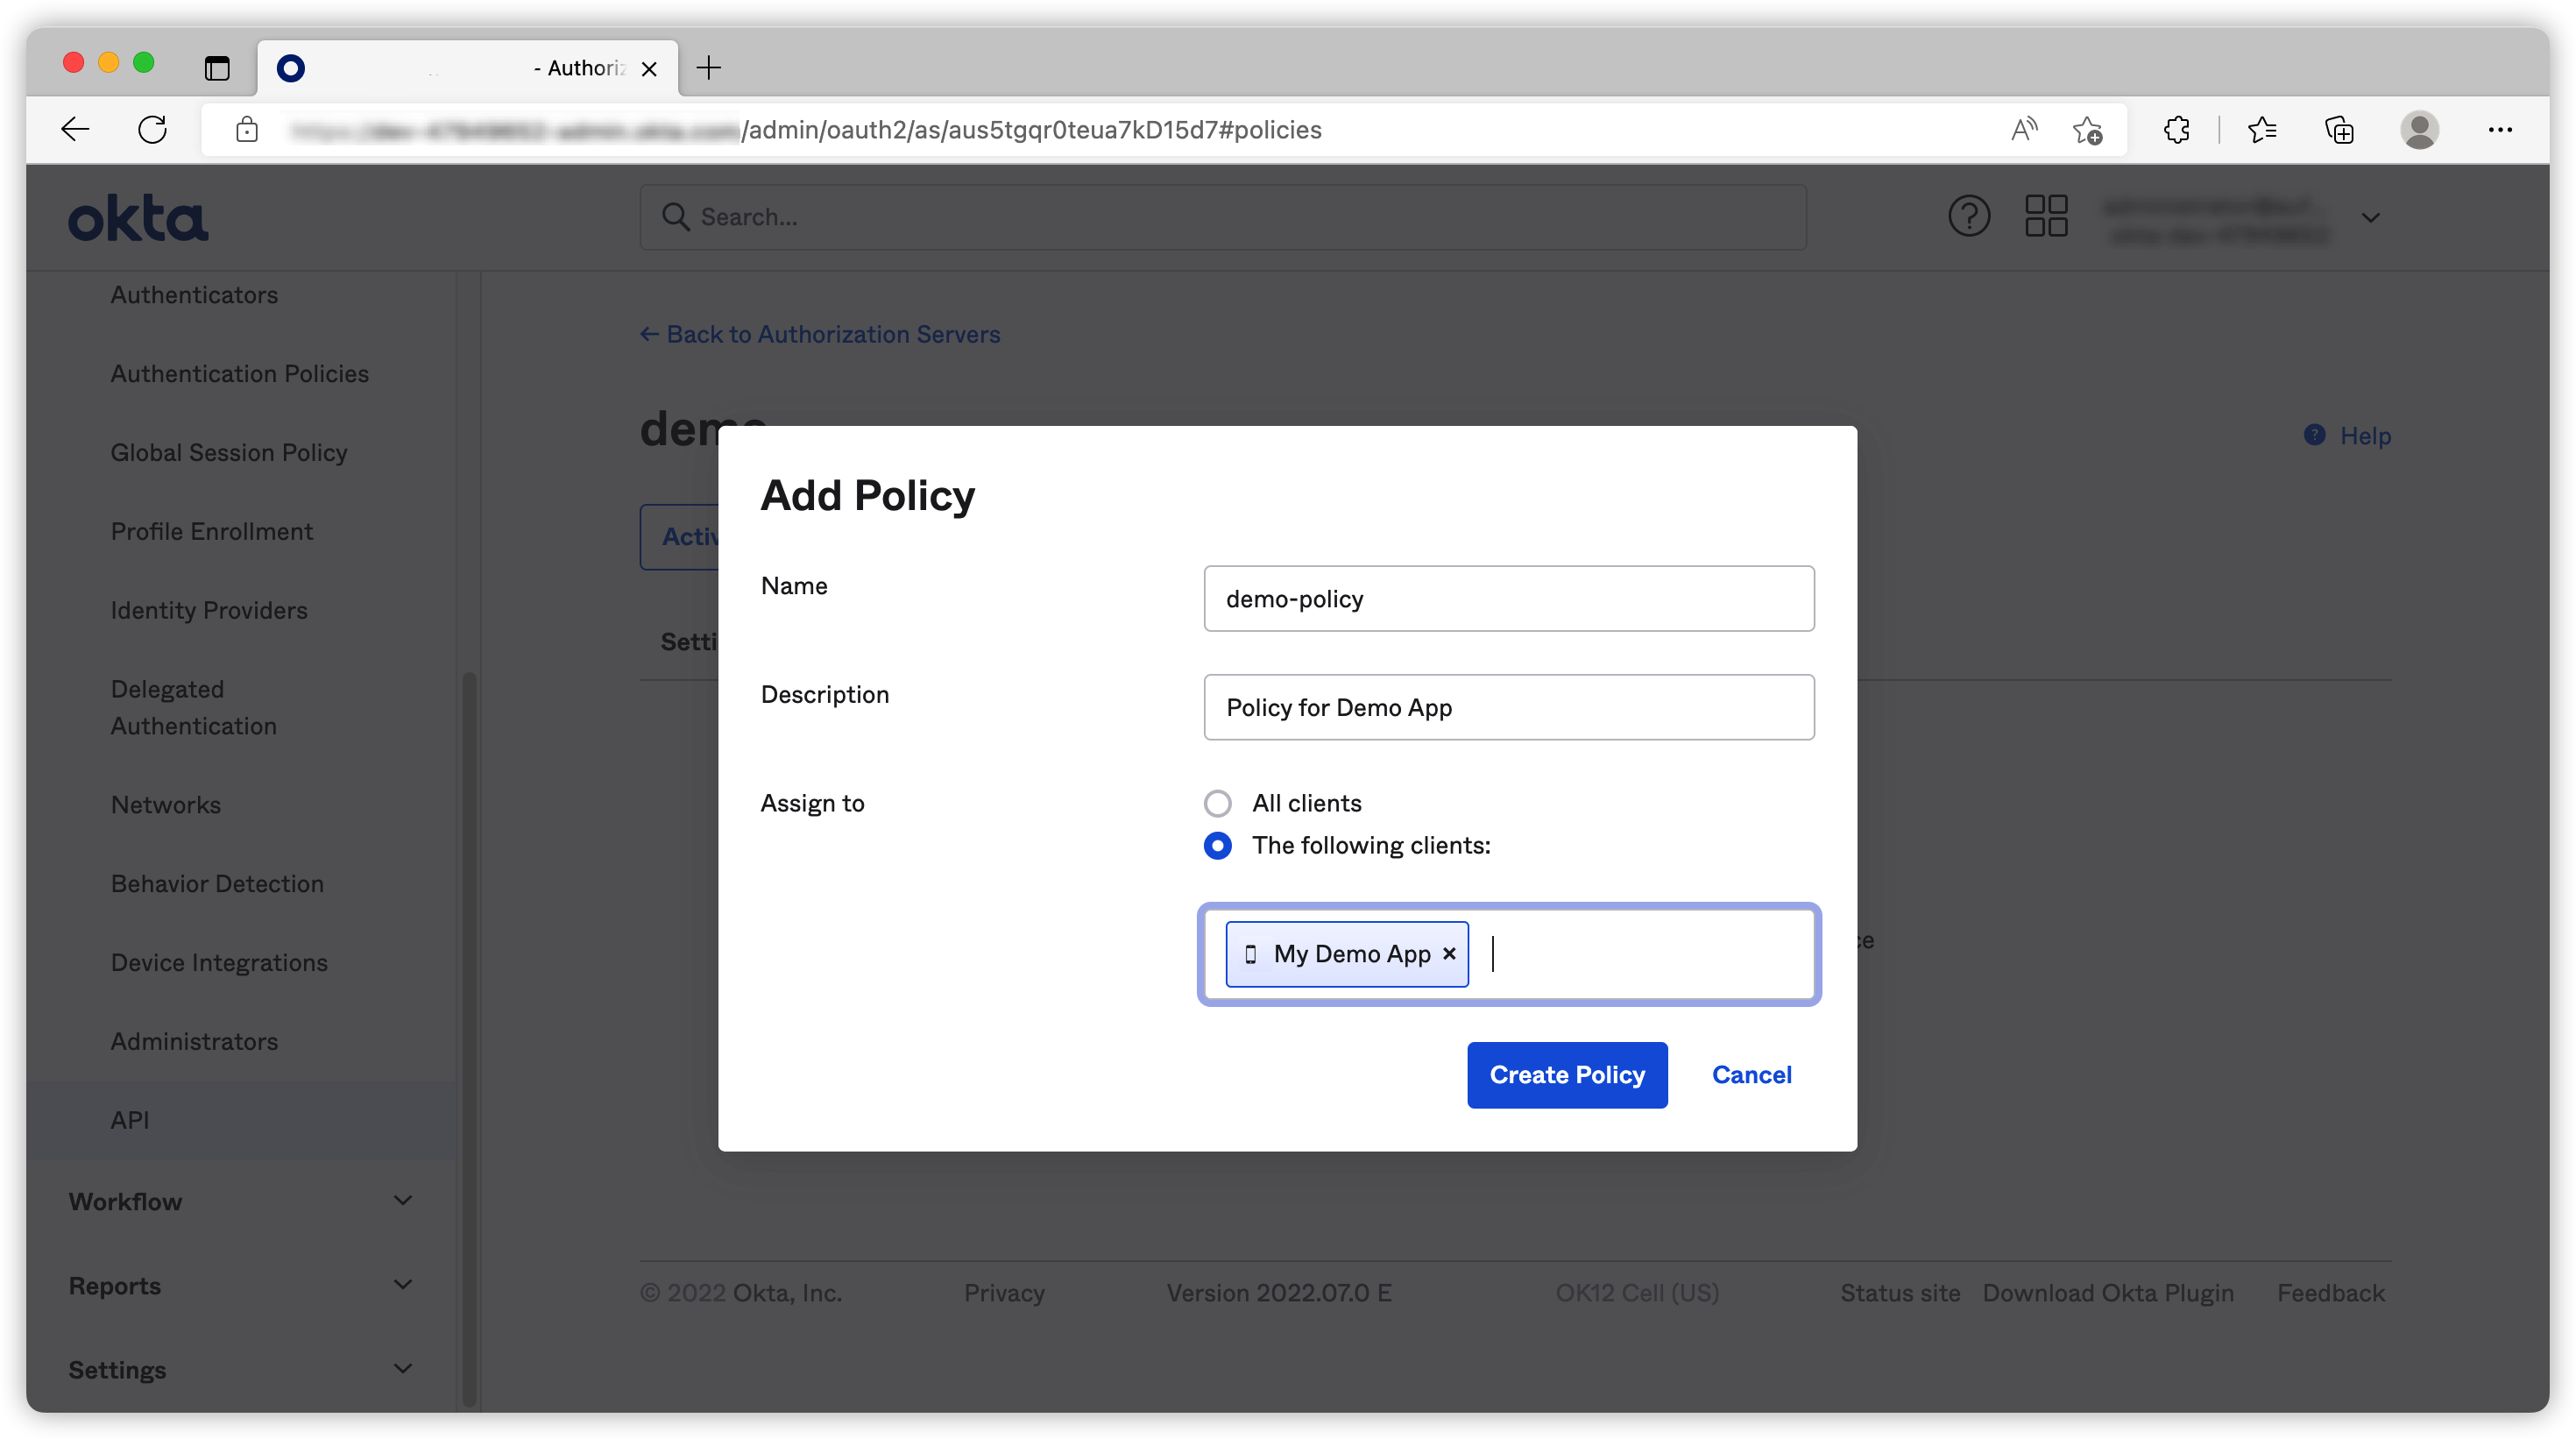
We need to add rules to Access Policy to control how we want the application to access this CAS.
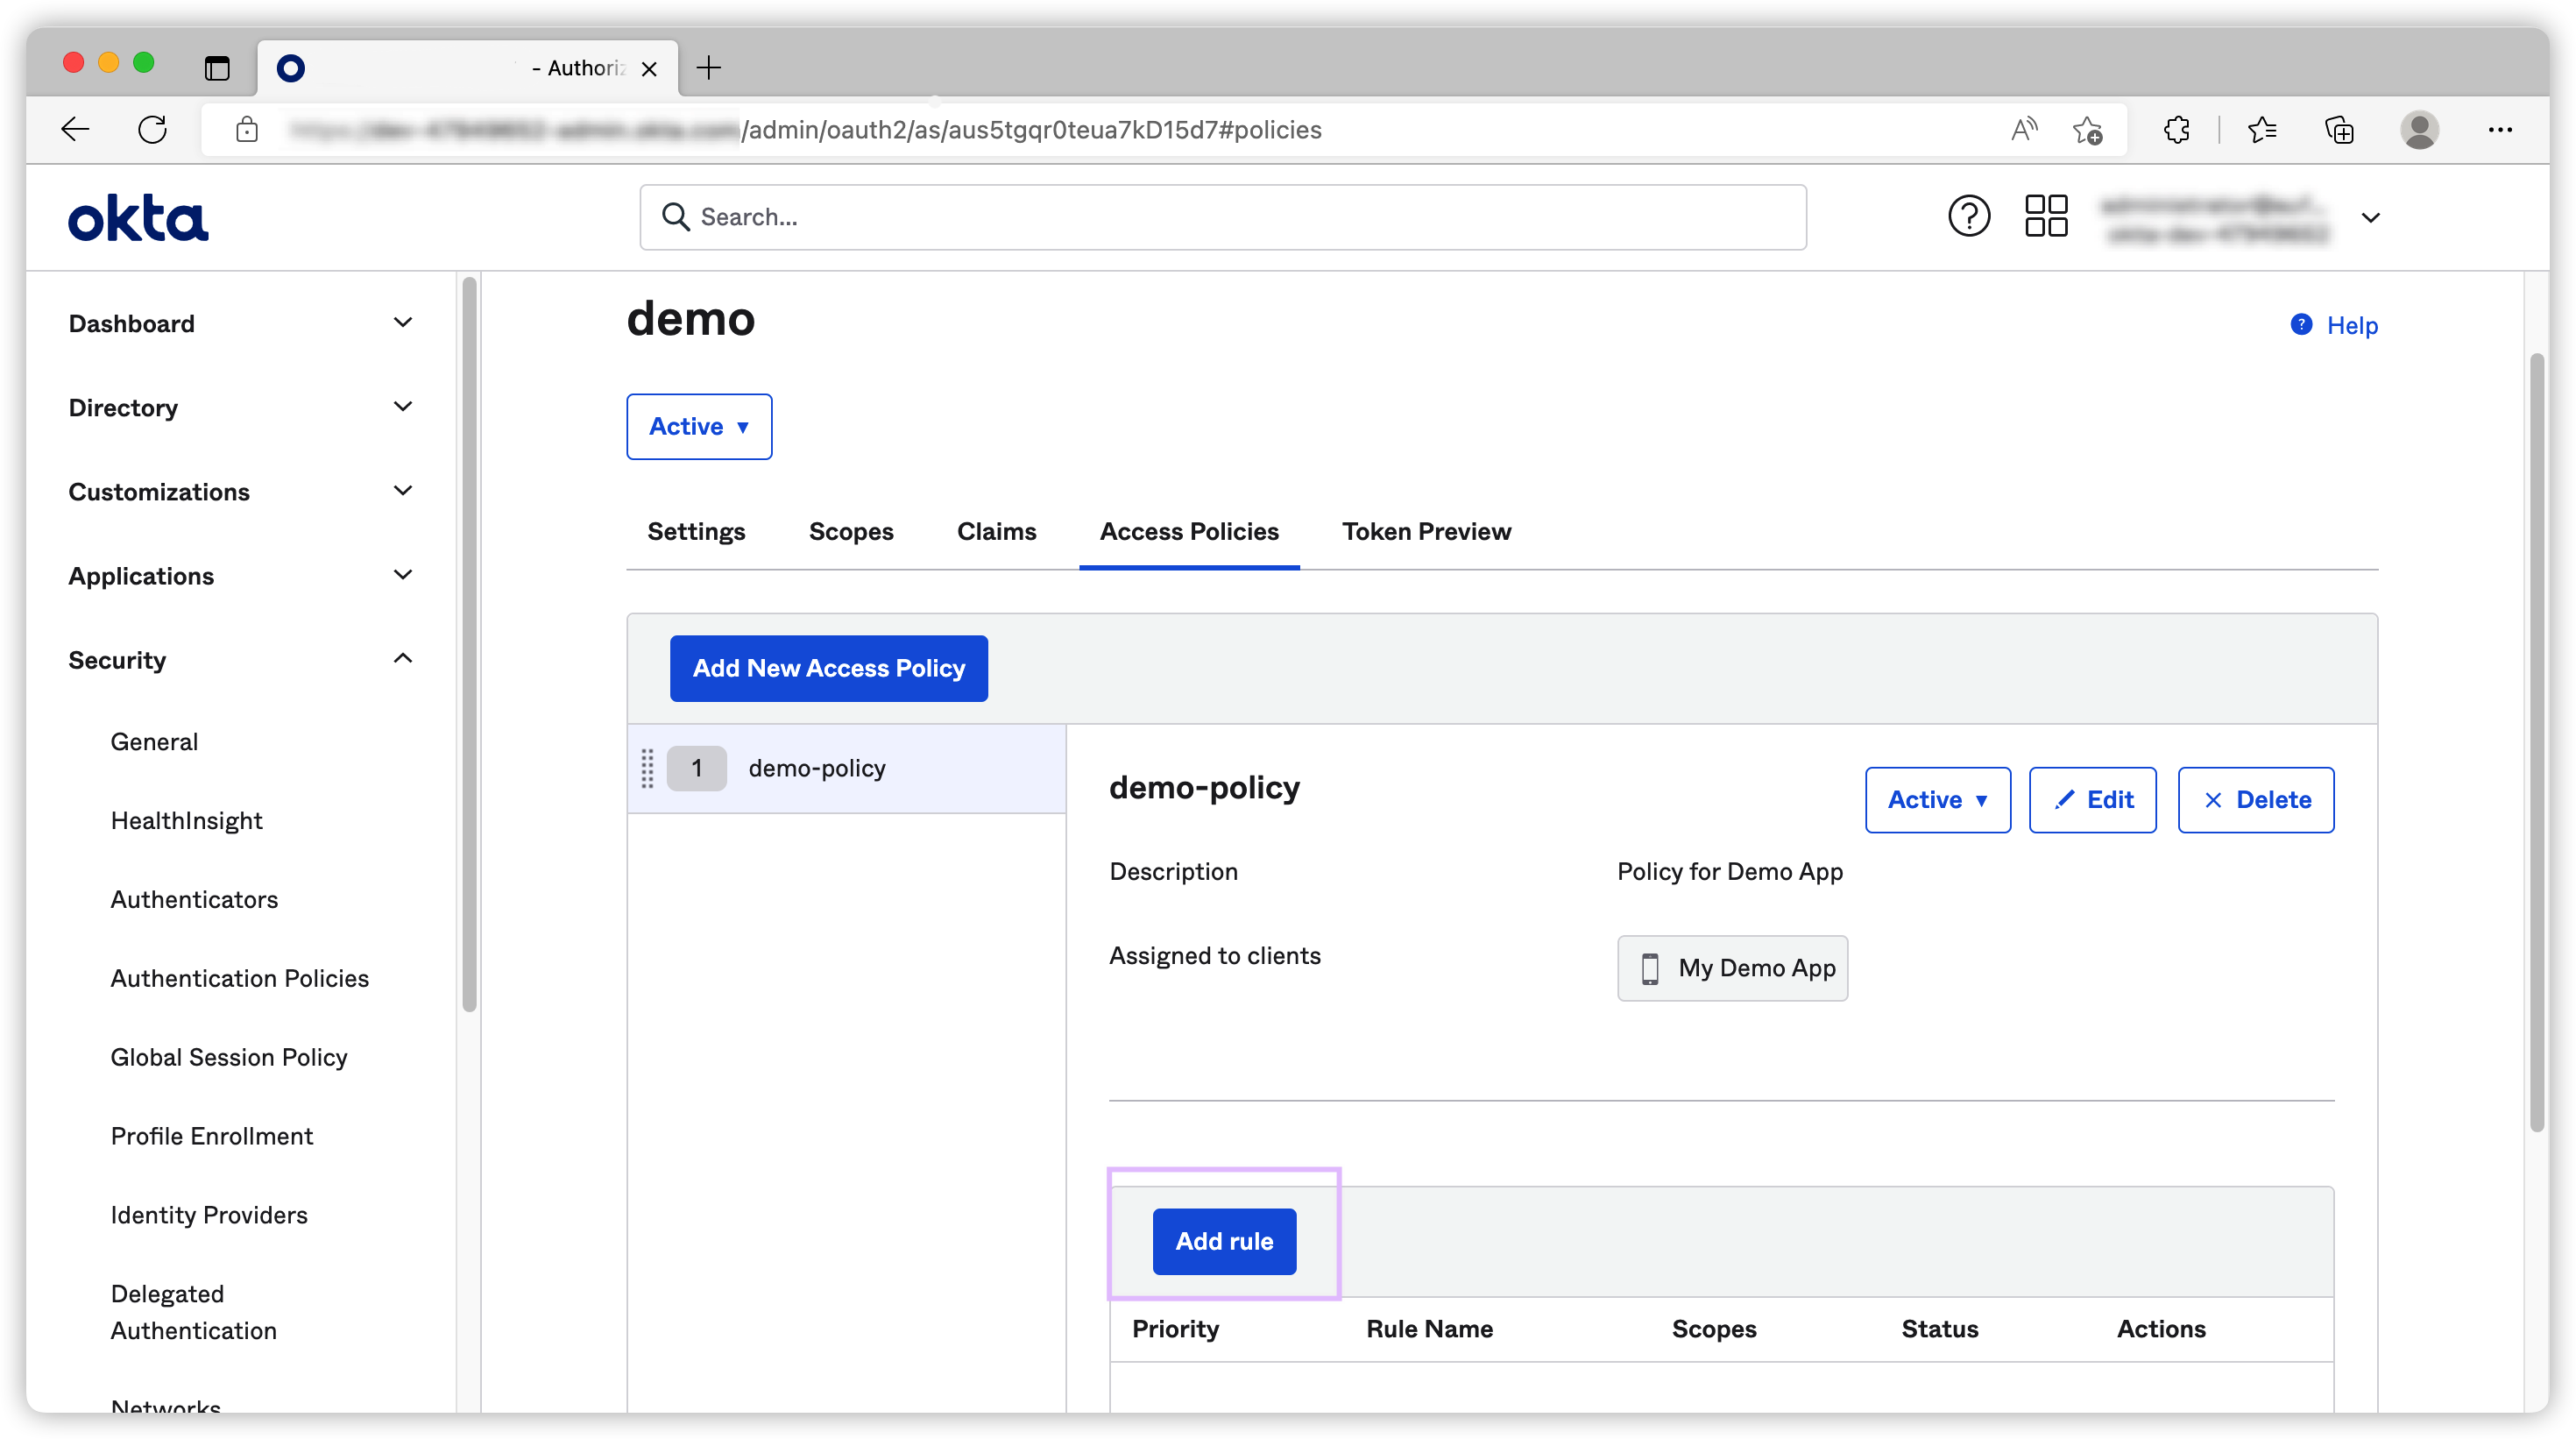
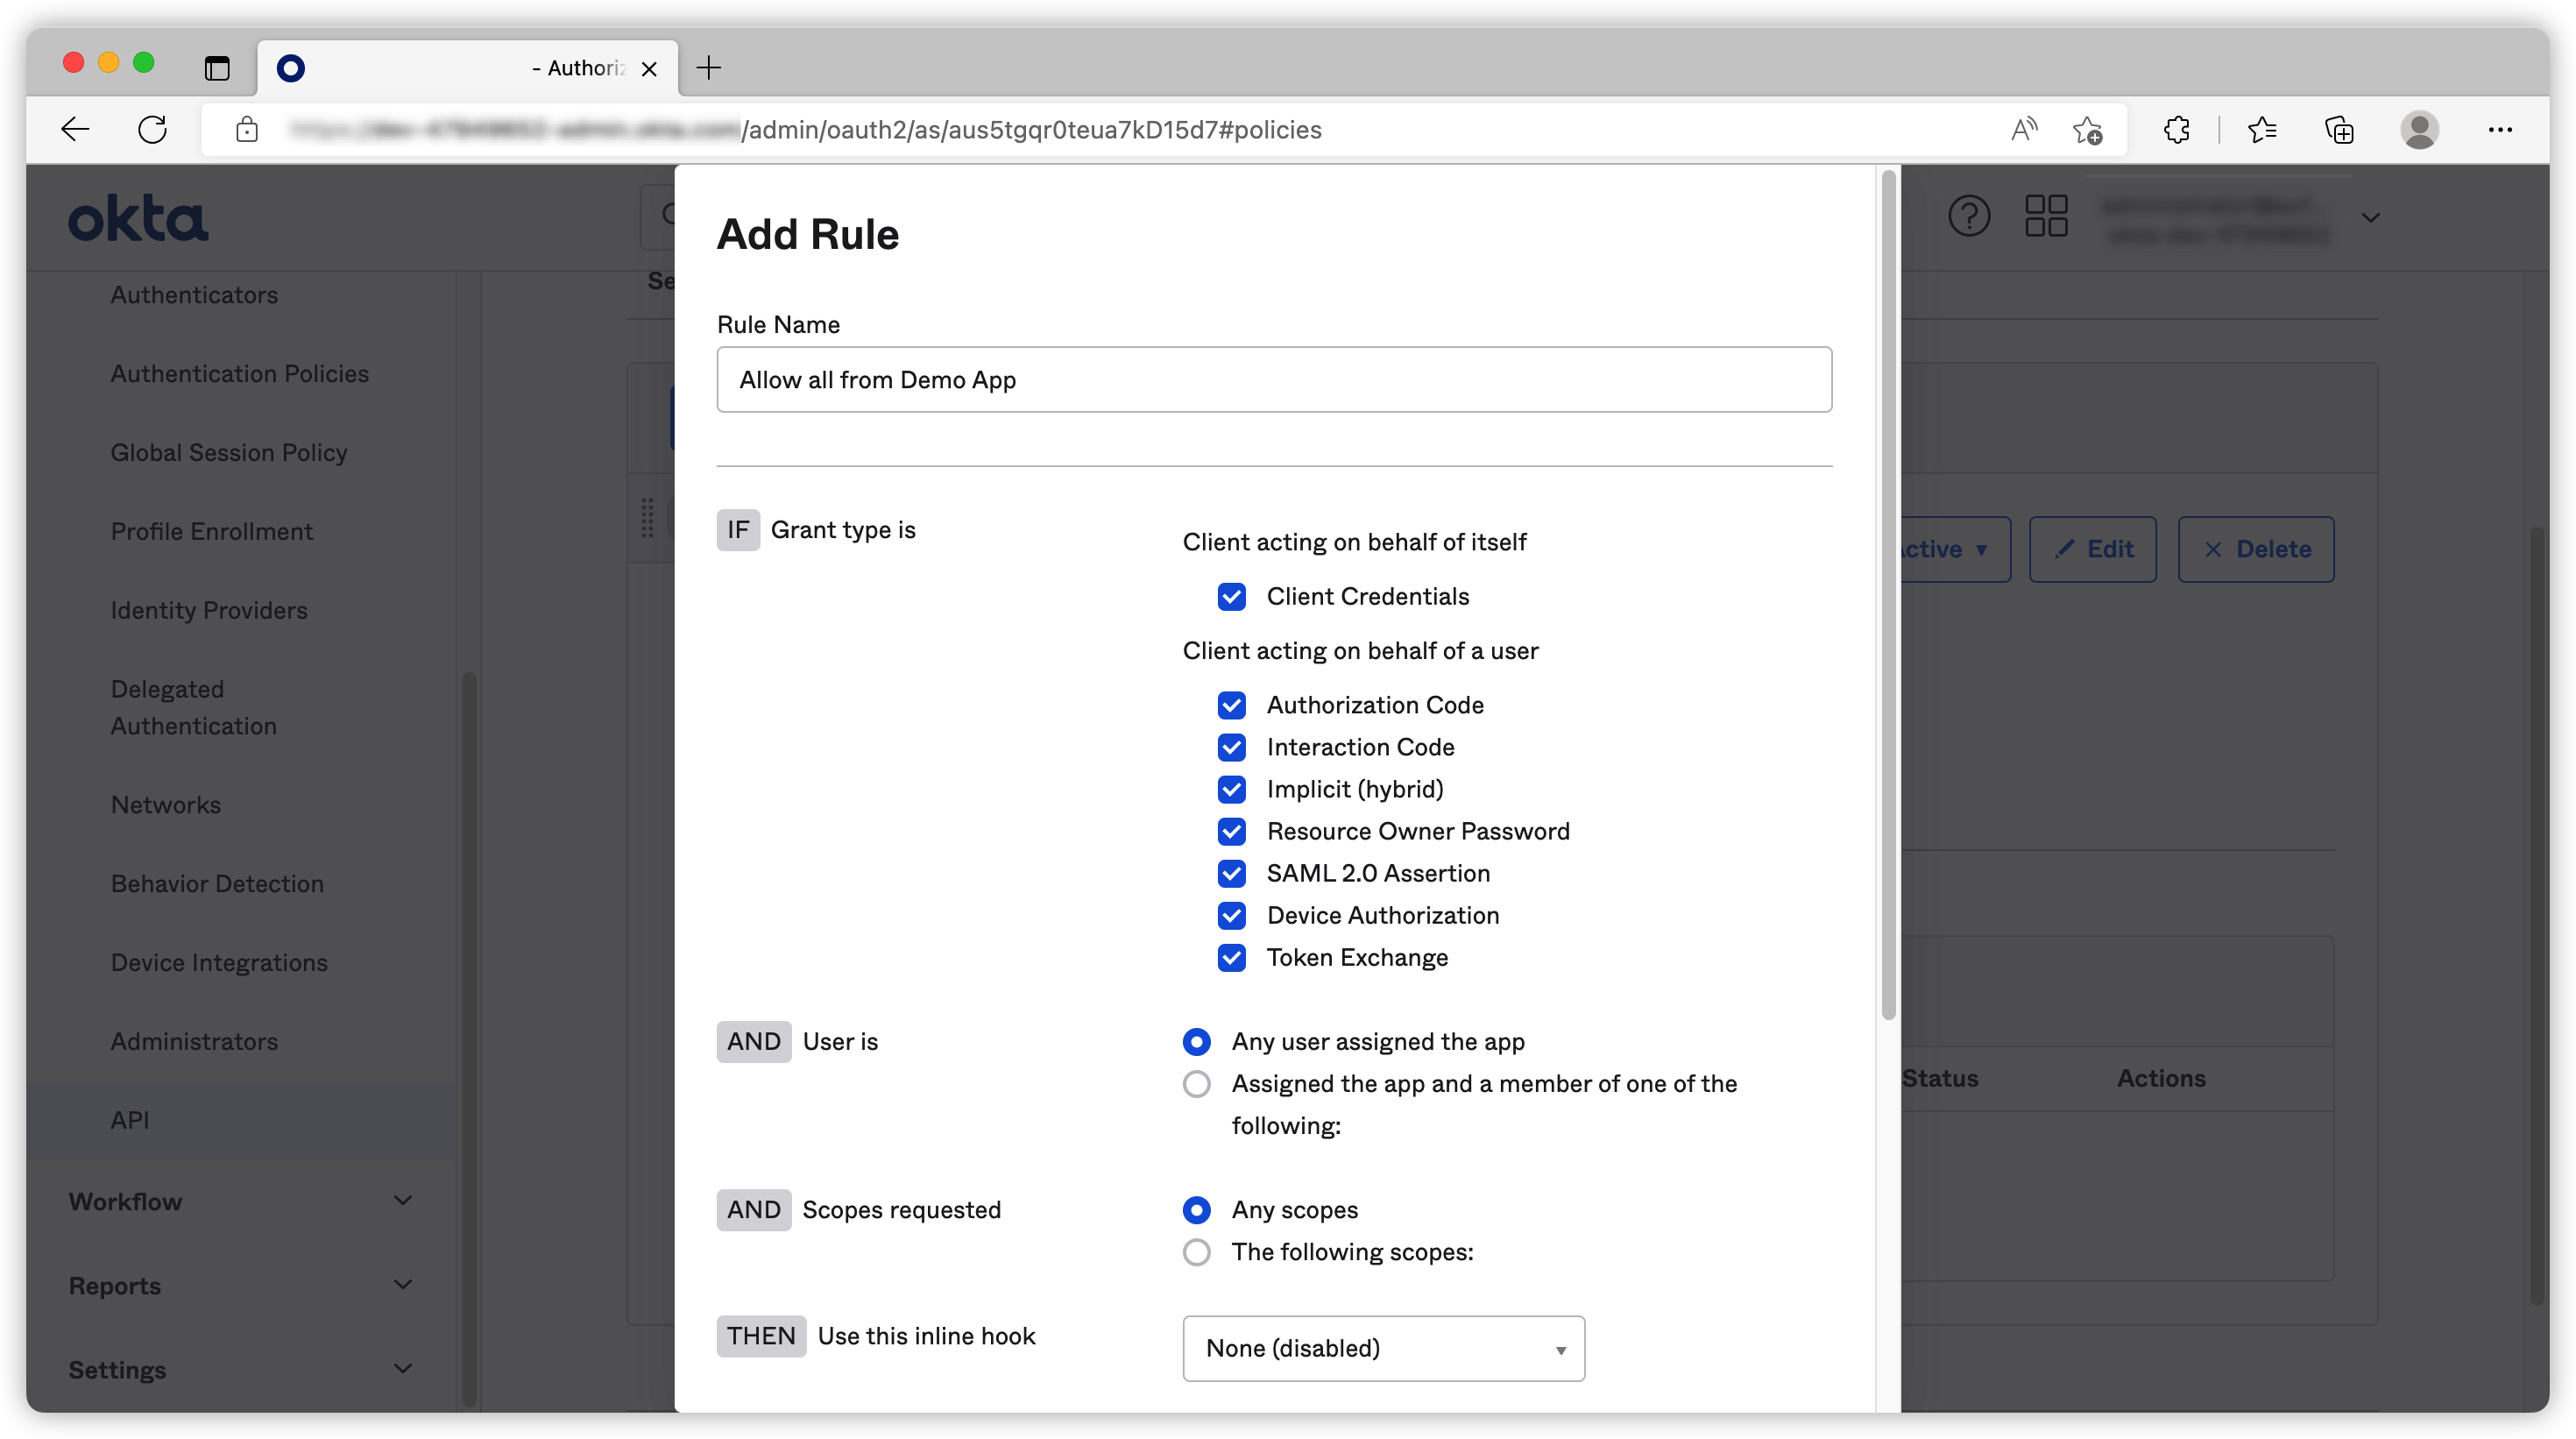
After that our Demo App can use this CAS to request tokens.
Add Scope and Claim to default Custom Auth Server
One important feature we need to know is to add scope and claims to our custom authorization server. For example if you want to add user’s email to a custom claim demo-email, you can go to add the claim as below.
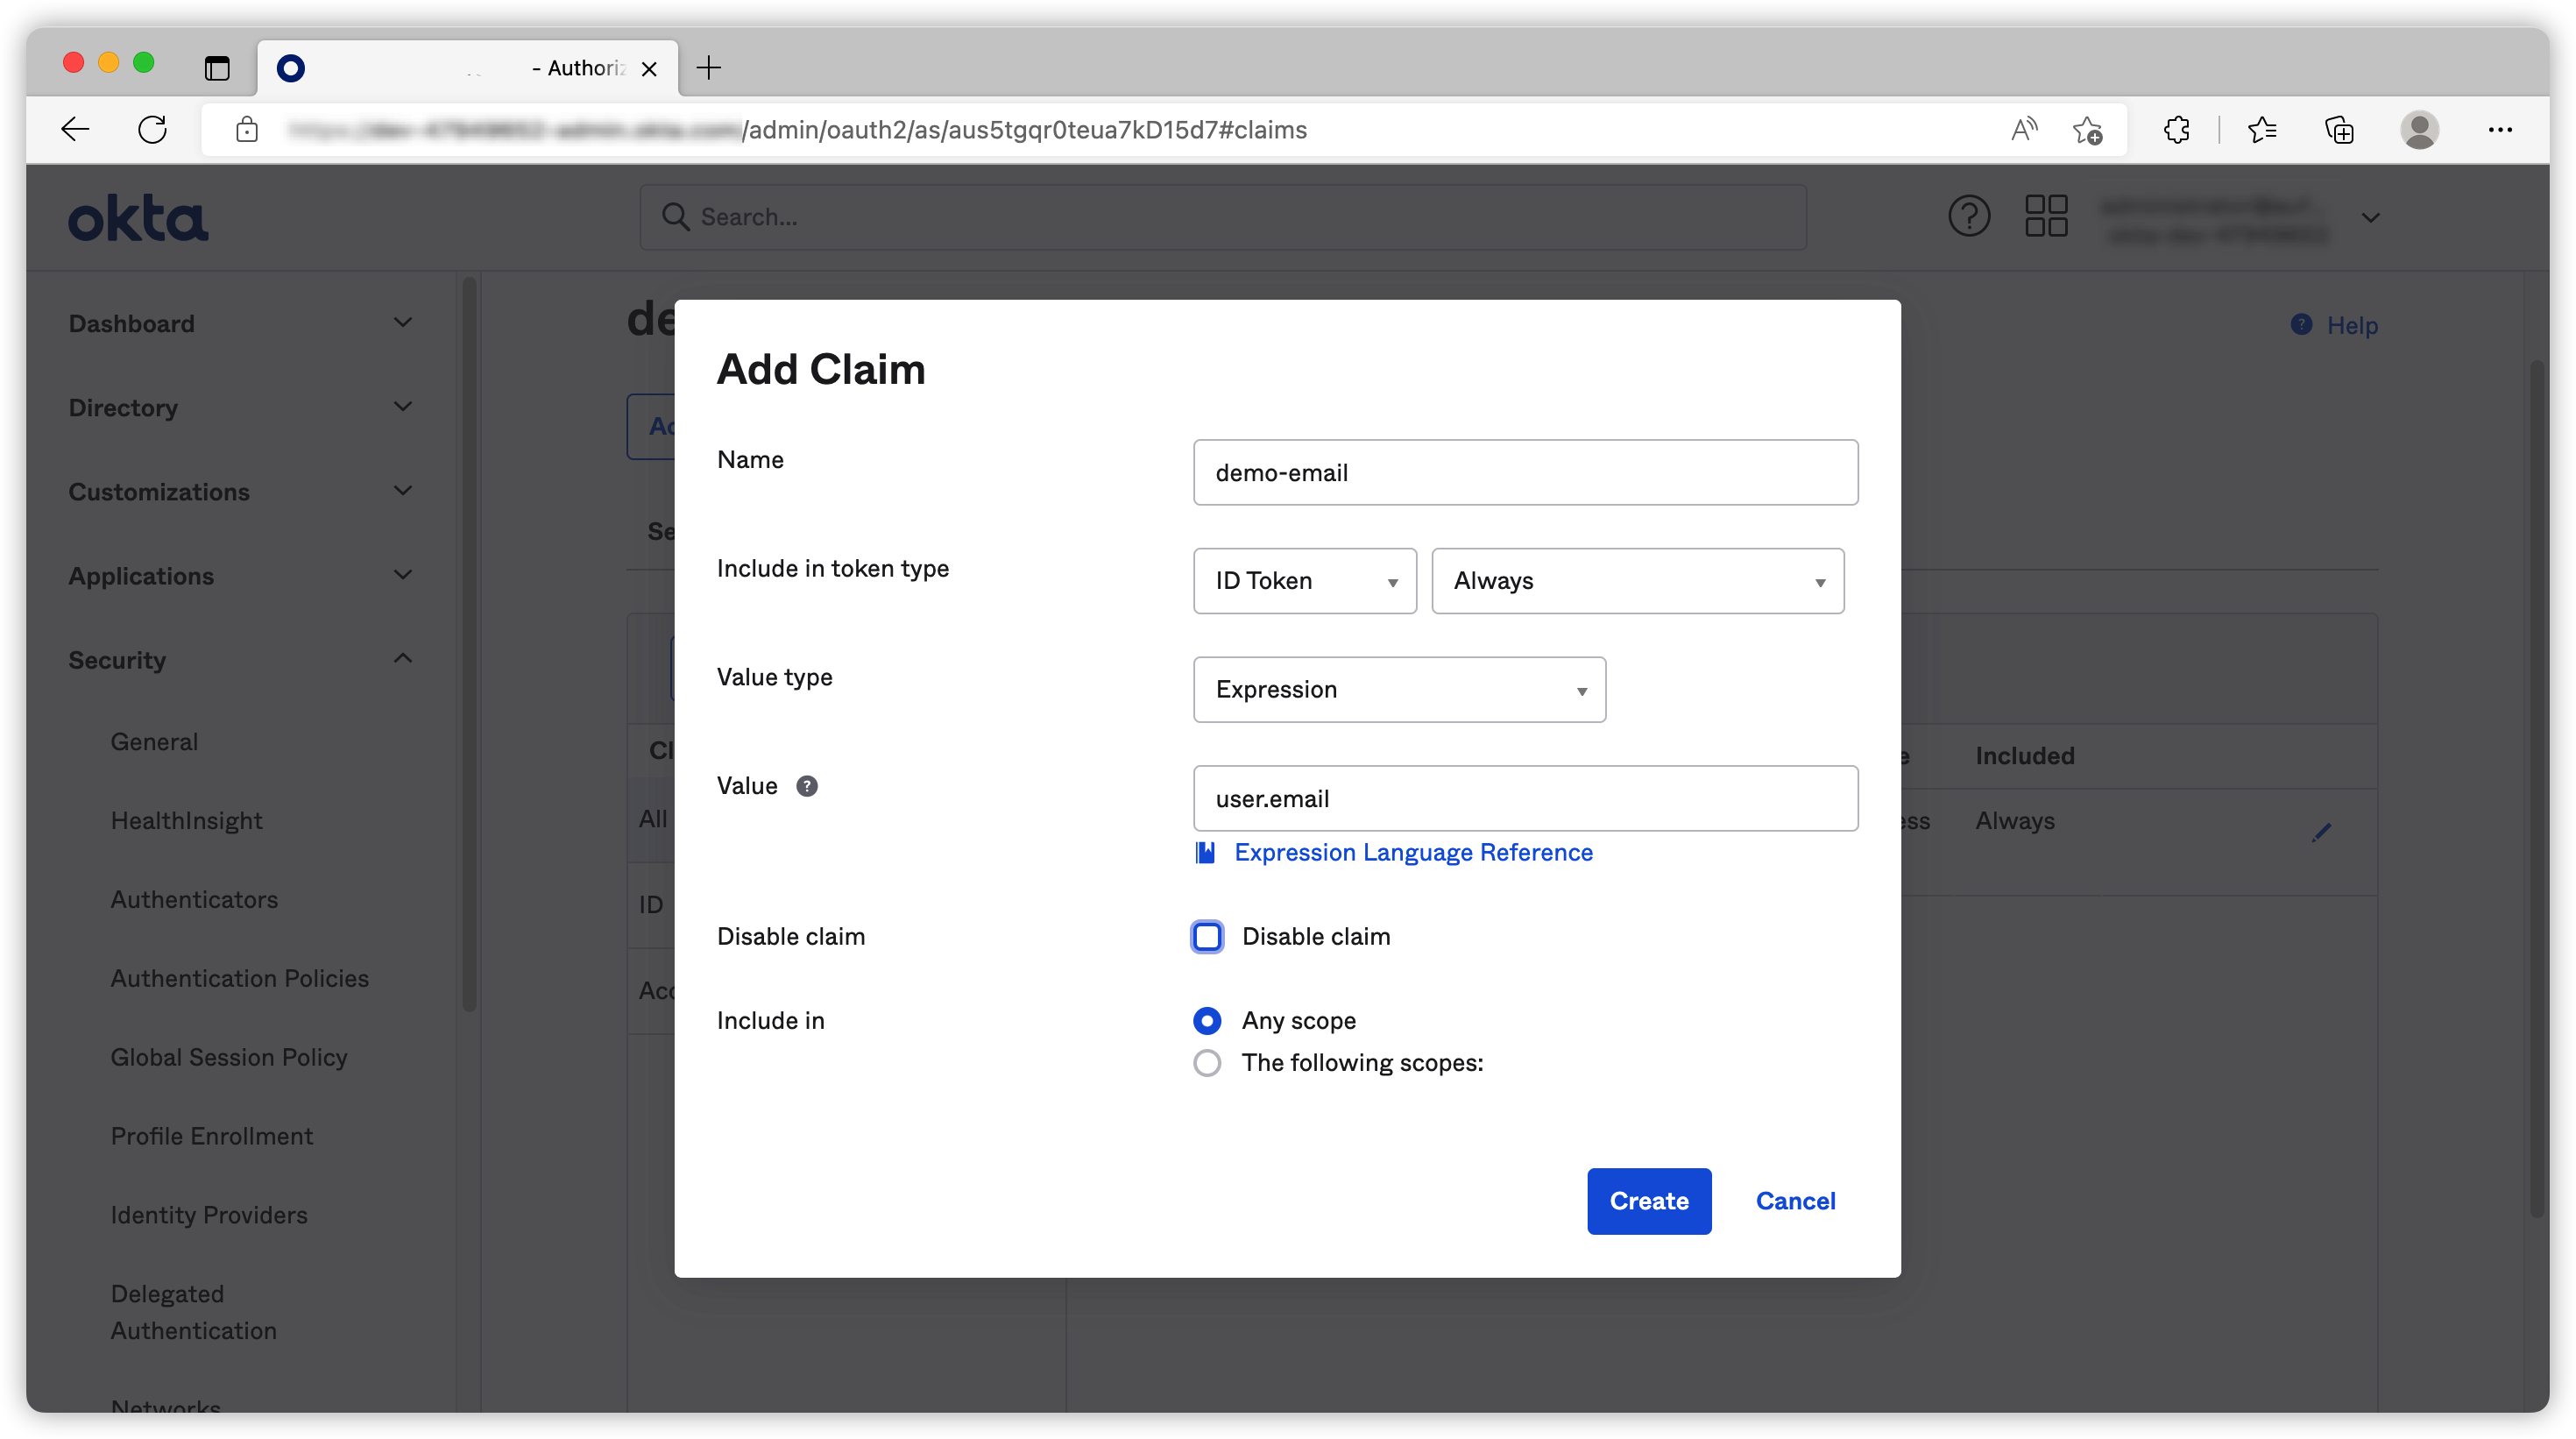
Okta Expression Language is pretty straight forward but what attributes you can use could be a bit hard to find. This info is actually hidden on their API doc. For example, you can check the user profile attributes at this link.
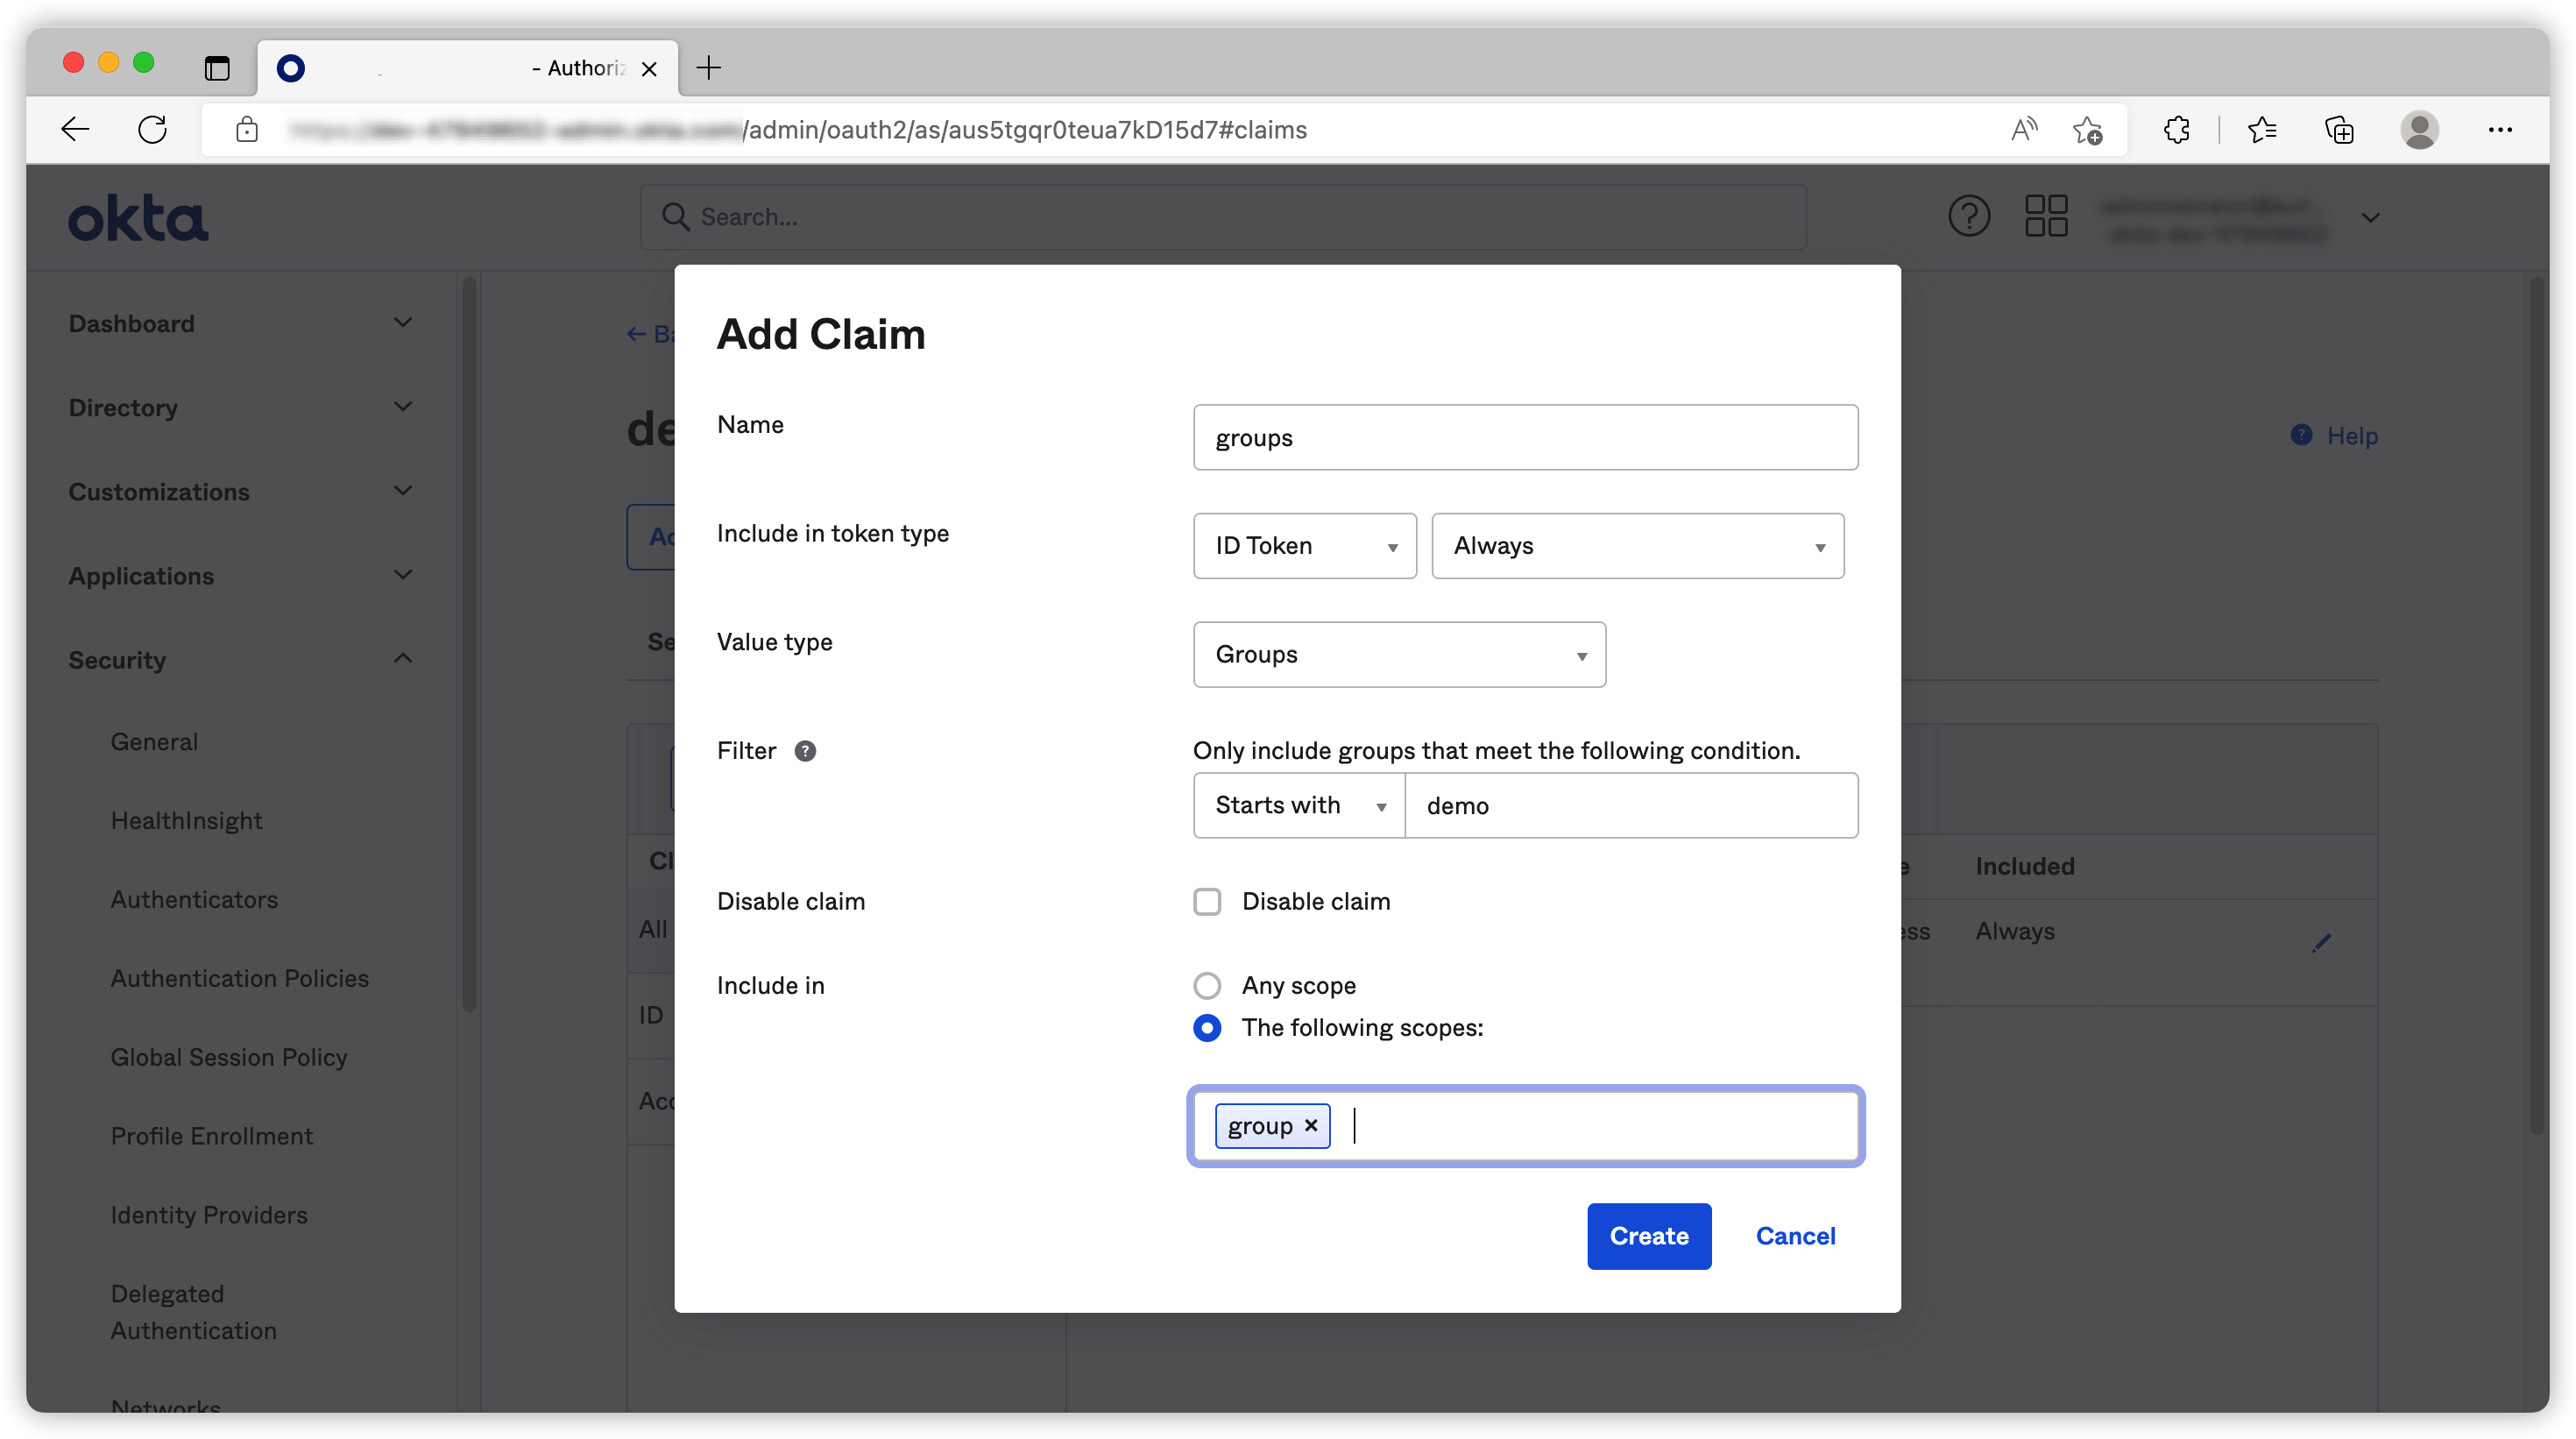
Add group scope and groups claim
You might see
Groups claim filterunder Applications ➡️ Your App ➡️ Sign On. This filter is for OAS only. It won’t work if you request your token through CAS. You can find more information on official doc here.
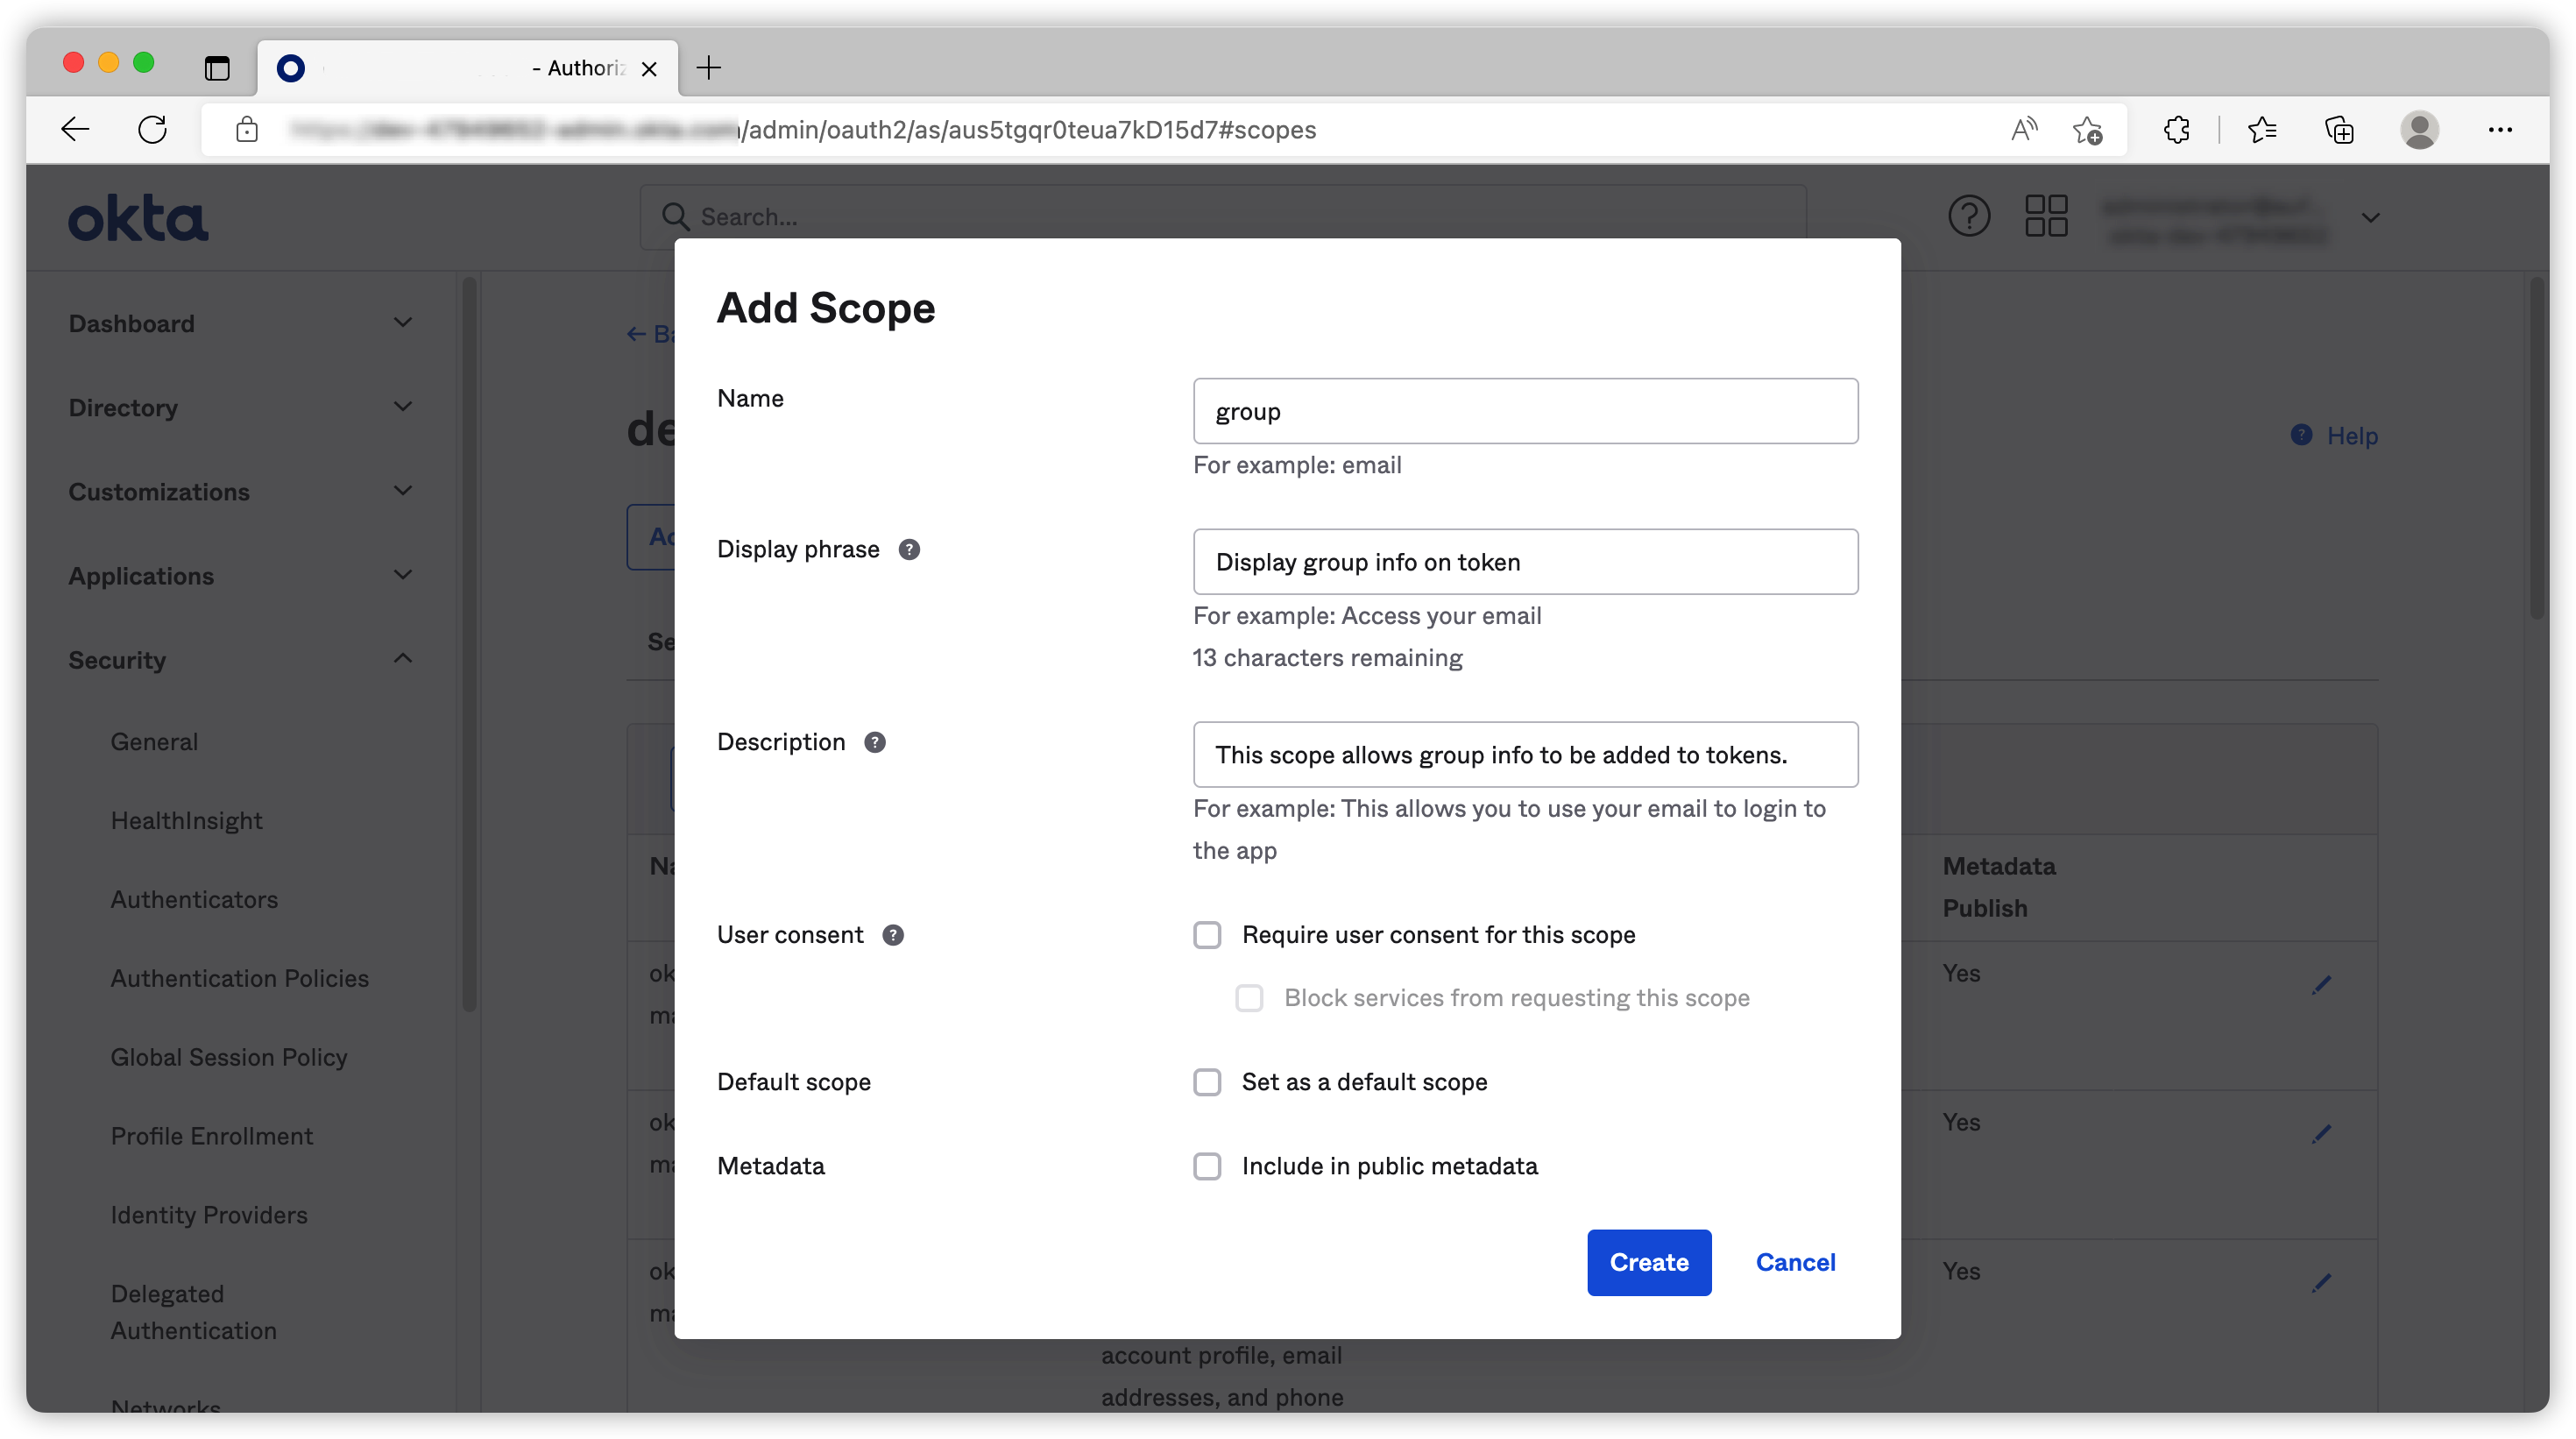
I like to separate different custom claims to different scopes and request token with the scope when needed. This is to avoid adding extra unnecessary claims to all tokens.
Firstly we create our scope call group
Then we can create our groups claim. (I use plural here because a user can be assign to multiple groups).
Because I created my group names as demo-readonly and demo-admin, I can use the filter
Stats-with: demowhen I am creating this claim.
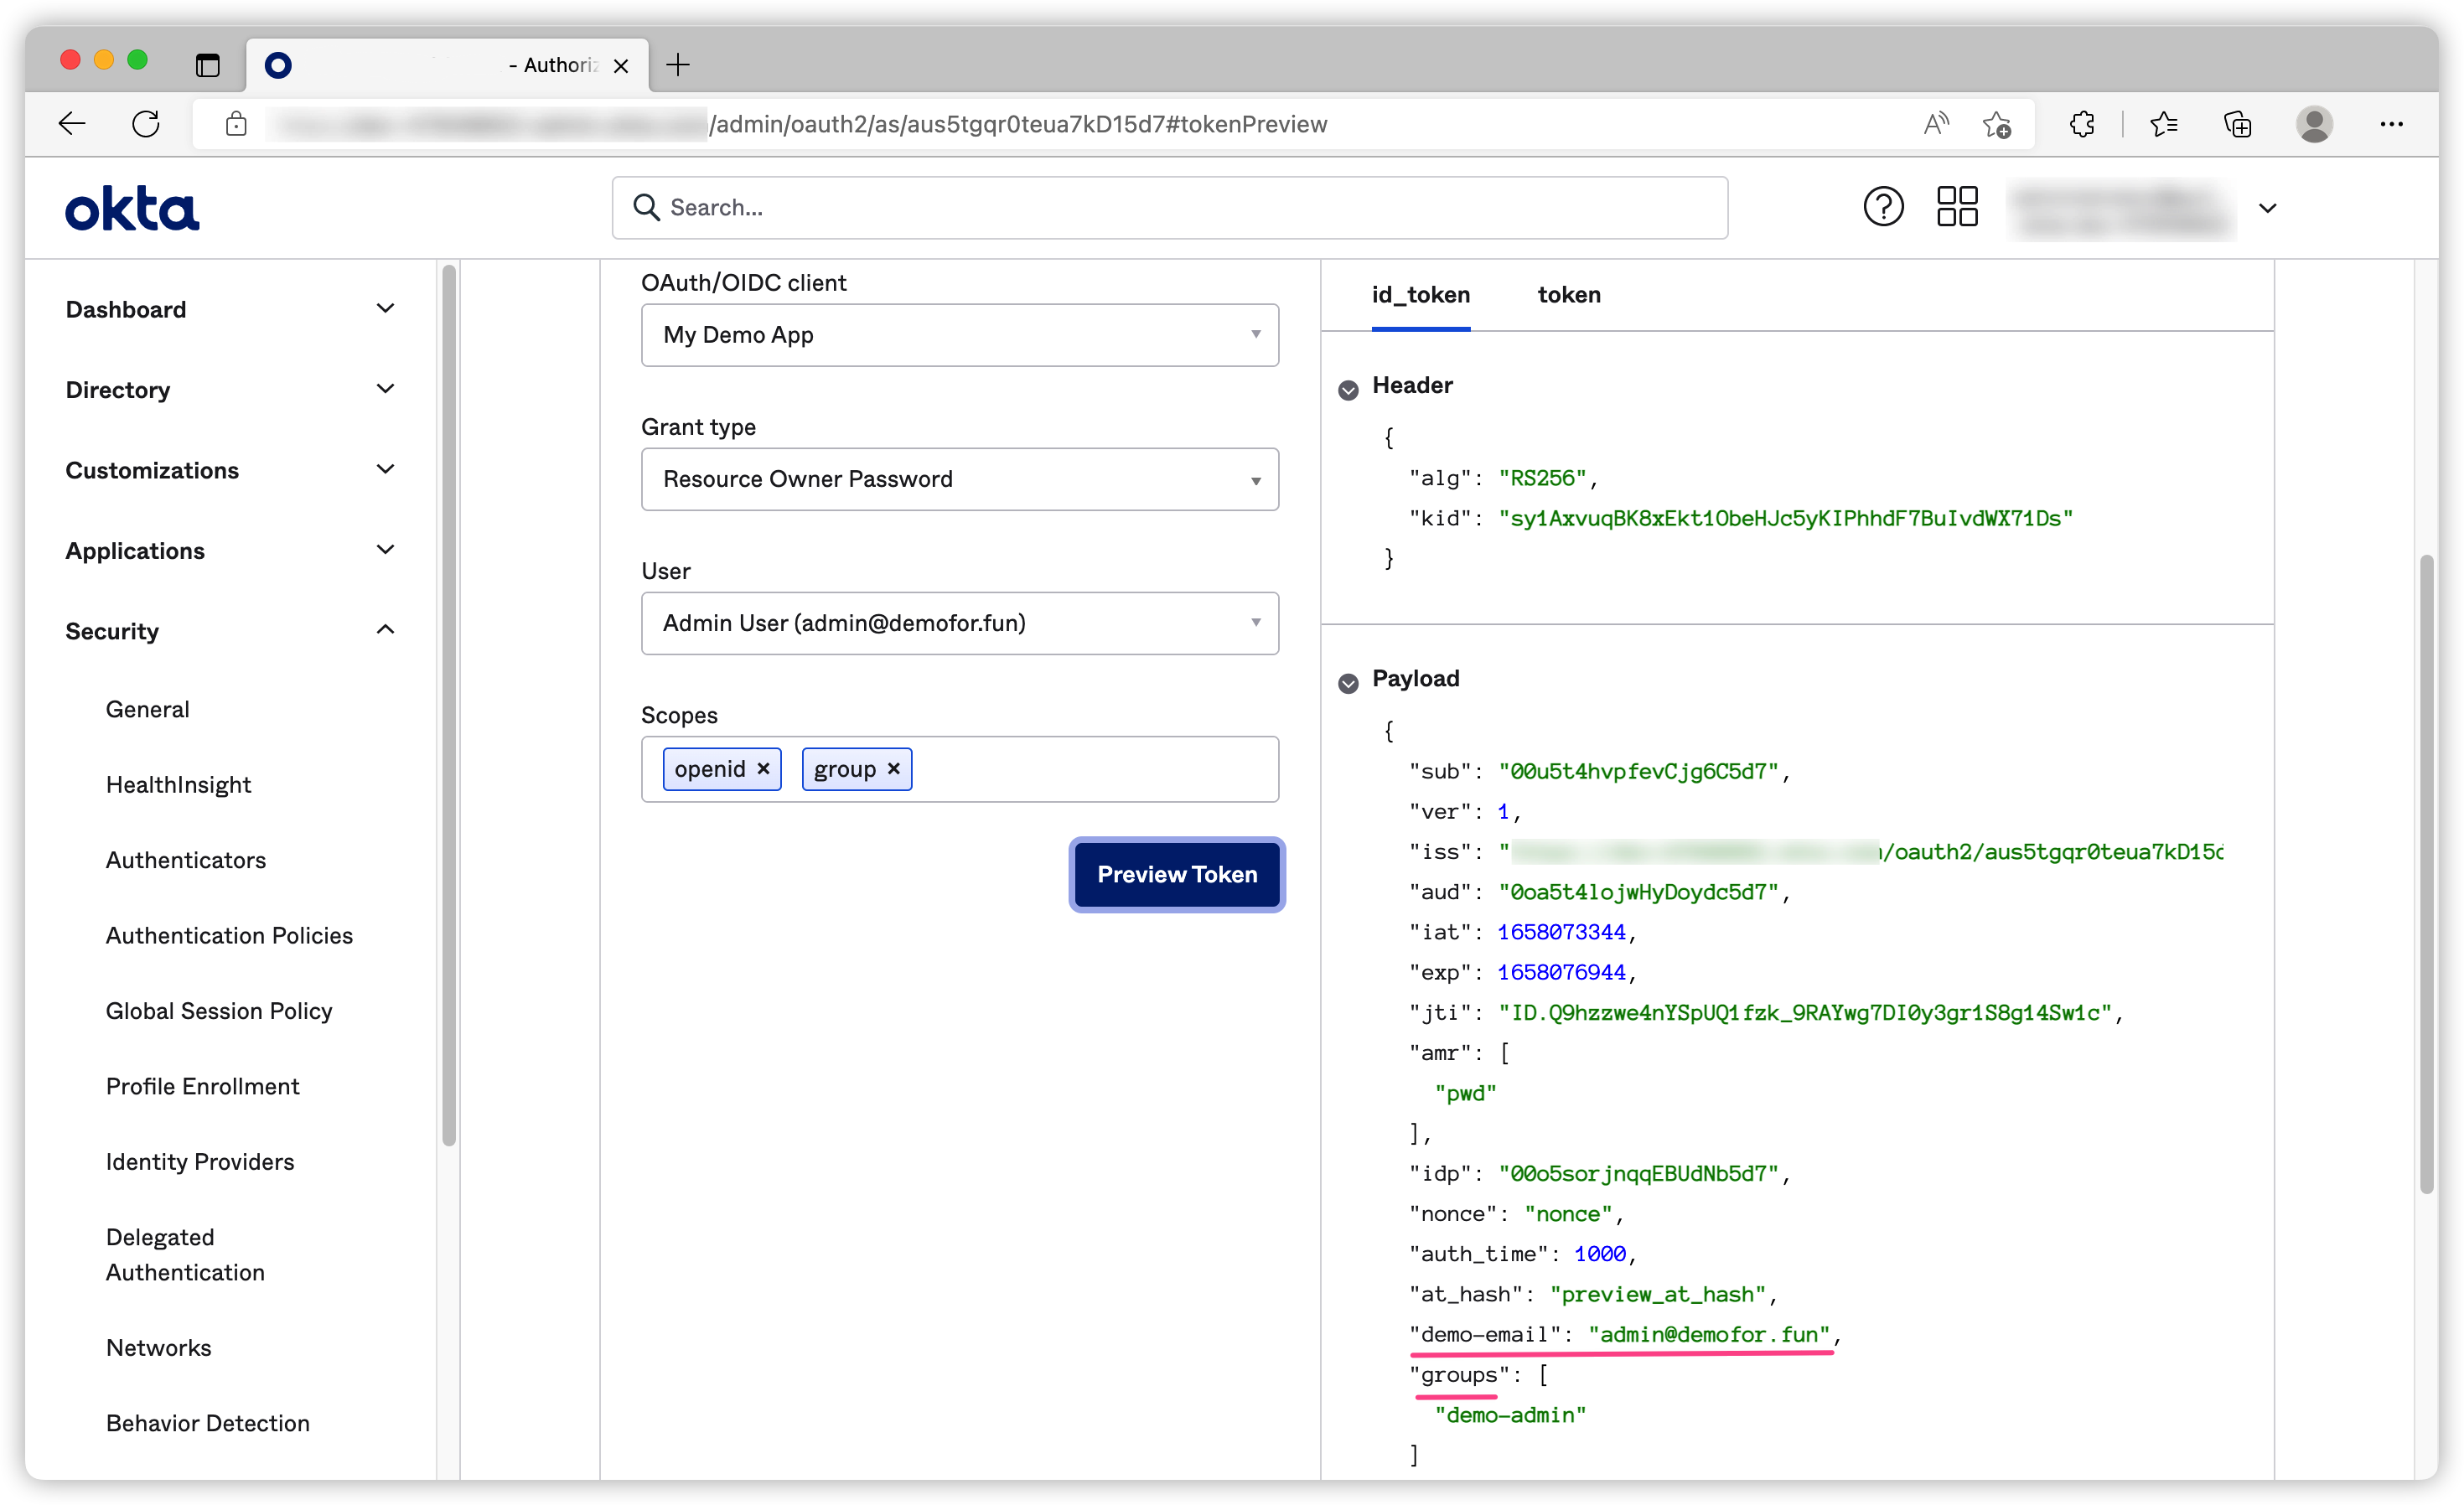
Token Preview
One thing I love Okta is the ability to examine what info is included on the token. This is extremely useful for debugging.
Now we are ready to test different Oauth2/OIDC flows.
Auth Flows
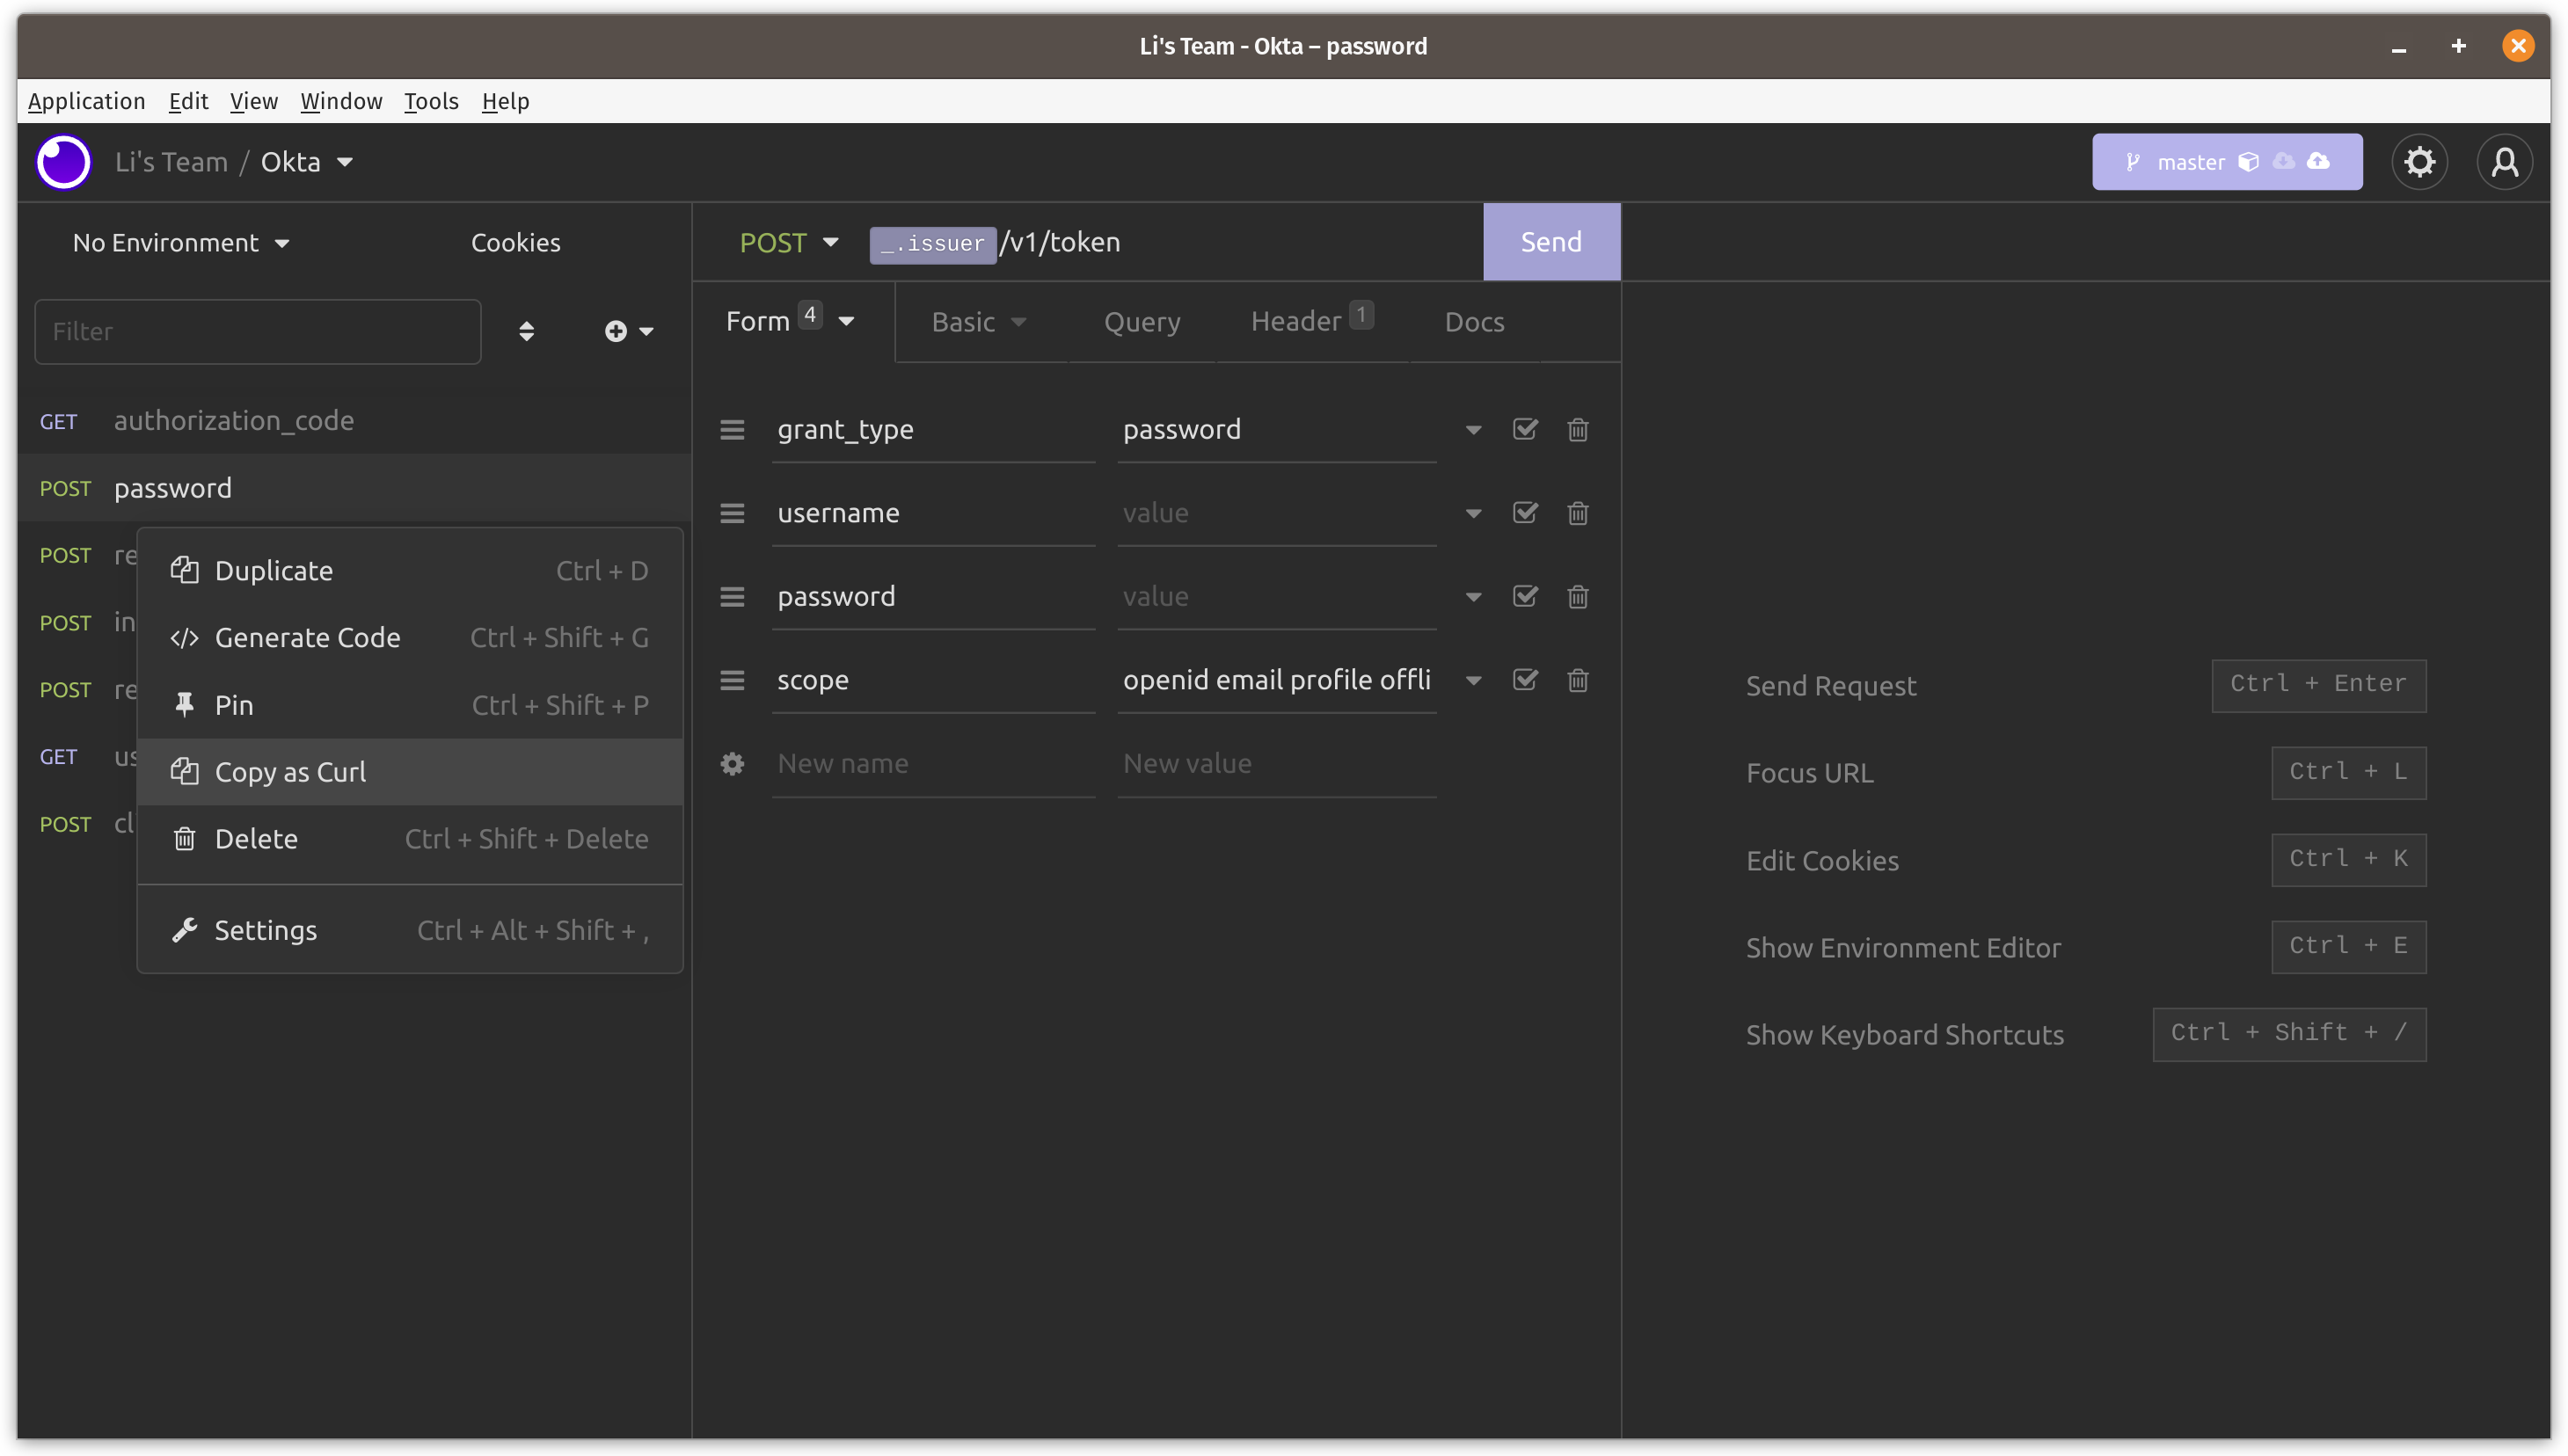
Insomnia collection
I’ve created an Insomnia collection with some Okta auth flows. You can click the button below to use it.

You can test these flows on Insomnia or copy the request as cURL command easily.
You need to set up some environment variables first. Please follow official doc if you don’t know how.
I will demonstrate how to do authorization code flow with cURL as below.
Authorization Code
Let’s start by creating some environment variables.
1 | export ISSER_URI= |
On Linux, you can save your basic auth header as
1 | export BASIC_AUTH=`echo -n "$CLIENT_ID:$CLIENT_SECRET" | base64 -w 0` |
On MacOS, you use below command to save the basic auth header.
1 | export BASIC_AUTH=`echo -n "$CLIENT_ID:$CLIENT_SECRET" | base64` |
Okta requires
stateto be included on the authorize request. For more information, please check official doc. I will useuuidgento generate a random string.1
export STATE=`uuidgen`
Create sign in URL.
1
echo "$ISSER_URI/v1/authorize?client_id=$CLIENT_ID&response_type=code&redirect_uri=$REDIRECT_URL&scope=openid%20group&state=$STATE"
Let’s open this link on a browser and sign in. Once we successfully sign in we will be redirected to an URL similar to http://localhost/callback?code=kh4hDO37OqI313ESdRapmDAePtd0M4vA15yC017xqpM&state=16bb8271-471e-4931-815d-63a8dce853ef.
Then we can redeem tokens with below code.
1 | curl --request POST \ |
PKCE
If you are using authorization code flow you are recommended to use PKCE (Proof Key for Code Exchange) method. What PKCE does is to use code_challenge to request token at issuer’s authorization endpoint and use code_verifier to redeem tokens from issuer’s token endpoint. This is to ensure token requester is the same client to redeem token.
Normally you should build your own tool to generate verifier and challenge on the fly. For demonstration purpose, I use https://tonyxu-io.github.io/pkce-generator/ to generate these values. Let’s save these two as environment variables.
1 | export CODE_VERIFIER='_Grk8mtxLHoWD9OVjIhjM0tfz8jGAOuKii.QEOjaZJsH~kXHp81pv6oVLsR_lhyp2OzdOGaOAXs~JNtyoTQNN9quOUBSVxm7fuYuvYtM7WdO2.C.Mnf_o2D.kPdzBJyX' |
Create sign in URL again.
1 | echo "$ISSER_URI/v1/authorize?client_id=$CLIENT_ID&response_type=code&redirect_uri=$REDIRECT_URL&scope=openid%20group&state=$STATE&code_challenge=$CODE_CHALLENGE&code_challenge_method=S256" |
Let’s open this link on browser again, log in and we will be redirected back to http://localhost/callback?code=EUP5pWrxJMKDlIXav9B1qvxQ6a_P0ZX4aAYEfpF19PM&state=2dc00635-a331-4f98-807a-cd7ca2916e87.
If we claim token without code_verifier, we will get below response.
1 | { |
To redeem token, let’s add code_verifier to our request.
1 | curl --request POST \ |
That’s all I want to show you today, I hope you find this blog post useful.
Thank you and see you next time.