How to Use Certificate-Bound Access Token With Kong and Keycloak
Introduction
Token-based authentication is widely adopted in API security for its advantages. It permits clients to access protected resources without constantly transmitting credentials and facilitates the delegation of authentication to a trusted identity provider. Despite these benefits, a significant vulnerability arises when a token is compromised. In such cases, the resource server cannot distinguish between legitimate and illegitimate access, as the compromised token remains valid. This highlights the need for additional safeguards to prevent abuse of compromised tokens in order to fully secure API access.
Binding access tokens to a sender’s identity mitigates this issue by only permitting usage by authorized senders holding the right cryptographic keys. This approach aligns with the Requirements for Authorization Servers outlined in the FAPI 2.0 Baseline profile.
In the realm of OpenID Connect authentication flows, there are generally four roles:
- End user
- Relying party
- IDP
- The Resource Server
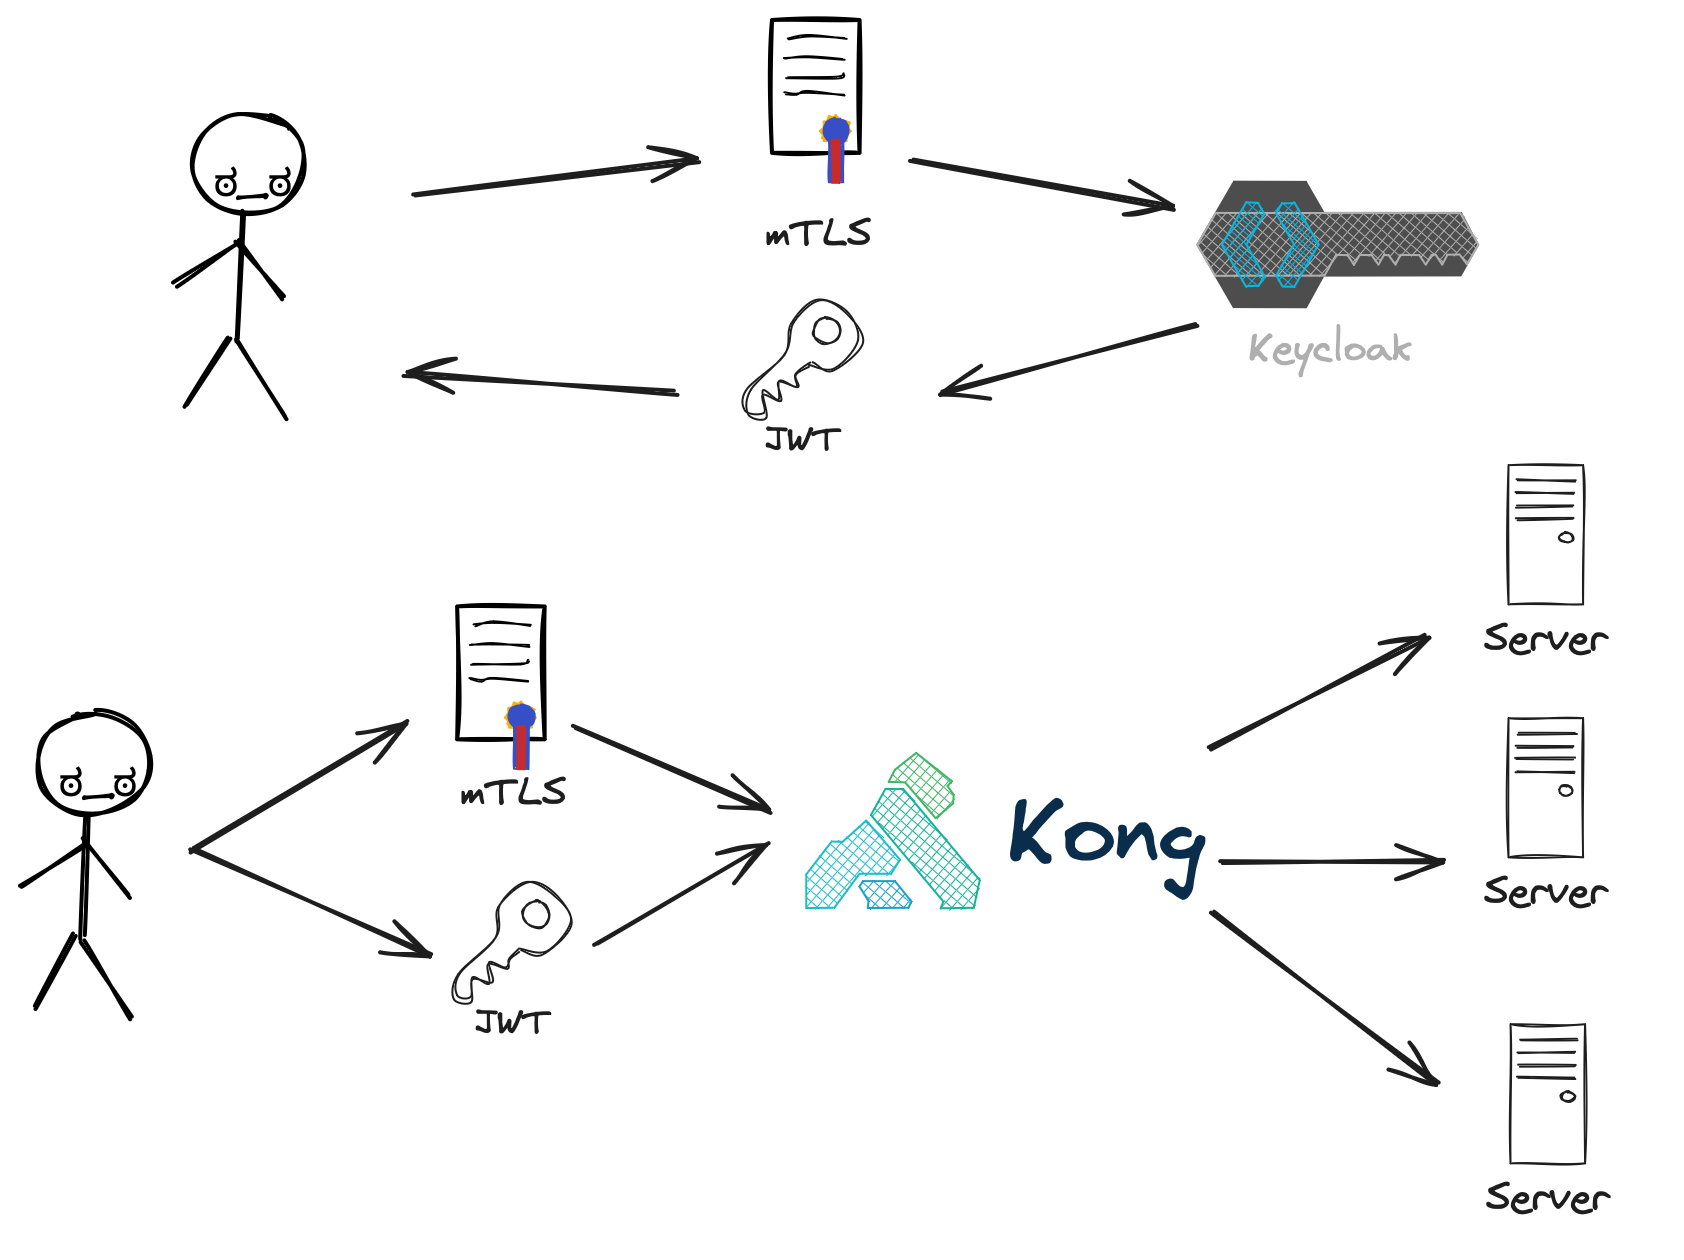
While Kong’s OIDC plugin can sometimes assume both the relying party and resource server roles, API gateways typically reside on the resource server side, focusing primarily on token validation. In this post, I aim to demonstrate how Mutual TLS (mTLS) can be employed for authentication, obtaining certificate-bound access tokens from Keycloak, and subsequently leveraging Kong to validate these tokens.
Prerequisites
Understand tls_client_auth
Before diving in, it’s crucial to understand how token endpoint authentication works. Identity providers (IDPs) typically expose supported client authentication methods in the OAuth 2.0 Authorization Server Metadata, accessible via /.well-known/openid-configuration. Take Keycloak for instance, it supports the following five client authentication methods by default:
1 | "token_endpoint_auth_methods_supported": [ |
- client_secret_basic : Clients that have received a client_secret value from the Authorization Server authenticate with the Authorization Server using the HTTP Basic authentication scheme.
- client_secret_post: Clients that have received a client_secret value from the Authorization Server, authenticate with the Authorization Server by including the Client Credentials in the request body.
- client_secret_jwt and private_key_jwt: The Client authenticates in accordance with JSON Web Token (JWT) Profile for OAuth 2.0 Client Authentication and Authorization Grants OAuth.JWT and Assertion Framework for OAuth 2.0 Client Authentication and Authorization Grants OAuth.Assertions.
- tls_client_auth: Client authentication to the authorization server will occur with mutual TLS utilizing the PKI method of associating a certificate to a client.
Now that we understand tls_client_auth means mutual TLS (mTLS) with the Keycloak token endpoint, we need to configure keycloak to support below:
- Trust the Client Certificate Root: Keycloak must trust the root certificate of the client certificates it verifies. This ensures authentication legitimacy.
- Enable HTTPS: Keycloak must be configured to use HTTPS for secure communication with clients.
- Enable Client Authentication: Within Keycloak, enable client authentication on the specific client we’re using for mTLS.
- Register Client Certificate Validation Metadata: We must register client metadata for validating client certificates with Keycloak. Refer to RFC8705 for details on this process.
Prepare certificates
Given above requirements, we need to prepare CA certificate store, client certificate and server certificate. Because I use my personal CA to sign all these certificates and Keycloak is a JAVA application, I need to use keytool to create the CA JKS keystore with my root certificates.
Install JAVA (optional)
On my mac, I need to make sure I have JAVA runtime first. I use homebrew to install JAVA.
1 | brew install java |
By default brew installs java in a non-system folder (/opt/homebrew/opt/openjdk/libexec/openjdk.jdk) and as such, macOS won’t automatically know of its existence.
1 | ➜ brew info java |
We need to create a symbolic link.
1 | sudo ln -sfn \ |
We can verify with below command.
1 | ➜ java --version |
Generate JKS keystore
This step is pretty simple, we only need to import the root certificates to the p12 file. In my case I need to import my ECC and RSA roots. Please note -storepass secret specify the secret to your keystore file, for demonstration purpose, I set the password to secret.
1 | keytool -import -file certs/ecc.ca.cert.pem \ |
We can verify the certificates are imported with below command.
1 | keytool -v -list -storepass secret \ |
Generate certificates
Depends on your CA set up, we should also generate
- Client certificate
This is used to authenticate with keycloak and to consume API with access token. The generated CN must adhere to the pre-defined pattern for Keycloak validation. - Server certificate
Keycloak server presents this certificate to client.
Once the certificates are generated, we are ready to deploy Keycloak.
Keycloak
Deployment
Here is my folder structure.
1 | . |
Let me explian what I have on my docker compose file.
- Default admin username and password is
admin - Enable Producation mode means we can only use https.
- Mount server and CA certificate inside container and tell keycloak where to find them and the keystore password.
- Enable client authentication and also accept requests without a certificate.
- Run container in docker network
kong-ee-net, assign static IP to my container and set hostname for keycloak server.
1 | version: '2.1' |
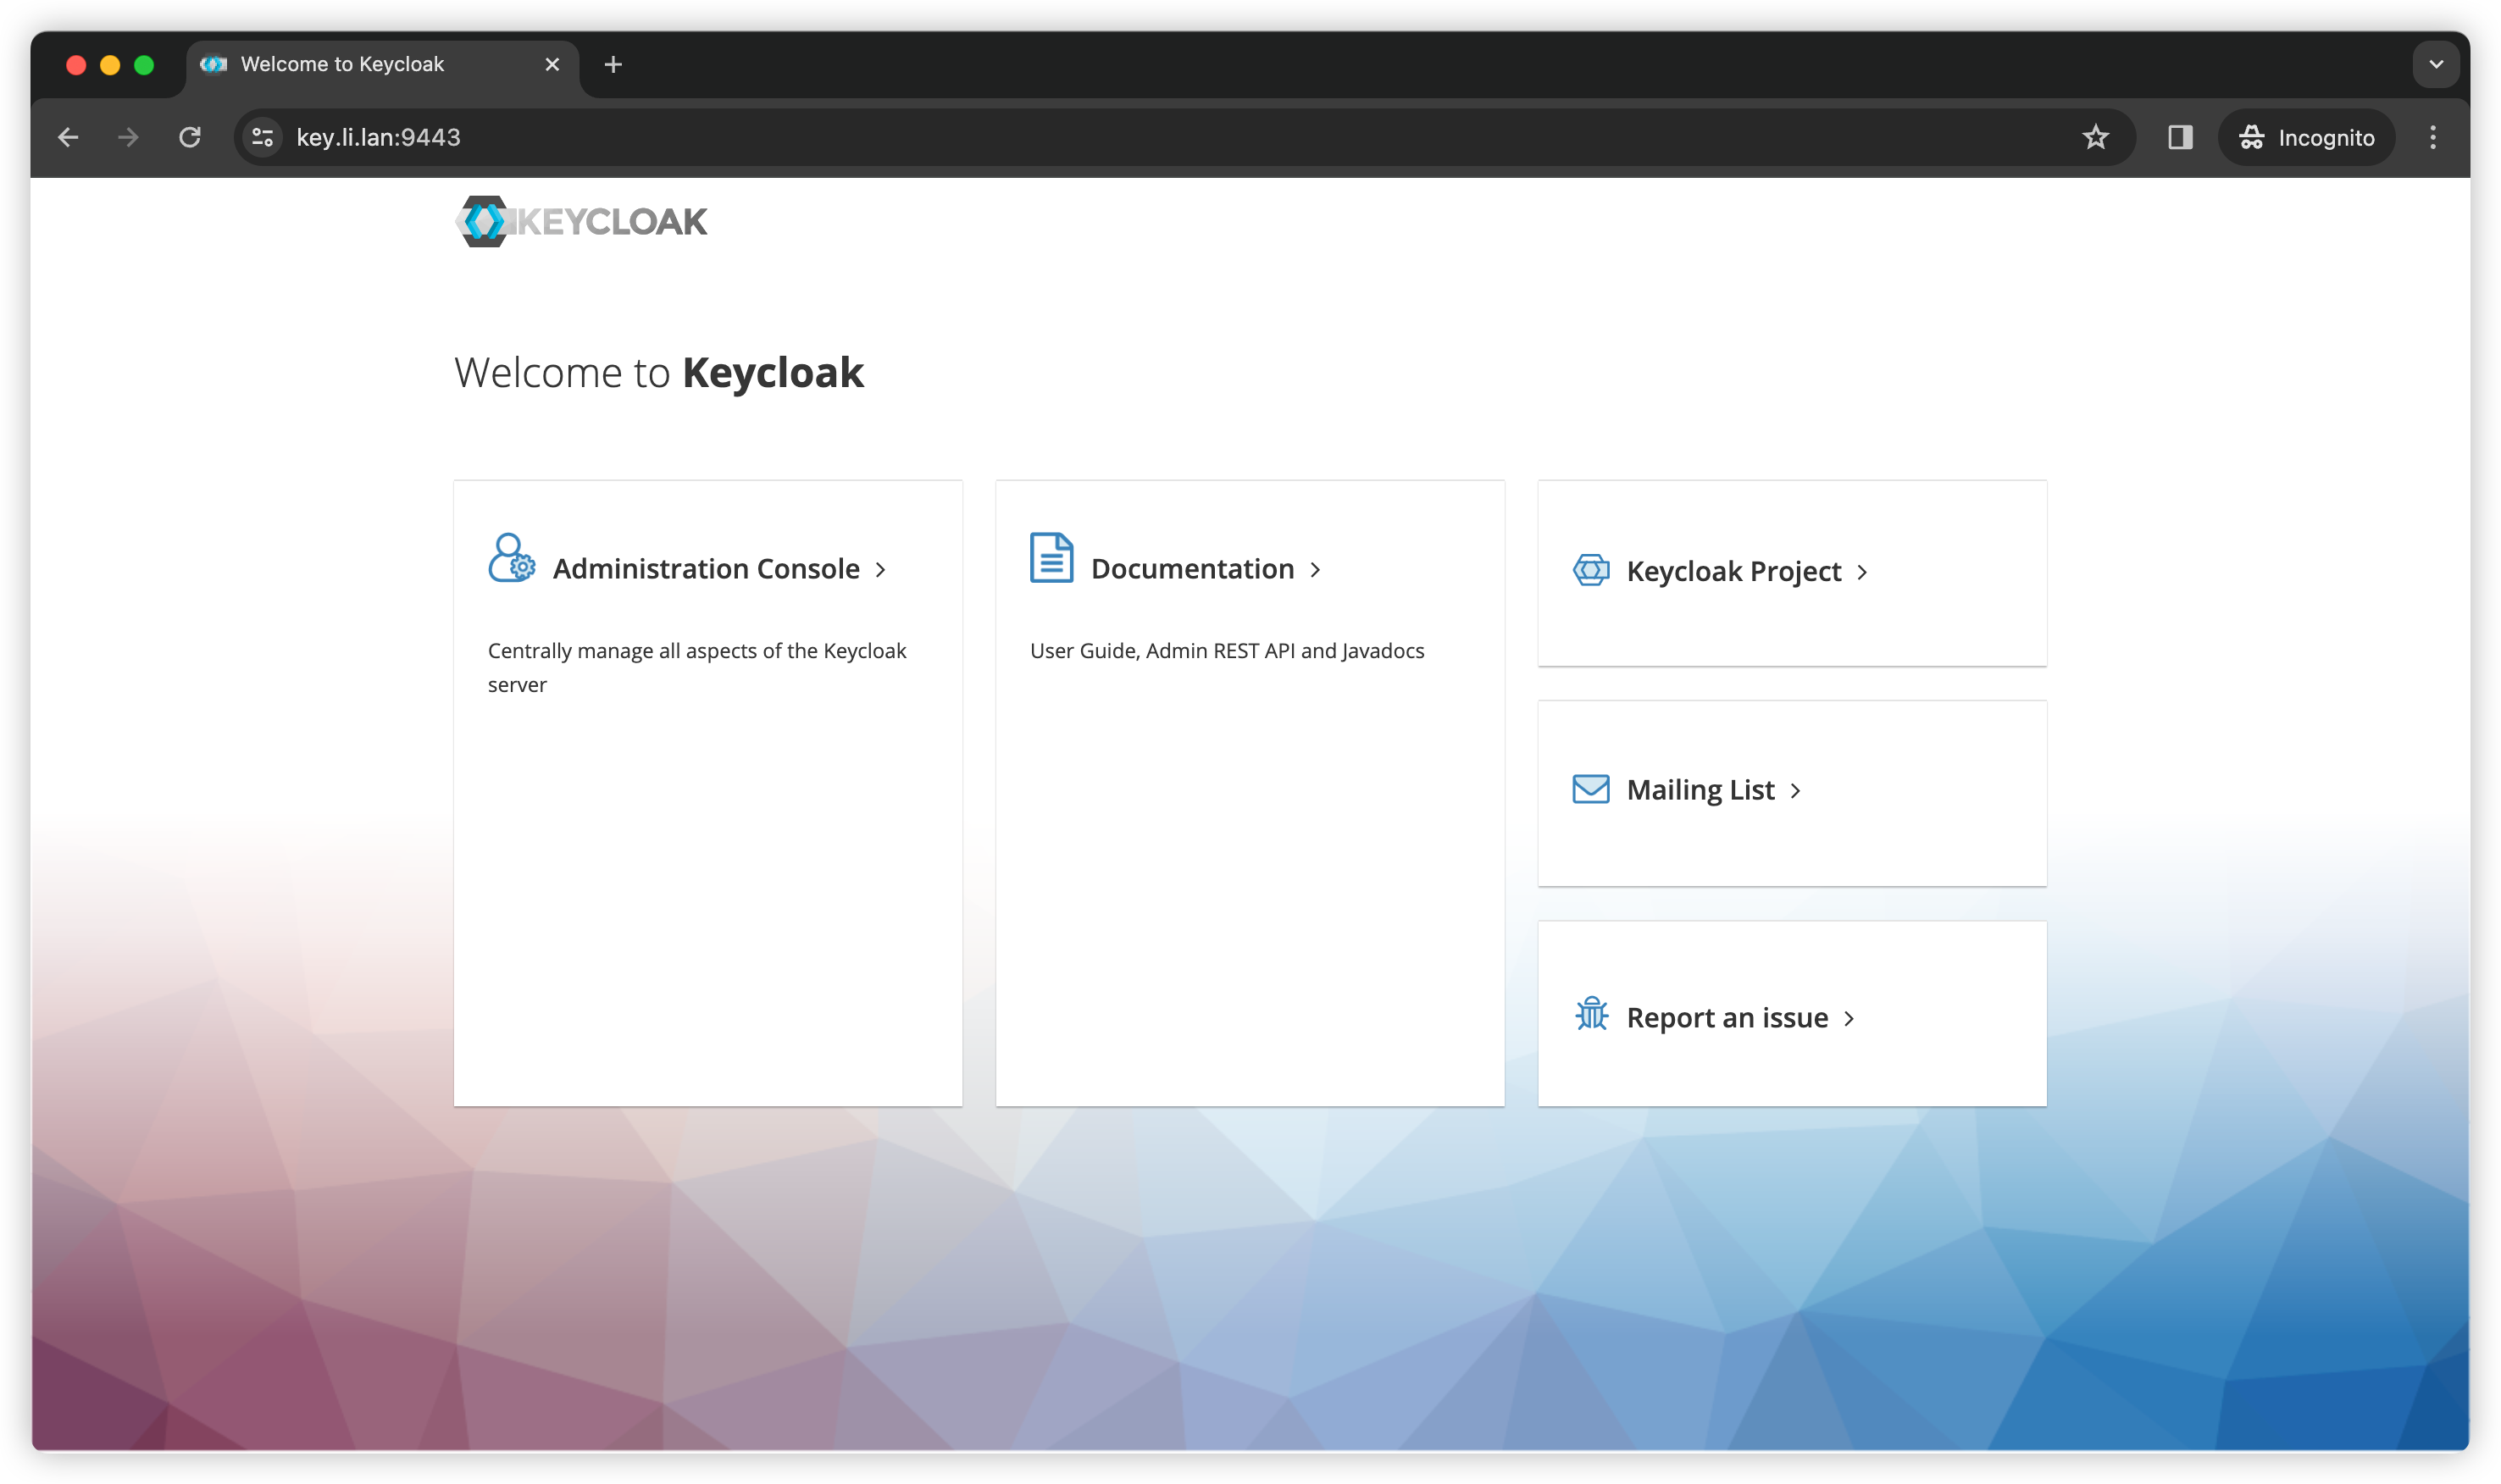
After running docker-compose up -d, we should be able to access keycloak UI via https://key.li.lan:9443.
Set up new client
We need to set up a new client that supports mTLS auth.
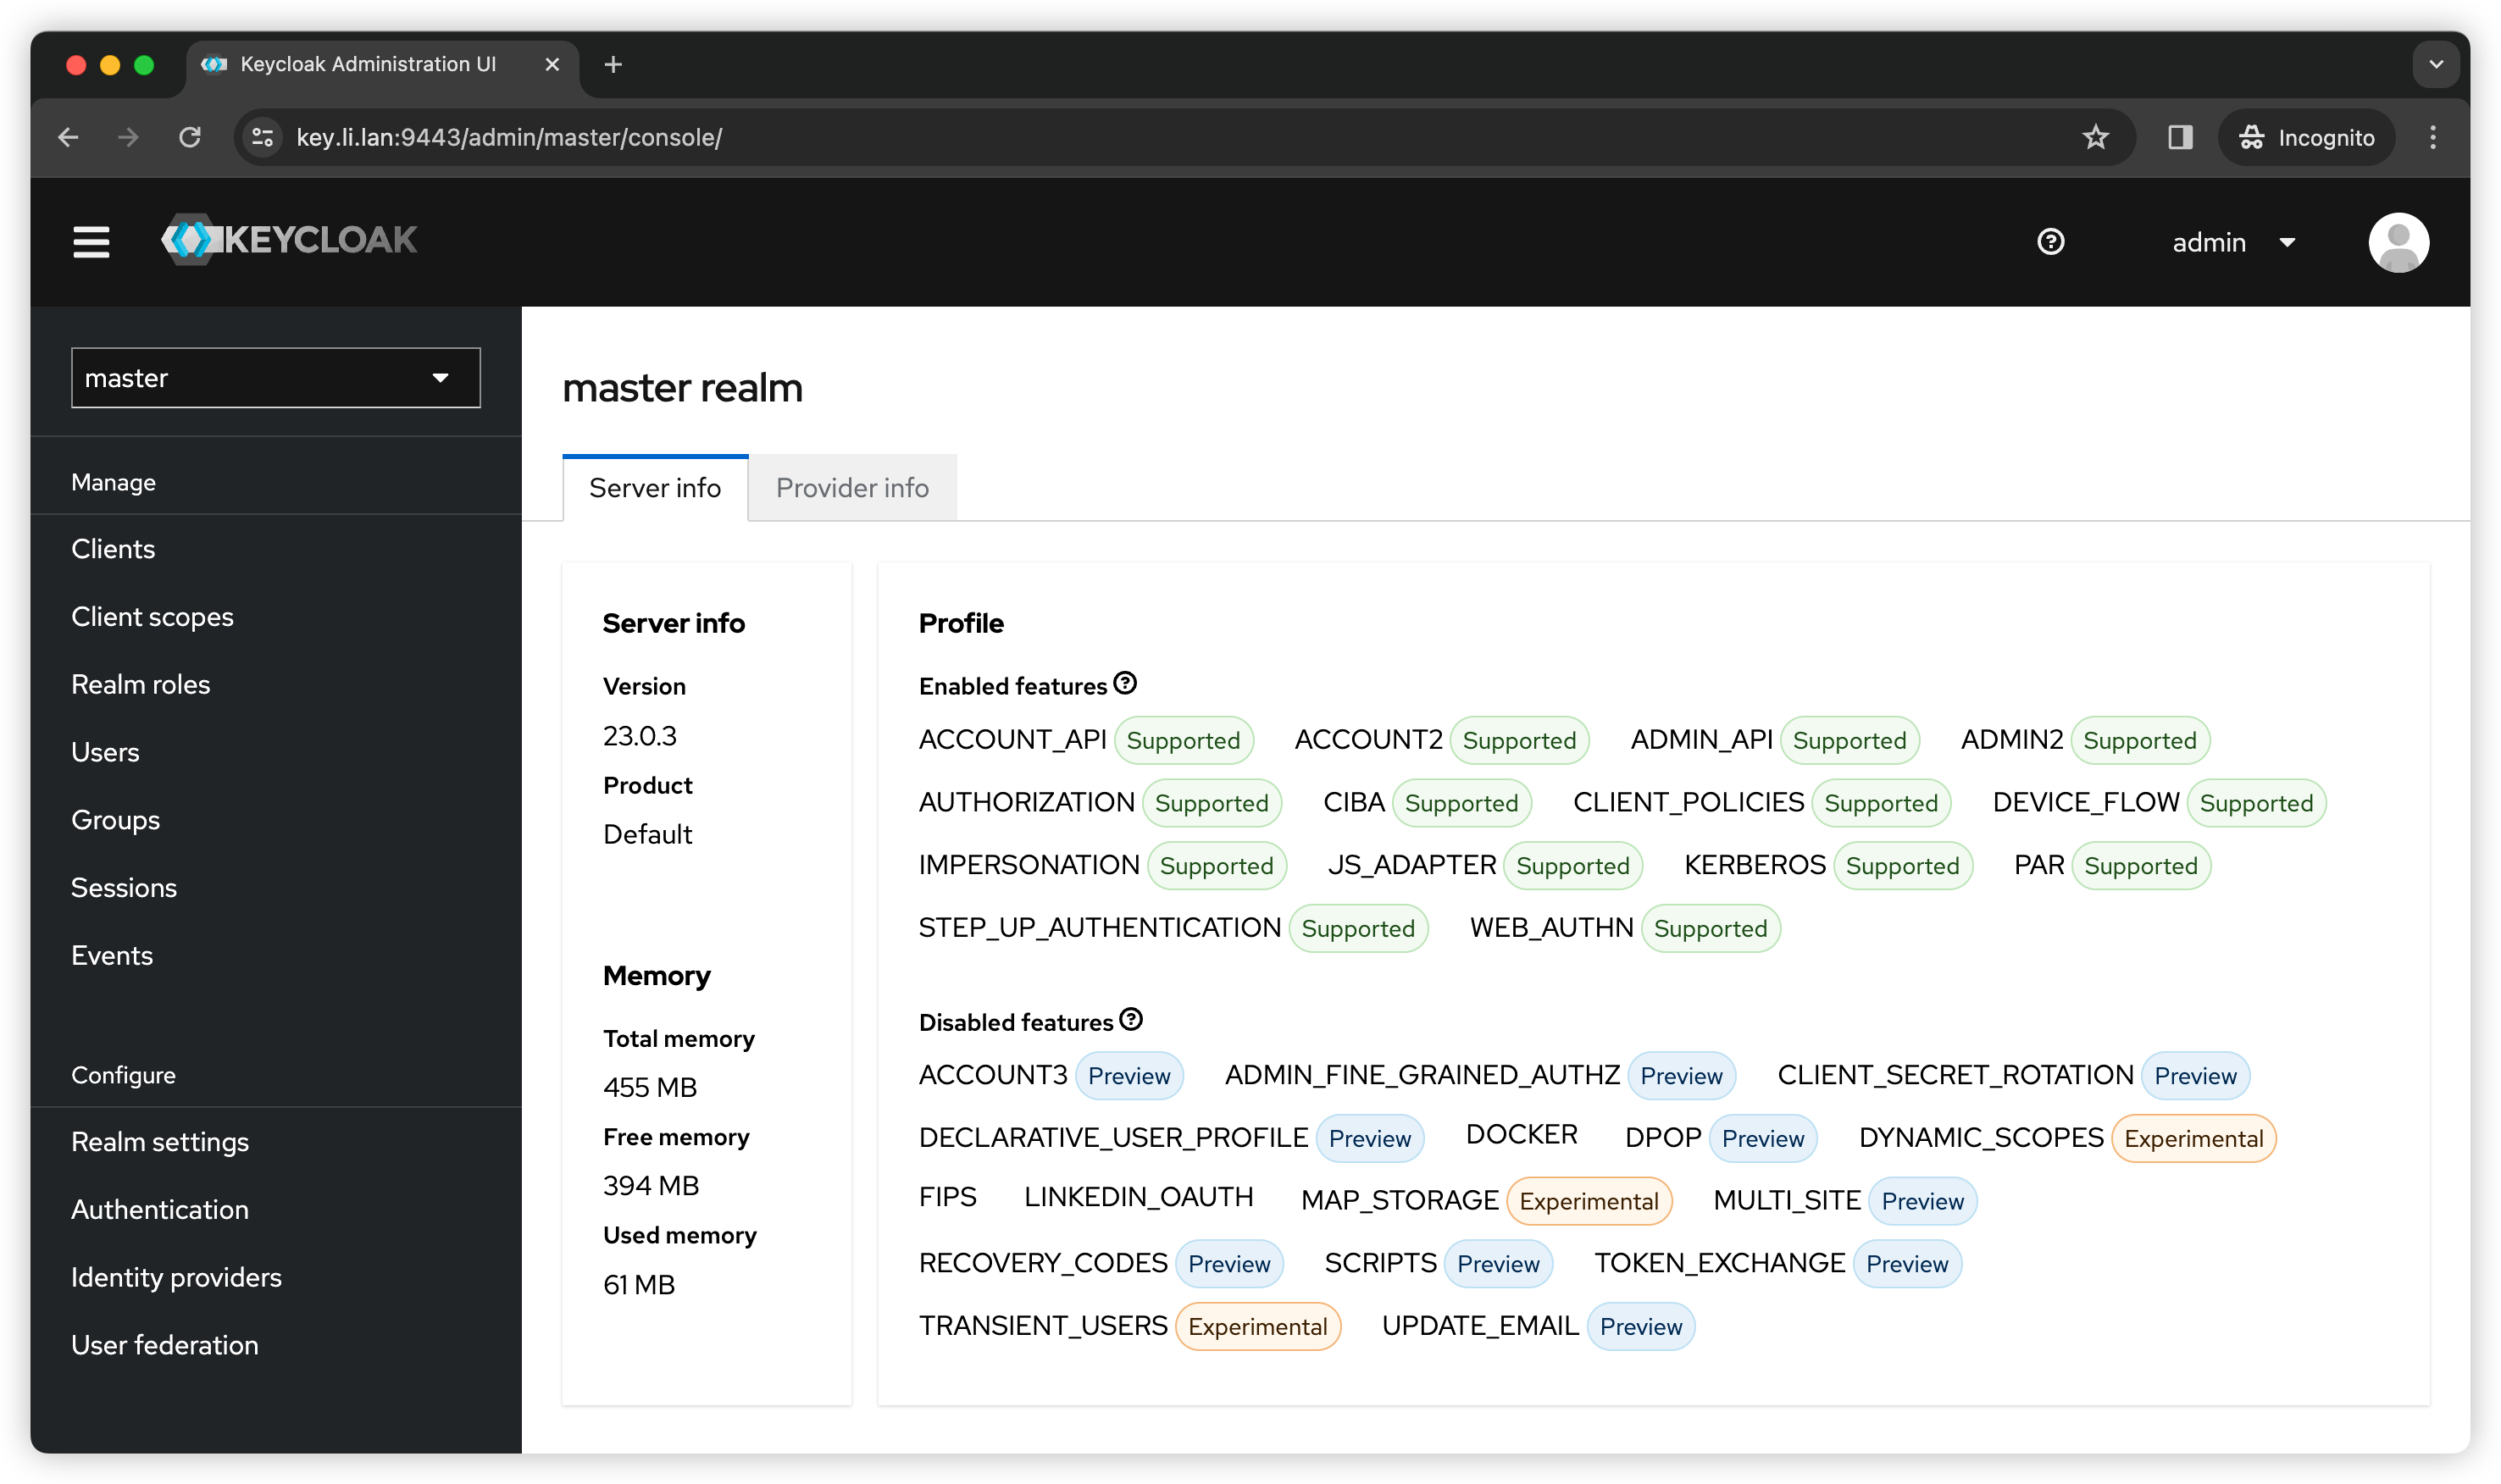
Log in to keycloak
Once we log in as admin user, we should see the master realm information.
Create client
Go to left panel, Click Clients → Create client. Then we can follow below screenshots to create a client called mtls_client_demo.
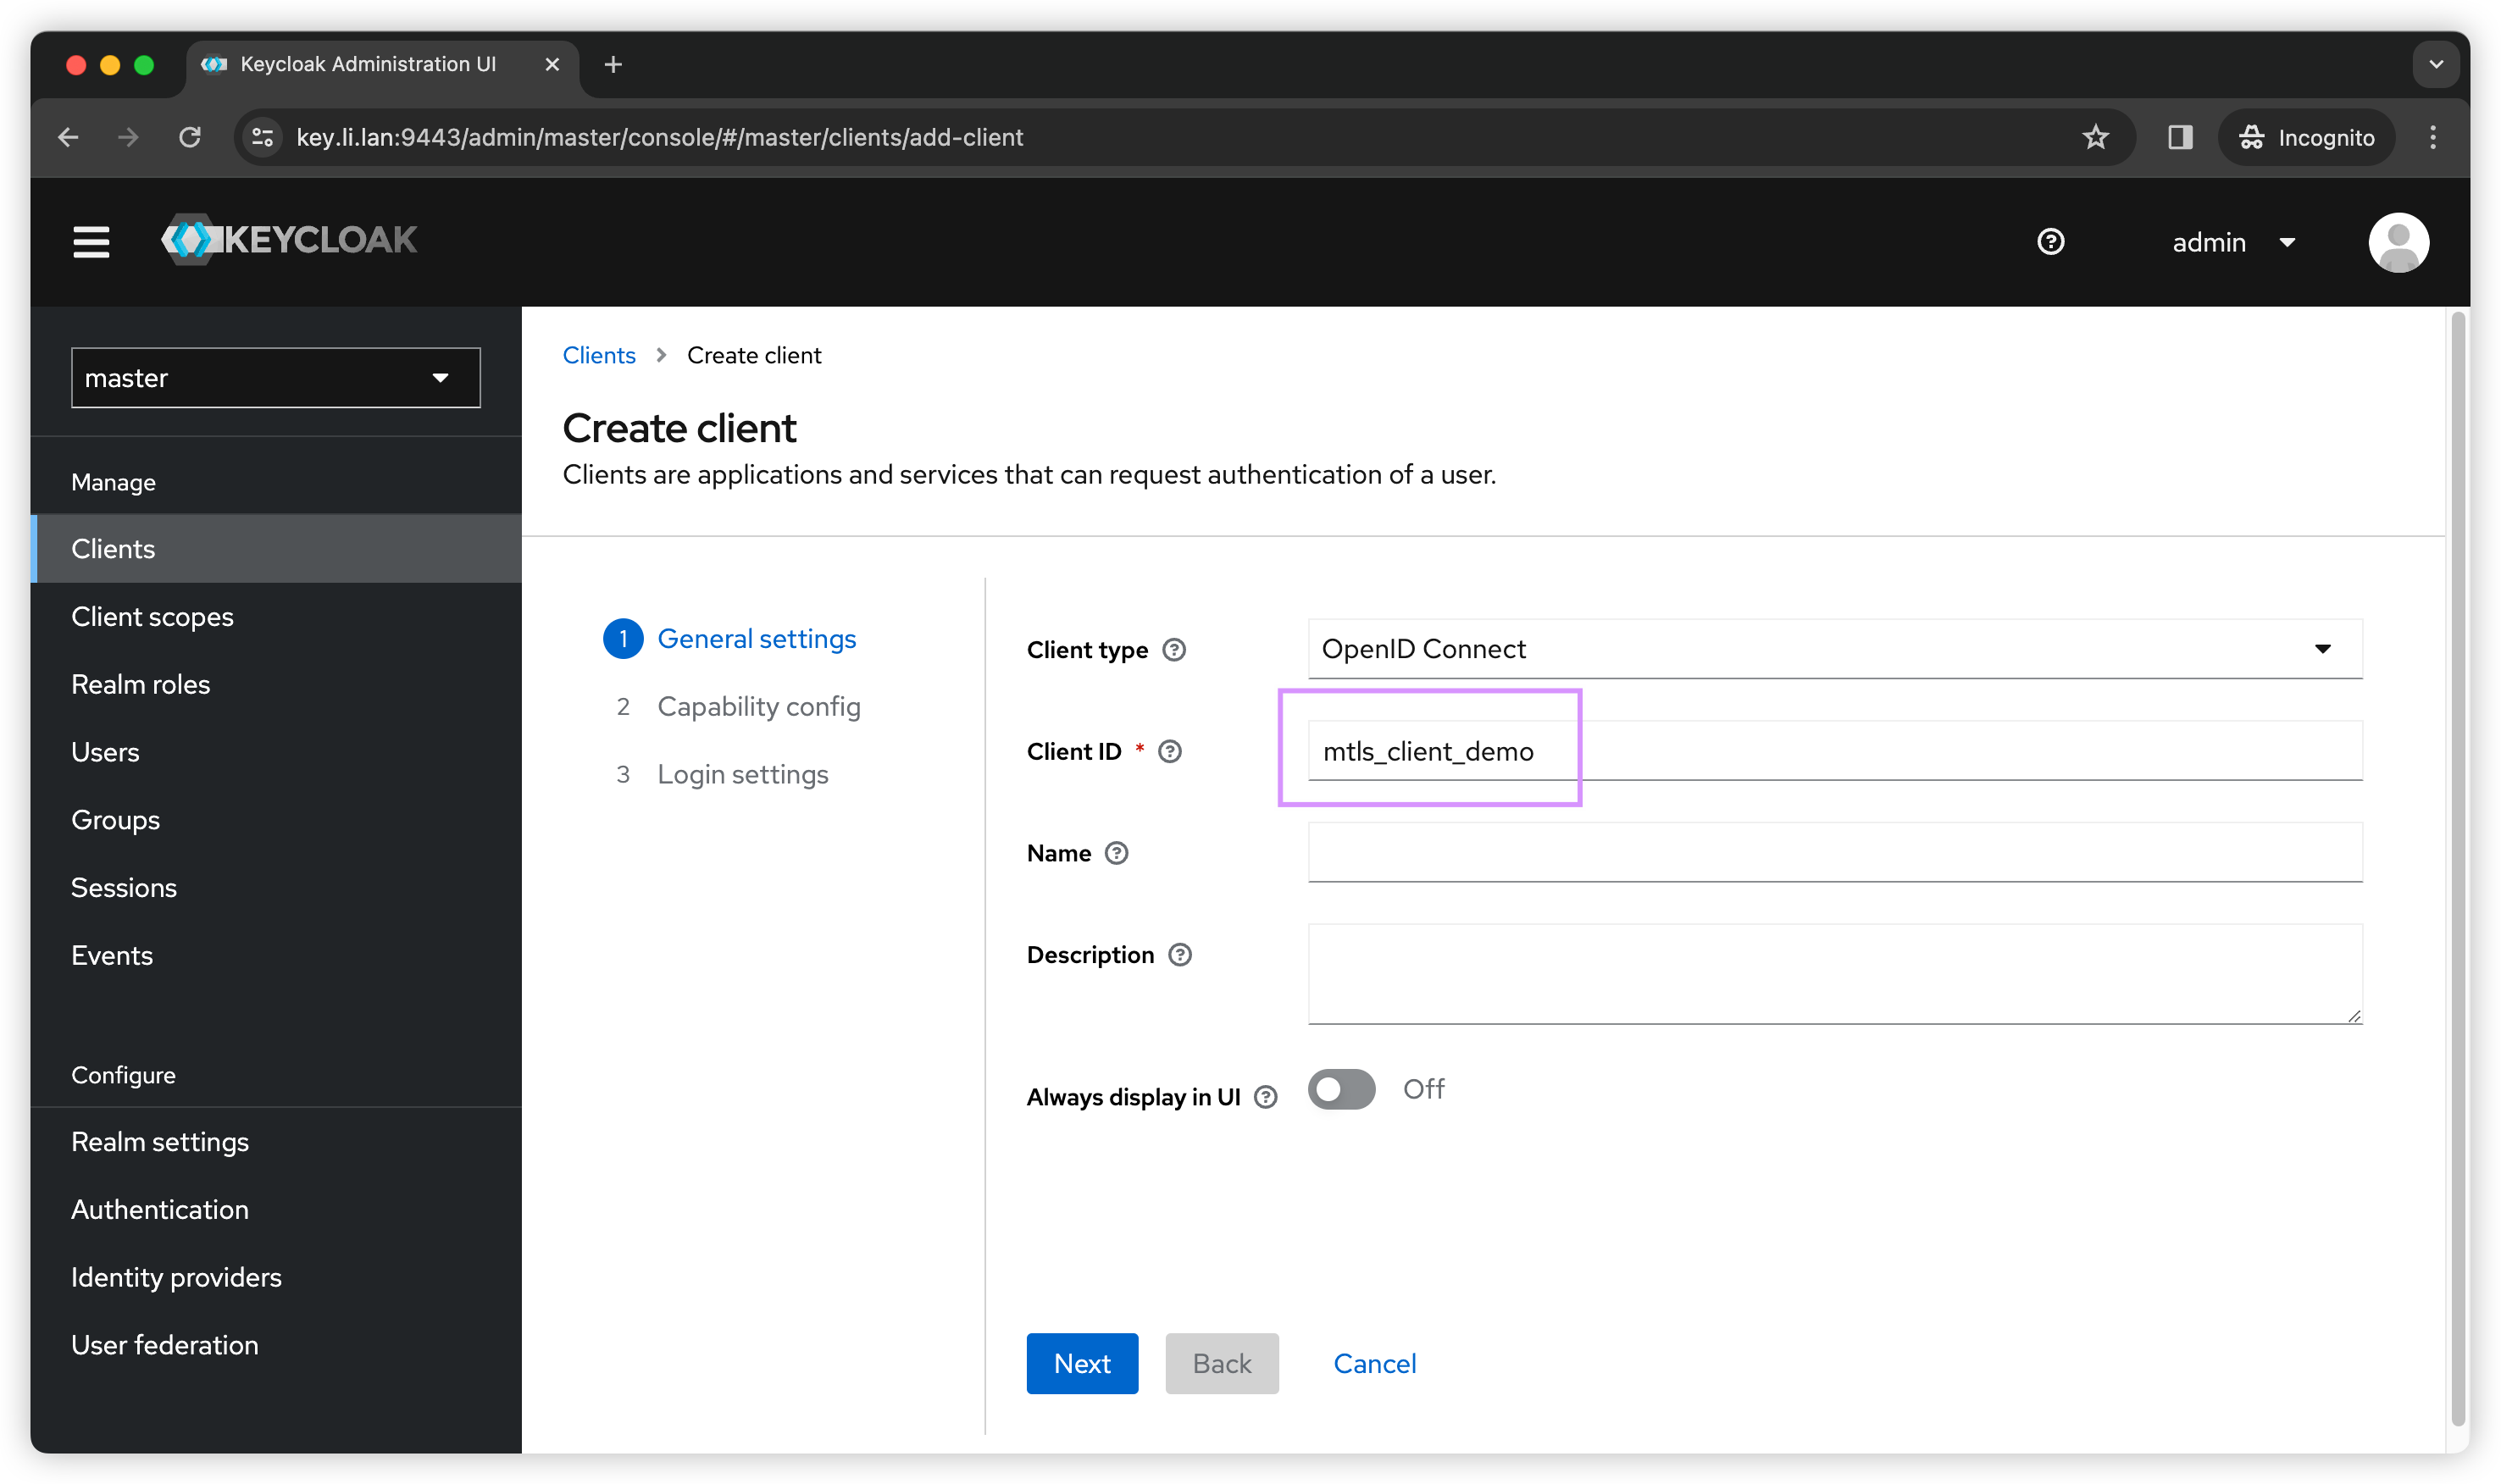
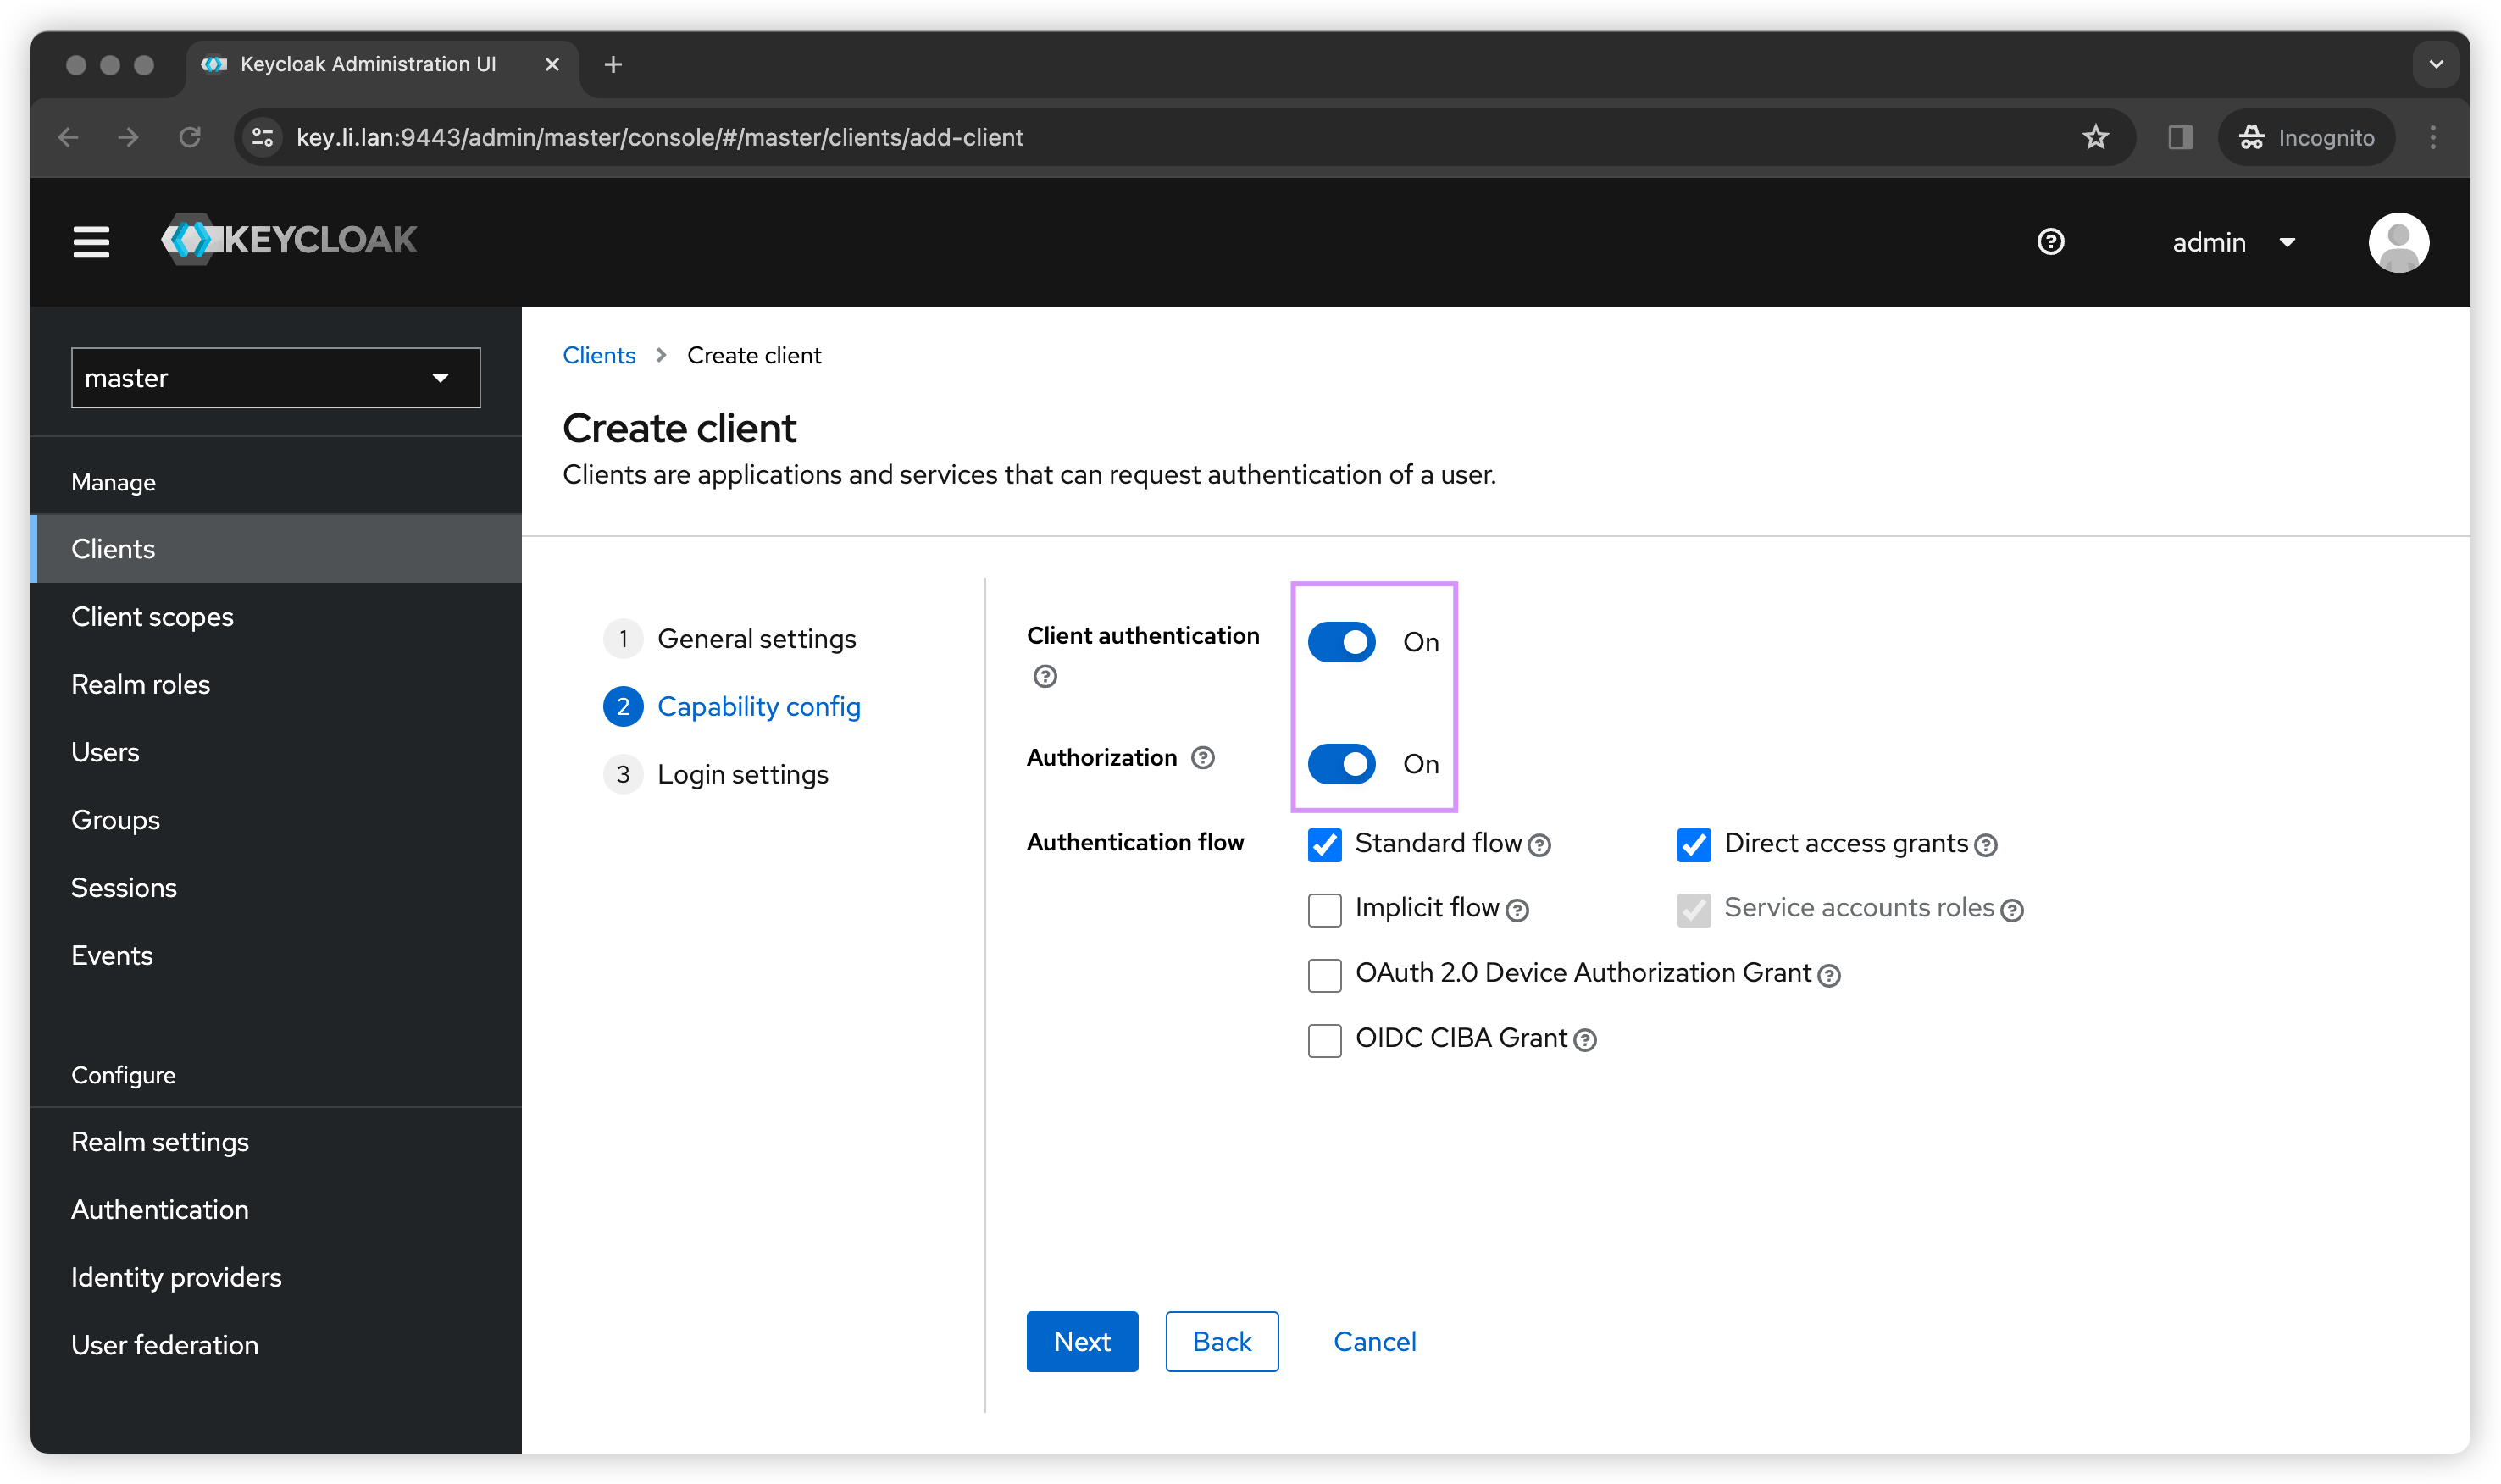
I will only demonstrate client_credentials flow, so we don’t need any URLs.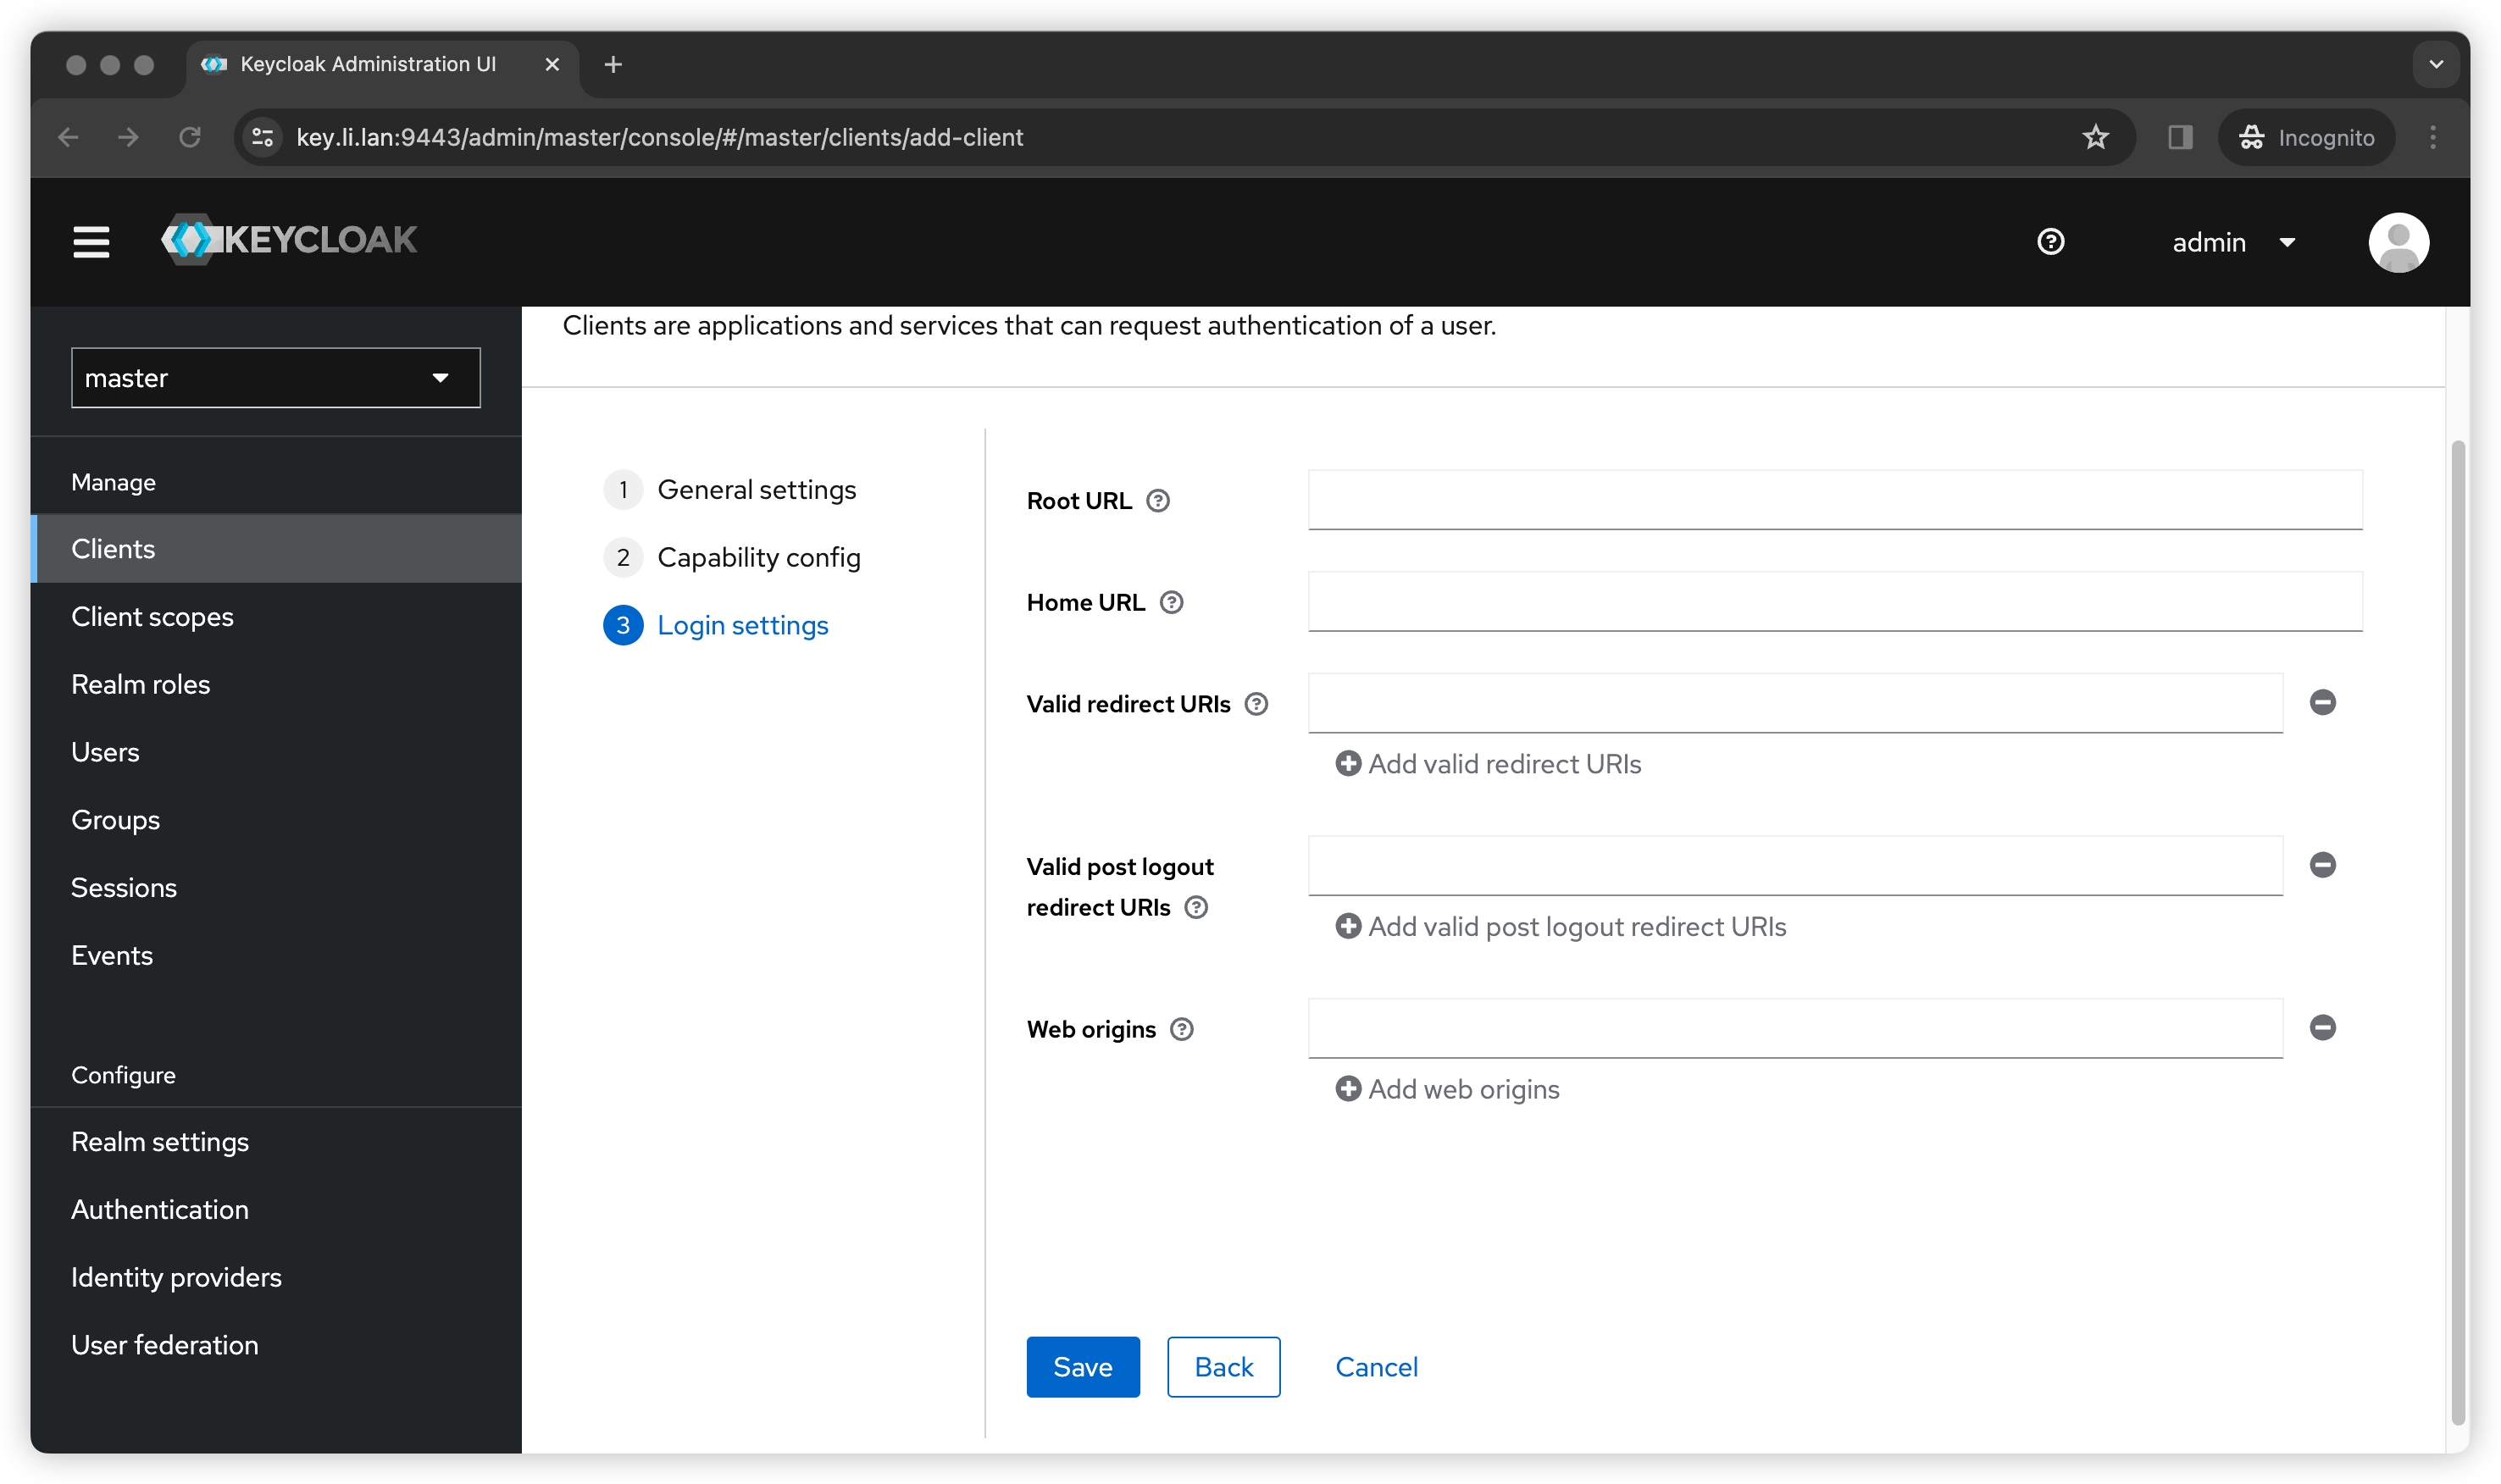
Configure client
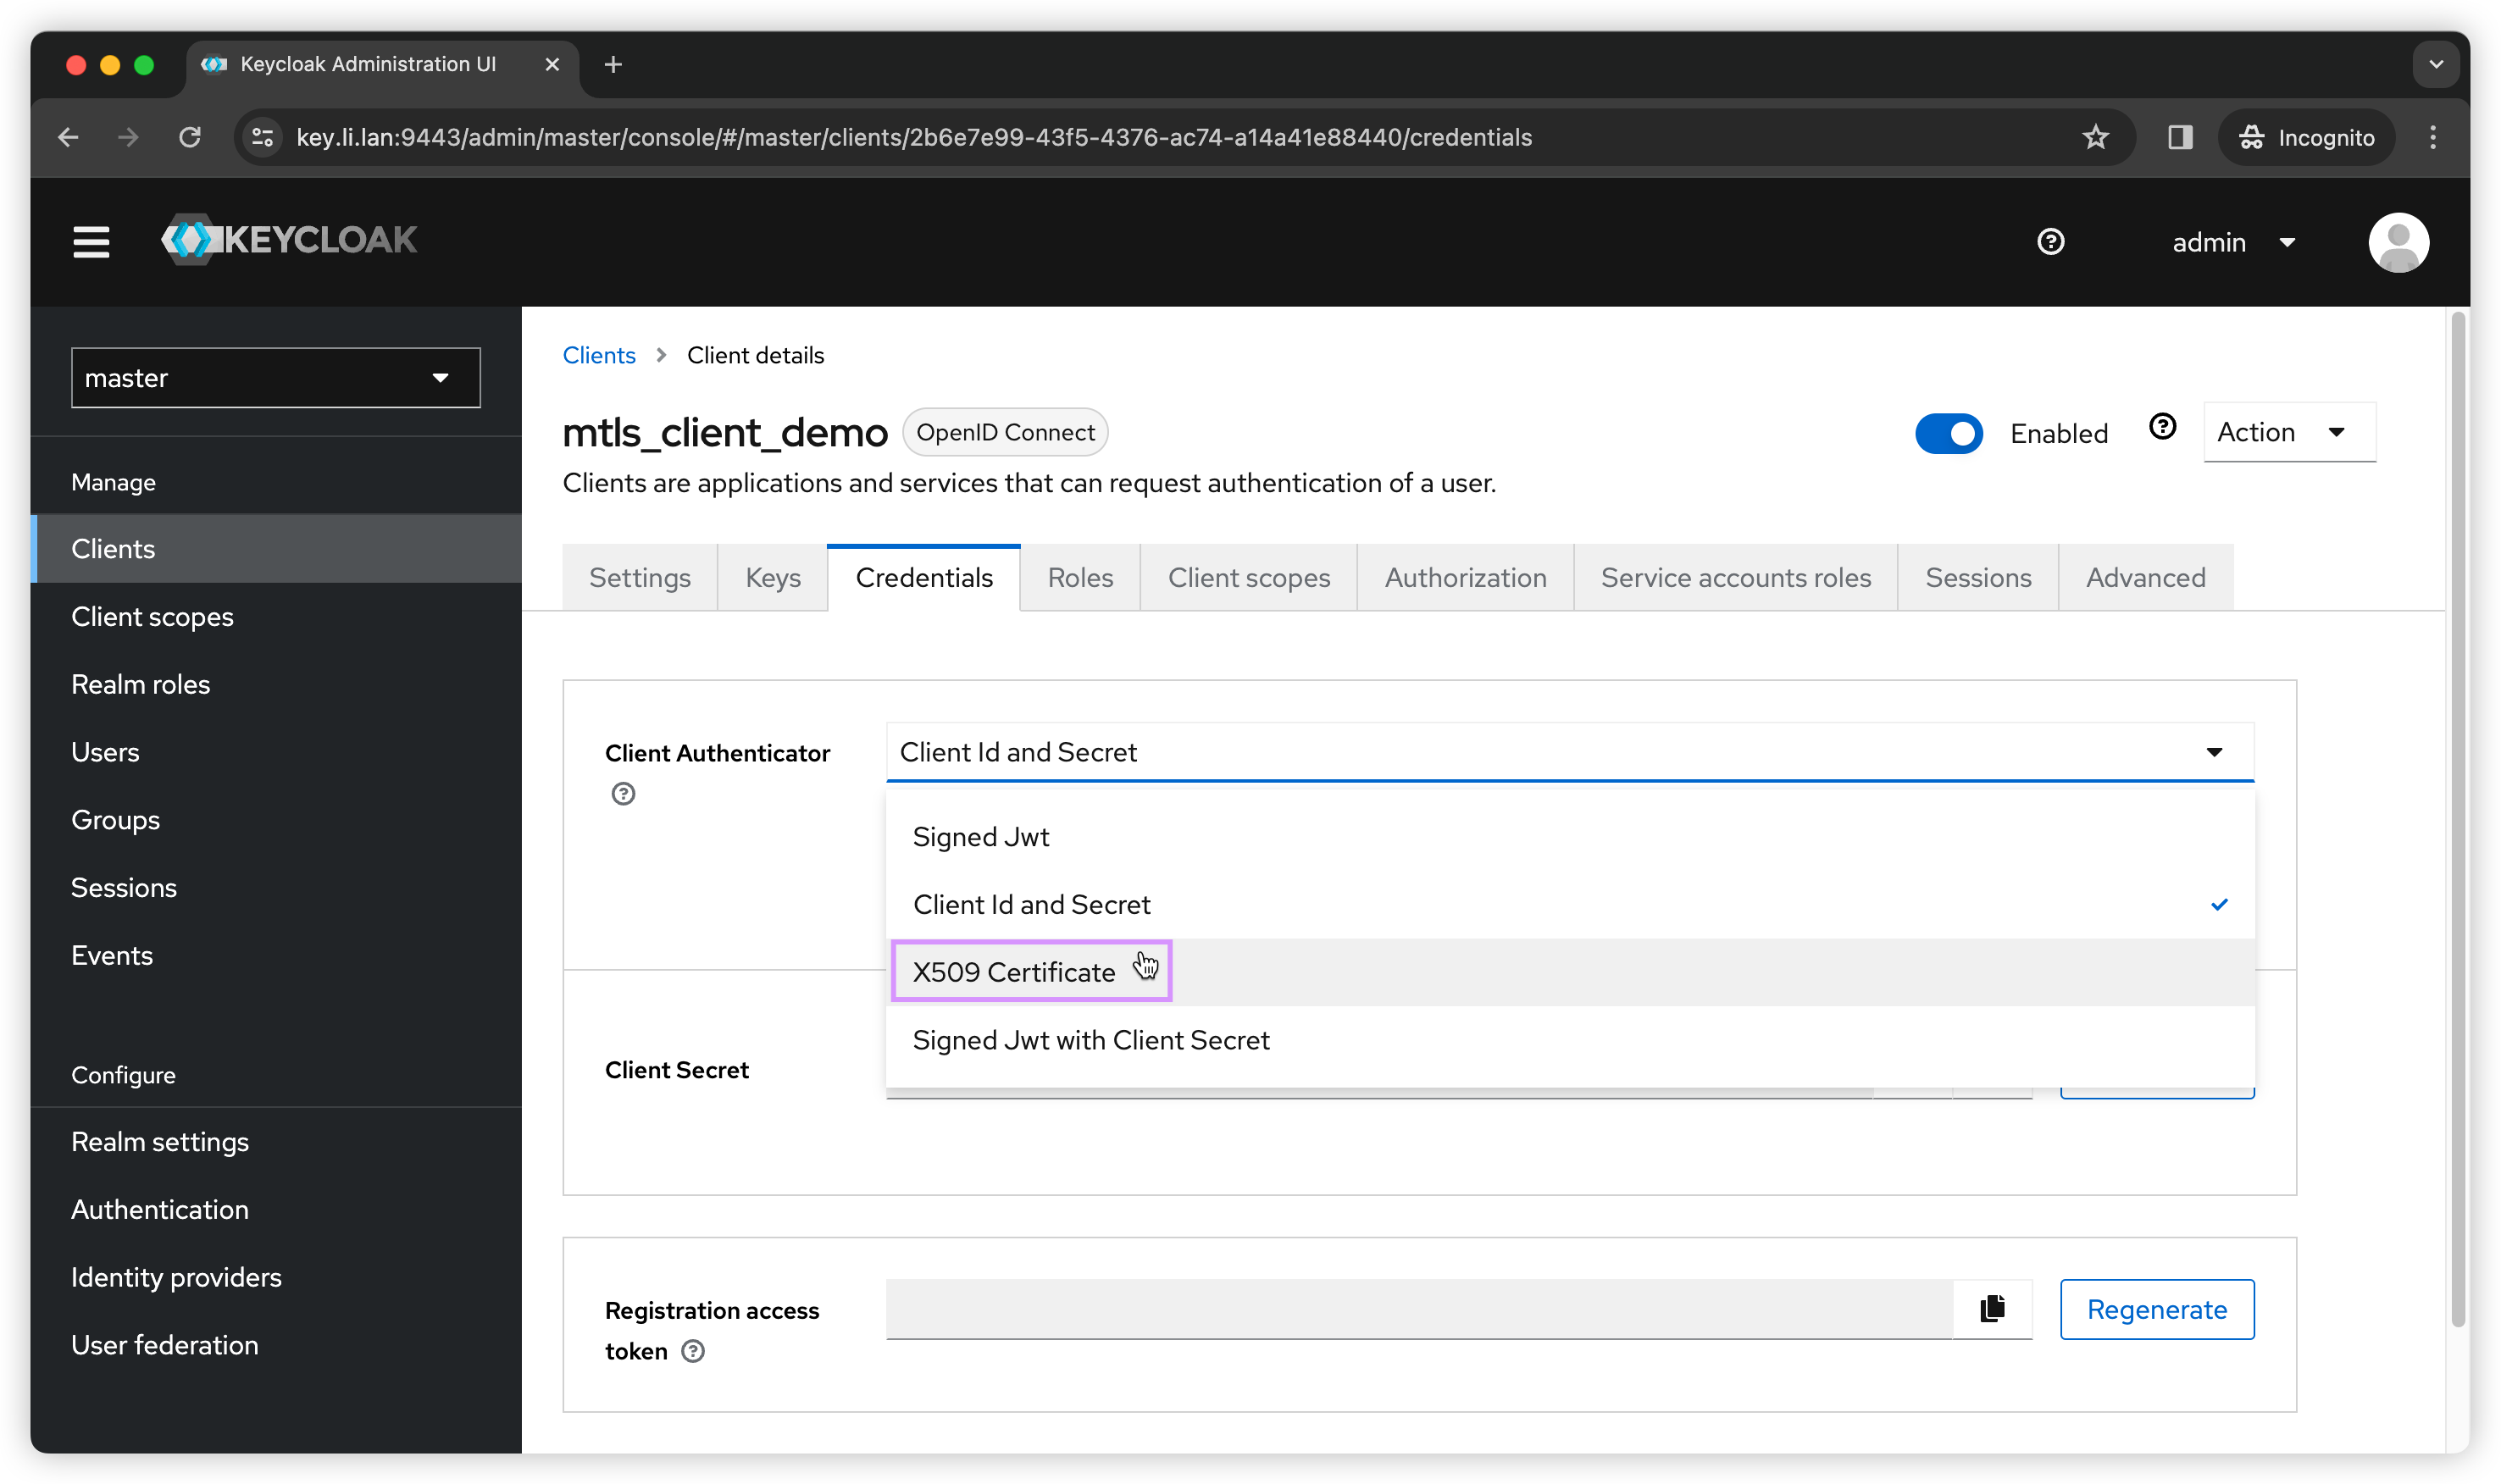
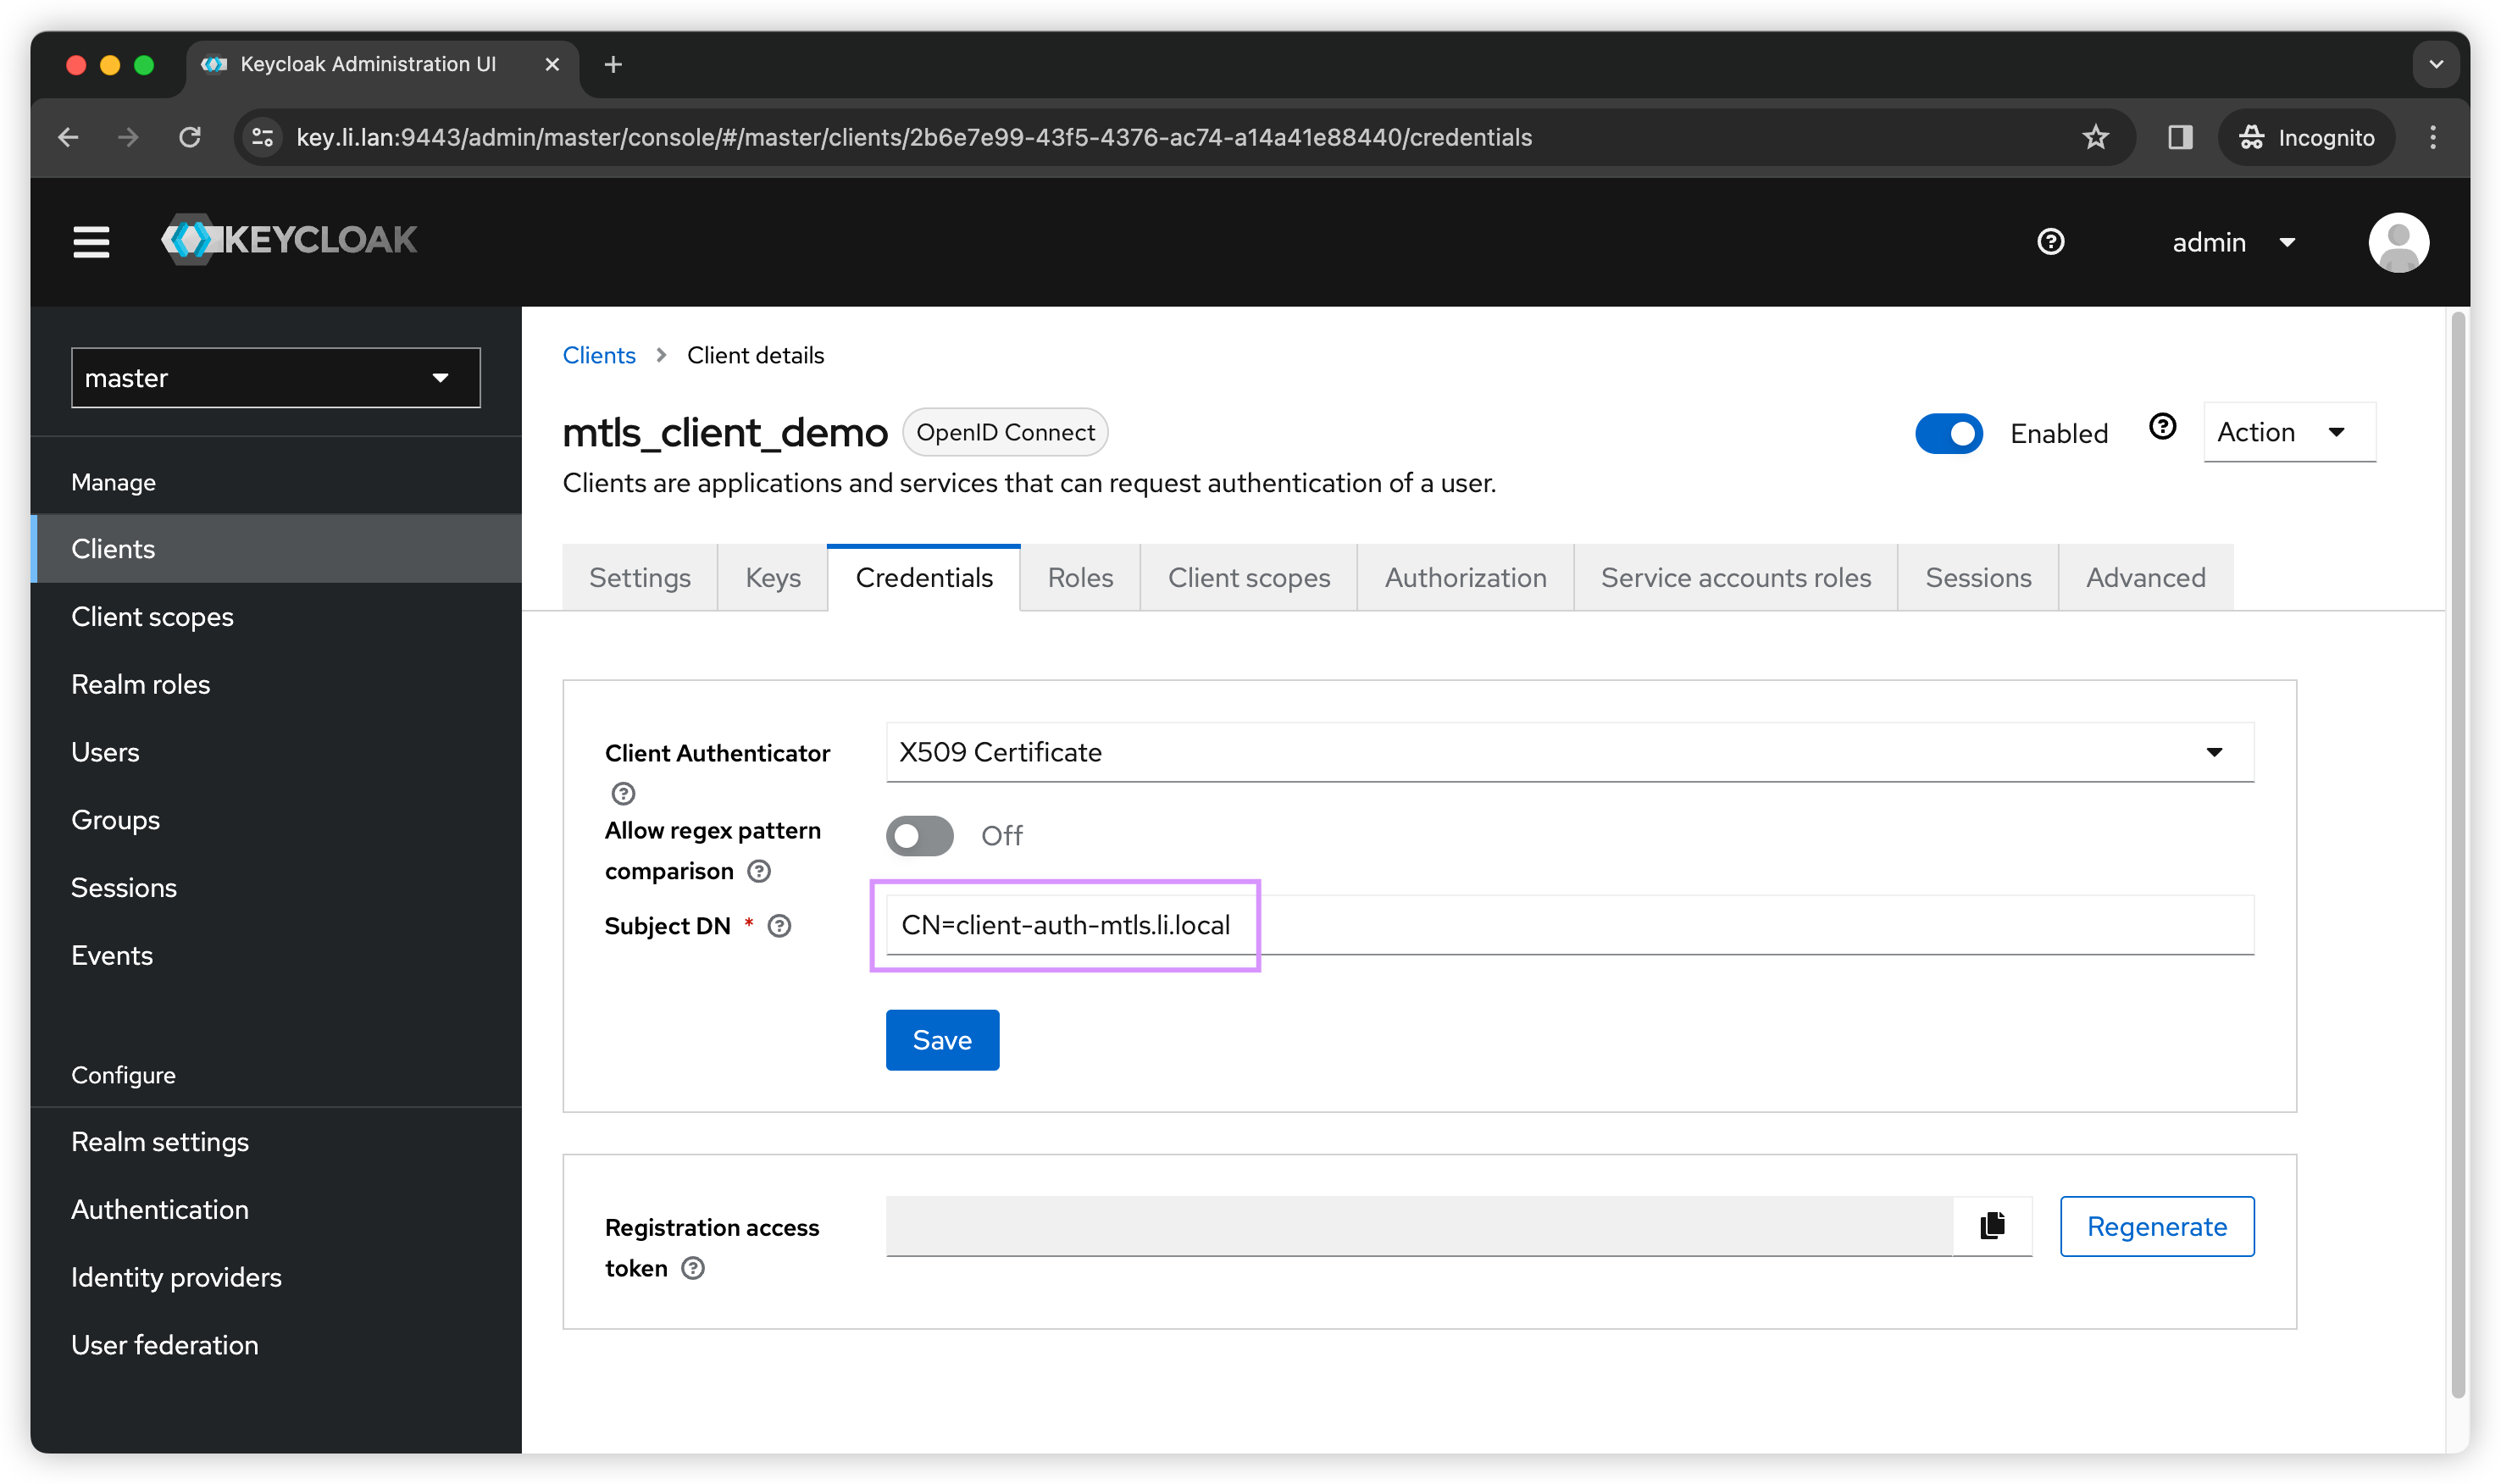
Once the new client is created, let’s got to Credentials tab and select X509 Certificate as the Client Authenticator.
Then we can put in our Subject DN. In my case I only need to support 1 client certificate so I don’t need to use regex pattern. I can use openssl to output my client cert DN.
1 | ➜ openssl x509 -noout -subject -in cert.pem |
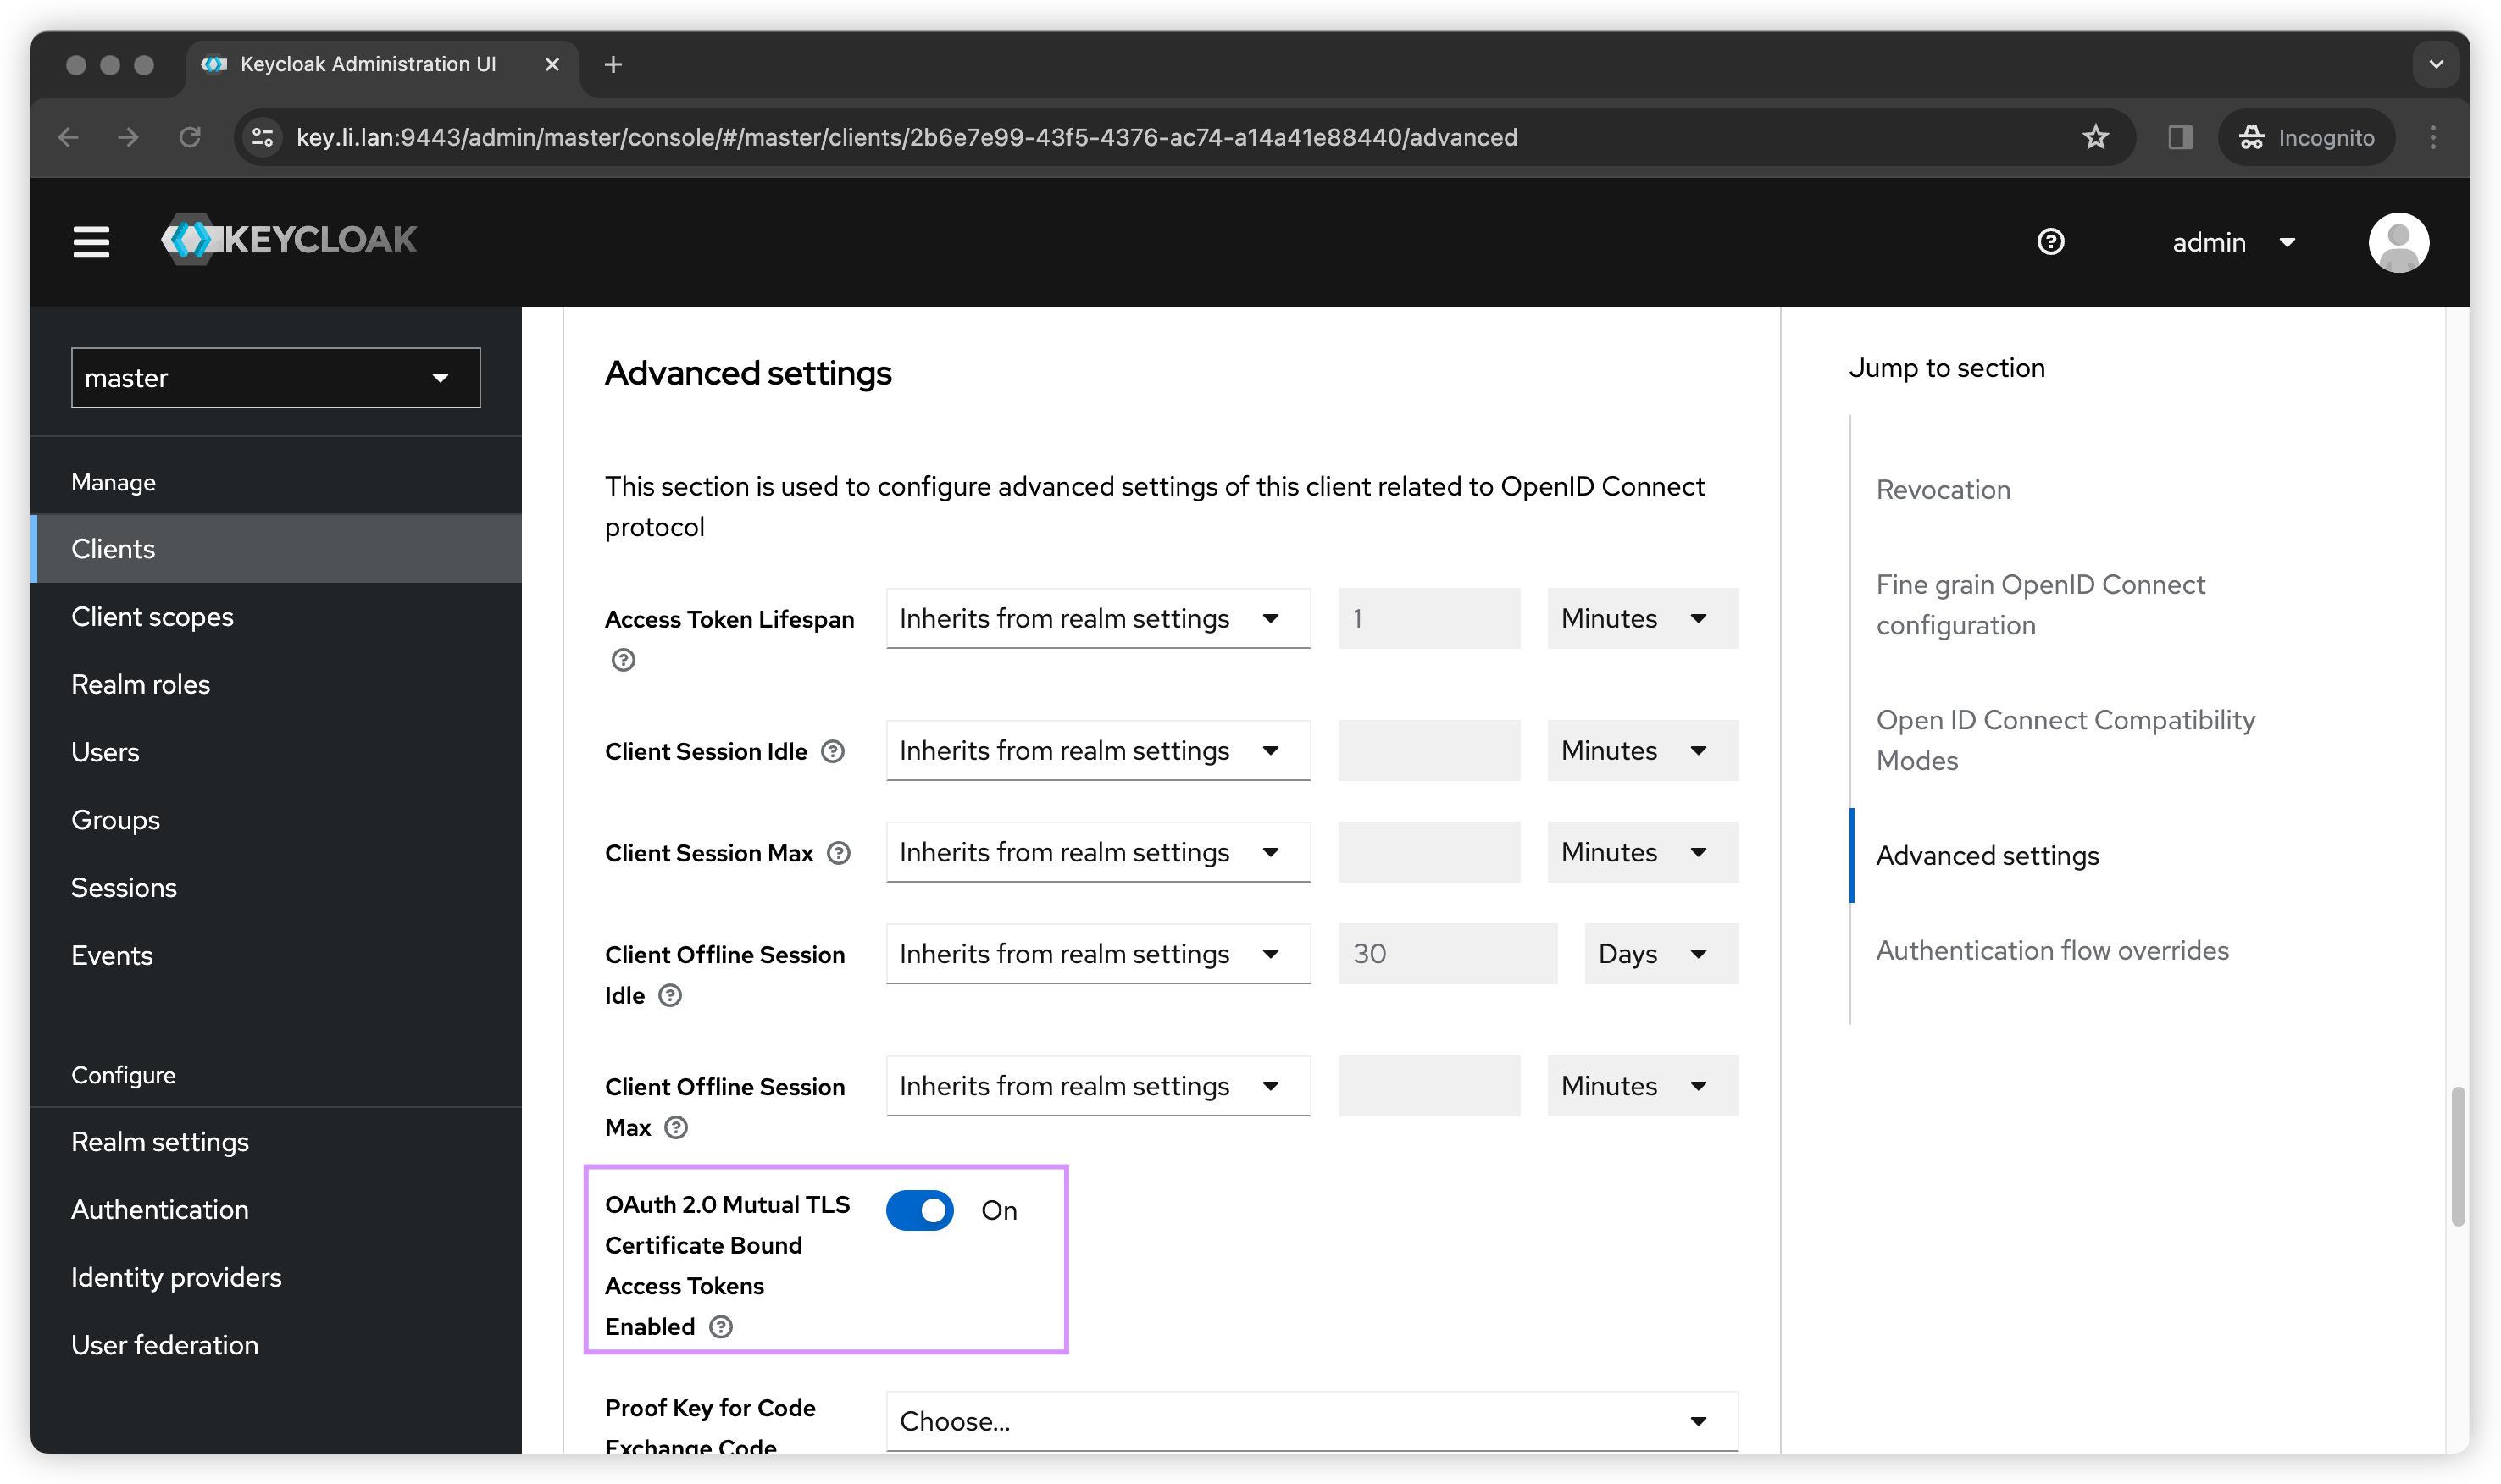
For the last step we needs to go to Advanced tab, and then go down to Advanced settings to enable Certificate Bound Access Tokens.
Request Token
Now we have everything set up, we can use curl to authenticate with the client certificate to get the access token.
1 | curl -s \ |
The access token should be similar to below
1 | eyJhbGciOiJSUzI1NiIsInR5cCIgOiAiSldUIiwia2lkIiA6ICJmOURxZFlmUzY0bjZZQklDUFY4ZlV3TjNpWFZXTnBFSUFIZXRHRDJWM0xVIn0.eyJleHAiOjE3MDMzMTMzMzYsImlhdCI6MTcwMzMxMzI3NiwianRpIjoiZDQyNzEwZmEtODhmNS00MWNiLWJjYjctZWQwMjMyMjY3ZWYyIiwiaXNzIjoiaHR0cHM6Ly9rZXkubGkubGFuOjk0NDMvcmVhbG1zL21hc3RlciIsImF1ZCI6ImFjY291bnQiLCJzdWIiOiI3ODkyNTZkOS1hNzZlLTRmOTMtYmE1OC01OTA2YzliYTE0ZDgiLCJ0eXAiOiJCZWFyZXIiLCJhenAiOiJtdGxzX2NsaWVudF9kZW1vIiwiYWNyIjoiMSIsImFsbG93ZWQtb3JpZ2lucyI6WyIvKiJdLCJyZWFsbV9hY2Nlc3MiOnsicm9sZXMiOlsiZGVmYXVsdC1yb2xlcy1tYXN0ZXIiLCJvZmZsaW5lX2FjY2VzcyIsInVtYV9hdXRob3JpemF0aW9uIl19LCJyZXNvdXJjZV9hY2Nlc3MiOnsibXRsc19jbGllbnRfZGVtbyI6eyJyb2xlcyI6WyJ1bWFfcHJvdGVjdGlvbiJdfSwiYWNjb3VudCI6eyJyb2xlcyI6WyJtYW5hZ2UtYWNjb3VudCIsIm1hbmFnZS1hY2NvdW50LWxpbmtzIiwidmlldy1wcm9maWxlIl19fSwiY25mIjp7Ing1dCNTMjU2IjoicmdBR1h0aHhaMzR2ZGFGTlo1LVlnRG9EdUtVaGh3bWZ4dWp4c2ctSUllayJ9LCJzY29wZSI6InByb2ZpbGUgZW1haWwiLCJjbGllbnRIb3N0IjoiMTkyLjE2OC4xODYuMCIsImVtYWlsX3ZlcmlmaWVkIjpmYWxzZSwicHJlZmVycmVkX3VzZXJuYW1lIjoic2VydmljZS1hY2NvdW50LW10bHNfY2xpZW50X2RlbW8iLCJjbGllbnRBZGRyZXNzIjoiMTkyLjE2OC4xODYuMCIsImNsaWVudF9pZCI6Im10bHNfY2xpZW50X2RlbW8ifQ.CEmq-x2Sqpw8YHEqu9hiR-vSWrilp5oLQSgGTxTSTBqV1zbiVkNXvCqlLcX1jx8DI78CdOGVj6FUObKN-XarshXgFpH7hBdILfoMPLDMcecSNiivXm8isEkmbP8tmrHs6Lc2rd1L1IwSz4Bs8PXFeJ1iqw_6s9pMWGbL39-cWdJwevkveTXYzTATZGaVSQ_dcLJjFEiHn_FBPVVi216_foXqSk2wKEQPfk_iljhNudHoxp1yxBpEmLkmjLpiapeSQyVm9pQbxQQdNh1tvTnH-OrPJjqR_rWVbtrwfunzAswayp4pFkBCpWKwFYl33OdoVVeObl-D_VW4Asn2PmCdFw |
If we decode this token, we can see the payload has the cnf cliam and its value is certificate sha256 thumbprint. The resource servers need to make sure provided client certificate has the same thumbprint to confirm it is the same user making the request.
1 | { |
Now that we know how to generate certificate-bound access token, let’s use Kong to validate these tokens.
Kong Setup
Start Kong EE
As usual, I will deploy Kong in the DBless mode for the demo. Assuming you have a valid kong enterprise license and it is stored in environment variable KONG_LICENSE_DATA. We can start Kong Enterprise 3.5 in dbless mode with below command.
1 | docker run --rm --detach --name kong \ |
Prepare Kong config
Let’s save below config to /tmp/kong.yaml.
1 | _format_version: "3.0" |
Here is what I have on the config.
- I use request termination plugin as upstream to return 200 response and echo back the request.
- You can use mTLS or tls-handshake-modifier plugin to request the client to send a client certificate. I choose tls-handshake-modifier for the demo.
We can verify the server is requesting client certificate by using curl with
-vflag. WITHOUT mTLS or tls-handshake-modifier plugin, we won’t seeRequest CERT (13).1
2
3
4
5
6
7
8
9
10
11* ALPN: offers h2,http/1.1
* (304) (OUT), TLS handshake, Client hello (1):
* (304) (IN), TLS handshake, Server hello (2):
* (304) (IN), TLS handshake, Unknown (8):
* (304) (IN), TLS handshake, Request CERT (13):
* (304) (IN), TLS handshake, Certificate (11):
* (304) (IN), TLS handshake, CERT verify (15):
* (304) (IN), TLS handshake, Finished (20):
* (304) (OUT), TLS handshake, Certificate (11):
* (304) (OUT), TLS handshake, Finished (20):
* SSL connection using TLSv1.3 / AEAD-CHACHA20-POLY1305-SHA256 - The last plugin is the OpenID Connect plugin. I use
beareras the authentication method and requiring verification for Certificate-Bound Access Tokens.
Let’s push this file to kong at /config endpoint.
1 | curl --request POST \ |
Validate JWT
With everything set up, let’s see how we can authenticate with CBAT. Let’s request a new token and save it to ACCESS_TOKEN.
1 | curl -s \ |
Then we can consume our API by sending the ACCESS_TOKEN in authorization:bearer header AND the same client certificate that was used to request the token.
1 | curl -sk \ |
We should see a 200 response.
Final thoughts
Undoubtedly, implementing Sender-constrained Access Tokens can be complicated. To utilize it, not only do you need a robust solution for managing client certificates, but you also need to configure the IDP and Kong meticulously. Configuring any of these is no easy task; it requires time and effort.
Security enhancements are a gradual process and are achieved by raising awareness over time. The key is to keep progressing rather than remaining stagnant. For personal information security, the journey may start with using simple passwords and then transition to more complex ones. Eventually, adopting password managers to create unique passwords and enable multi authentication for different sites becomes a logical step.
Similarly, ensuring the security of Enterprise APIs is an ongoing effort. It must consistently evolve to align with modern standards. While beginning with API keys or basic authentication is common, the gradual adoption of OAuth2.0 is advisable. Given the heightened focus on security, especially in the financial sector, integrating private_key_jwt or tls_client_auth for authenticating with the IDP token endpoint and the use of Sender-constrained Access Tokens might soon become the standard and a requisite. Preparing and strategizing to elevate security to the next level is essential.
Given all the points mentioned above, it is also important to set realistic goals. Avoid taking on too much too soon, as this raises the risk of either giving up or compromising your security standards. You should start with small, achievable goals and gradually build on them over time.
Be patient. It takes time to make meaningful progress in security. Don’t expect to see results overnight.
Be persistent. Don’t give up if you experience setbacks. Just keep moving forward and you will eventually reach your goals.
I hope this blog post helps. See you next year.